... or, as some of us call it: 'Little Christmas' or 'Women's Christmas'. Traditionally the Feast of Epiphany was, and still is to many, the end of the "12 Days of Christmas" when families - particularly those of the Catholic faith, spent Christmas day and then the next 12 days fulfilling the duties of their religion, spending much of each day in church with their families and neighbours. It was on the 12th day, the Feast of the Epiphany, that, in Ireland, the men were left home to handle the children and household chores and the women of the community would have a very well-deserved respite. This would often include the ladies all meeting up and taking over the local pub to have a wee "drop" and to catch up on all that had happened since they had last gotten together. It was also the day when most of their family's gifts were exchanged as Christmas Day itself was for honouring the birth of the Christ child, not for trading gifts amongst themselves.
On this day, the 12th day of Christmas, any greenery or other decorations for celebrating Christmas were removed from the home. In our household, it has continued to be the day we remove all of our decorations - and what a job it is!! Although, I must admit, it seems to take less time to take the decorations down than it did to put them up.
So - this morning, as I was looking around the house and trying to get up the energy to make a start at "un-decorating", I thought that perhaps before I began I would take a few pictures to show you why I don't look forward to this chore.
First, since before the last post there had been several weeks since I had posted anything, I hadn't shown any pictures of our Remembrance day tribute for November 11th so I will start there and move forward. last year we decorated the whole front verandah for Remembrance Day but this year we just made one very large wreath of poppies and hung it from our flag post along with a Canadian flag, again in honour and respect for not only my own late father and father-in-law but for all those who have served in the military, past and present. We are forever grateful for the sacrifices made and the work they continue to do.
Each year I start decorating for Christmas around November 15th - as long as Remembrance Day is over, I am ready to go. So before I take all of this down today, here is a walk-through of what I have to remove and put back in storage:
Foyer:
On one side of the front door we have a 6 foot tall wicker lantern which, of course, lights up beautifully at night. Unfortunately I never thought about taking pictures of most of these things before this morning so you will have to see them in their daytime look.
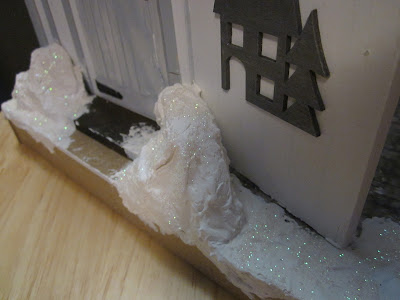
On the other side of the door - oops, it looks like Santa left behind a pair of boots - and the naughty elves have filled them with greenery and lights!
Visitors to our home, of which there sadly have been very few during this second Covid Christmas, were greeted by a 4.5 - foot tall Welcome Santa..
a large picture of Santa which, if you were able to look more closely at it, you would see within his beard, mustache and eyebrows are pictures of many happy children...
more pictures of Santa, or, as I prefer to call him, Father Christmas...
... and lastly, in the foyer, a little entry hall table with yet another picture of "the Big Guy" above. The trees and lantern on top of this table light up so beautifully at night - it might be my favourite little decorated area when the lights are twinkling and casting shadows on the walls.
Moving out of the foyer we could go straight ahead into the dining room or take a left turn into the living room. I think we'll check out the dining room first.
On top of the buffet I have a small lit tree, another lantern, a star with a laser cut front and lights inside which looks quite pretty at night considering it is just a Dollarama buy, and a tall thin Father Christmas made by Lennox which I purchased many years ago.
A wicker reindeer stands beside one of the extra dining chairs...
On top of the china cabinet I have put together a little scene with a church and carolers - all completely out of scale with each other but I don't care. I like them anyway!
..in the corner of the dining room we have a cluster of three "rustic" trees which are usually one of the first things we put up at the beginning of our Christmas decorating. At their base is another Father Christmas along with the two gnomes I made last year when I used them in an outdoor display on our front verandah.
Right next to these trees is a tree of another sort. While it cannot be called a Christmas decoration it does serve its purpose as someone tries to figure out how much fun can be had before someone catches them at it!!!
In the opposite corner of the dining room, on the way into the living room through this archway, is another lantern. I did have a picture taken a week or so ago at night as well so I will show both below:
As you can see from the foyer, I often take down our regular pictures and paintings and substitute others during Christmas. I only did that in the foyer this year and with these three pictures in the dining room which replaced two larger ones that hang there the rest of the year. I love these little scenes of wildlife winter.
At the end of the hall leading to the bedrooms I have a small vignette sitting atop an antique sewing table.
In the kitchen I have displayed two of my Christmas minis by Bruce's coffee centre...

...and Christmas wouldn't be Christmas without a candy and fruit table set up somewhere. This year it is in the kitchen, up against the stairway leading to our lower level. It is looking a little bare now since, after all, it is more than a week after Christmas and much of the chocolates, cookies, and other fruit is now gone. I'm sure it won't be long before the rest is as well. Although our nephew who is serving in the military in Germany right now did provide us with a few bags of Dutch licorice treats he picked up on a recent visit across the border to the Netherlands, we find our North American palate is definitely not used to these and, sadly, cannot eat them. Luckily my good friend Marijke from Punchinella's Cellar has agreed to take them off my hands as she says they will bring back memories of her childhood before coming to Canada.

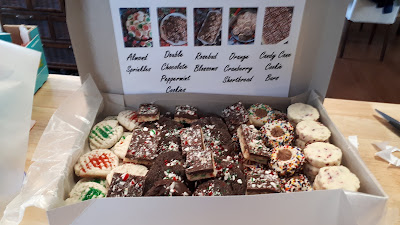
While on the subject of my kitchen, I will mention that I did a lot of baking leading up to the big day and then I boxed up a dozen of each of five different sweets I had made and gave one box to my sister and one to my daughter. They both appreciated them but now I will need to come up with different recipes for next year. No problem! I love to cook!
I'm sure you're getting tired of reading this long post but we have only one more room to go!
The living room:
First, in case you haven't guessed yet, I am a collector of Santas, or Father Christmases if you prefer. Nowhere is this more evident than in our living room at this time of year.
Just inside the door from the foyer is a large old-world Santa under a bare gold tree with a rocking horse and poinsettia by his side:
On top of one bookcase is a large Father Christmas primed and ready to play us a tune on his bass cello.
And on the other is another version of him as he is bundled up for a walk through the forest.
On one end table is an animated scene with a train running through it. Our grandson loves this one.
On the other end table is a picture of a Santa Gnome that was done by my daughter using the diamond painting craft. Also is my "modern nativity" set and a wind-up skating pond scene - another of our grandson's favourites.
On the table behind the sofa is a small nativity scene and a lovely framed mini scene in white and red that my friend Louise made for me last year. It is battery operated so when turned on a soft light glows through the windows - quite lovely!

As for the Christmas tree itself, alas, several years ago now I finally gave in to my allergies and we bought an artificial tree. I so loved our real trees but I love being healthy over Christmas more. This is a narrower tree we purchased several years ago. The tree topper is one which we have used every year since 1974. The large "prism" in the centre of the star contains a black cylinder with many coloured stars which, when the star is plugged in, rotates within the prism sending beautiful light effects on the ceiling and walls. Our kids have always called it the disco ball tree topper and it is such a tradition now that they both wish they could get one for their trees to carry on the tradition. Alas, although these vintage tree toppers occasionally show up on places like ebay, they are now prohibitively expensive!
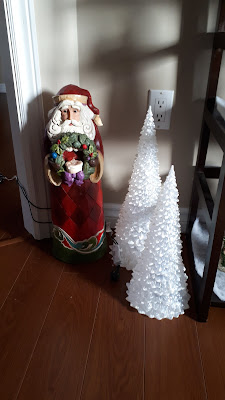
So - back to my collection of Santas. Next to the etagere in the living room is a large Santa purchased from Costco a couple of years ago. He is next to two of a set of three lighted trees also purchased from Costco several years ago. The third and smallest tree of the set is on a shelf in the etagere.
The etagere itself houses most of my collection.
You may not have noticed but, in the night time picture there are only four Santas on the bottom shelf but in the daytime picture there are five. That is because Bruce bought me a new one for my collection this year and "hid" it in plain sight with the rest of them. Apparently it was there for a full two days before Christmas and I never noticed it! No, that does not mean I have too many!
My other Christmas gift from Bruce this year is a wonderful surprise and I will make very good use of it.
Now you all know why I was so long between posts in November and December - I was very busy! But now I think the reason I decided to do such a long post today is because I am procrastinating on actually starting to take down all these decorations. However I have just received an offer of assistance which I suppose I shouldn't ignore. She is in the living room waiting for me so we can get started. This should be an experience!
Thank you for taking the time to read such a long post. My next one will definitely be about minis - my market stall! In the meantime I wish all of you the very best in 2022 - a year which hopefully holds a return to a healthy population and prosperity for all. God bless! TTFN!!! - Marilyn