Anyway, last night I managed to cover the outside area of the World War I bunker with a mixture of dry wall compound, dark brown paint, and dry coffee and tea grounds (used). I also used dried twigs to build a little bit of a barrier between the ground and the cliff face. The mixture I made was actually too dry so as it dried overnight cracks showed up through the ground area. I was upset at first but then thought hey, earth does crack sometimes if there hasn't been enough rain so I'm saying the little area is going through a mini-drought right now. I'm leaving it just as it is - - unless my co-members want me to change it. Here's what it looked like this morning.
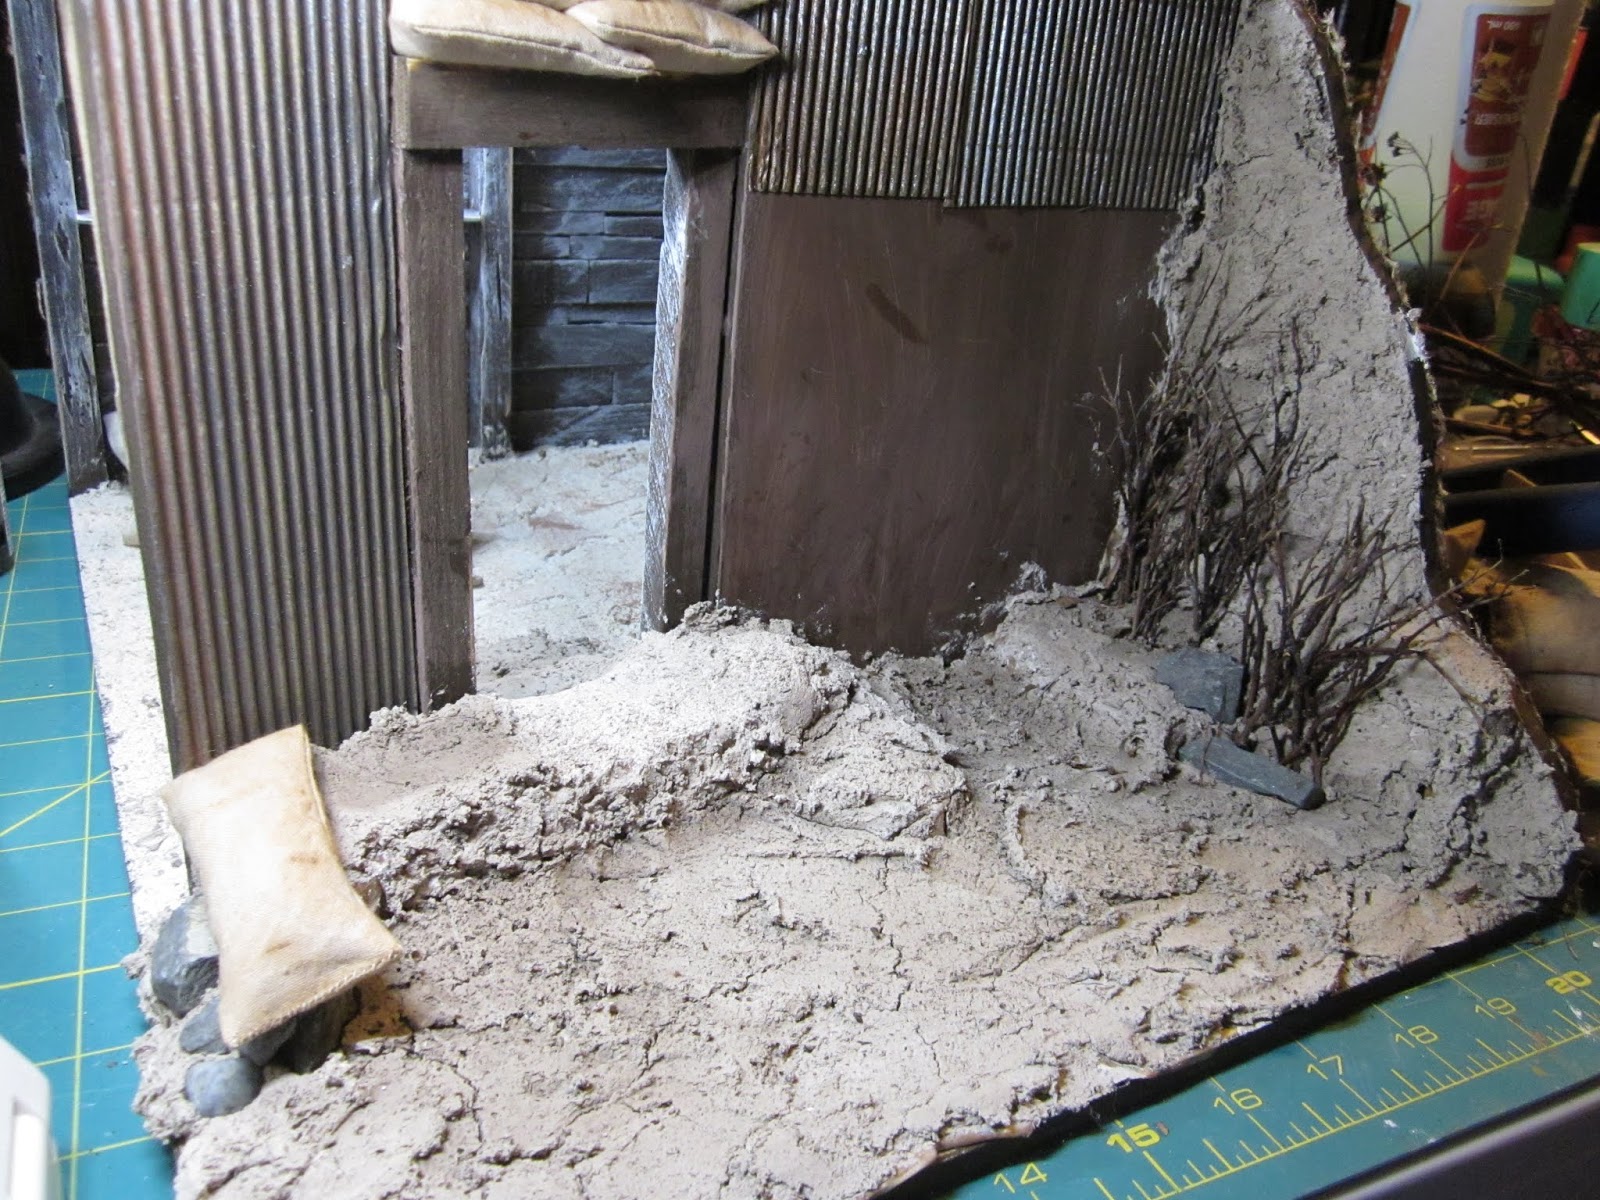
With that out of the way, I started applying sand bags. Okay - I made another mistake here but I did catch myself. I started layering the sand bags and I used tacky glue to glue each layer to the layer below it. I did the narrow wall first then, when I was about half to two-thirds up the larger wall I realized that by just gluing the sand bags to each other, the whole stack could just fall over in one piece! I went to the short wall and gently pulled the stack away from the wall a little bit, squirted some glue against the wall behind the stack, and pressed the whole stack into it. Then I did the same thing on the larger wall but since I was only part way up I then proceeded the rest of the way by applying glue to the back edge of the sand bag as well as to the bottom so that the stack would be held to itself and against the wall as well.

Bottom line - I think every miniaturist should follow my blog if only for the many examples of how not to do things!!! I am truly a disaster waiting to happen. Luckily I don't get discouraged easily! *smile*
So, I continued with the sand bags then, when those were done, I started messing up the "yard". I added rocks, broken pieces of wood, bent pieces of leftover corrugated metal, and I added a little bit of greenery - surely something would have self seeded over such a length of time.
I even added a long piece of tree trunk as a support for the door frame. (My little door frame didn't need the support but hey - with what they had at hand the soldiers may have done this, right??)
Anyway - here are the last two pictures I took before I called it a night.


We are meeting on Sunday to put this project to bed so I don't think I'll do any more work in the "yard" area. Tomorrow and Sunday morning I will concentrate on the inside and on the poppy field, then finish it up with my friends Sunday afternoon. Now to bed. TTFN! - Marilyn
Oh Marilyn. I am just loving all the work you, Marijke and the others are doing on this project.
ReplyDeleteBoth my parents are WWII veterans and both my mother's father and grandfather were WWI vets so it's very special to me.
Hugs, Maureen
Thanks, Maureen. My father and both my grandfathers were veterans as well. So was my father-in-law. The project has been fun but I'm ready to move on now. I have lots of ideas for what to do next - as usual. We'll see what wins out. Hugs - Marilyn D.
DeleteHello Marilyn,
ReplyDeleteWhat counts is the end result, and yours is always absolute perfection. These sand bags look so realistic...they look heavy! It is really coming along beautifully.
Big hug,
Giac
N.B. Jo and I are so happy we will get to see you at the show. YAY!!!
Thanks, Giac. Marijke and Louise did most of the work on the sand bags. I'll be adding some additional touches - like moss and dirt and such.That end of the room box is much heavier than the other side - go figure! *smile* Not too many days now to the Montreal show. Yeah! See you there, Big hugs to both of you! - Marilyn
Delete