Wednesday 27 April 2016

Boxed into a corner!!!!

At least that's the way I'll probably be feeling by the time I'm finished! I decided I should probably start some tidbits while I try to make up my mind about what I'll make as "gifties" for this year's Camp Mini Ha Ha. I downloaded two different designs from A Lavender Dilly on Etsy. Now, this is a shop located in Australia so the recommended weight of paper to print these on was 200 gsm. Here, in Canada, even though our official units of measurement have been metric for decades, we're kind of schizophrenic when it comes to metric versus imperial measurements. For instance, when buying meat in the supermarket, we post the weight in kilograms, then advertise it as price per pound. When it comes to paper, we still tend to refer to the weight in pounds (per ream - 500 sheets). The biggest problem in converting the gsm (grams per sq. metre) to pound weight is that different types of paper comes in different sizes - 8 1/2 by 11 inches; 11 by 17 inches, etc. - so 500 sheets of one size paper does not compare to 500 sheets of another. Let's not even talk about how that then translates to gsm!!! Bottom line - it doesn't!! So, to make a long story short - and when have I ever tried to do that?!? - I made an executive decision and had the boxes printed on 65 pound card stock. It seems to be the perfect weight, thankfully.


My first attempt to put the boxes together, I decided, against the actual instructions, to score them on the inside, instead of the outside as recommended, before folding. As a result, the box tops did not fit over the bottoms. Once I actually followed the instructions and scored them on the outside, it worked fine. The only adjustment I had to make is that, on the two larger sizes, the ends with the tabs on them need the height to be trimmed a bit as, once all four sides are folded up, the ends are a little higher than the sides. Luckily I found this out after cutting out and gluing together only a couple of sets so was able to cut all the others out correctly.

My plan is to put together 4 sets a day so will have them all done in 9 days. Sweet!! Now if I can just think of what to do for my gifties...


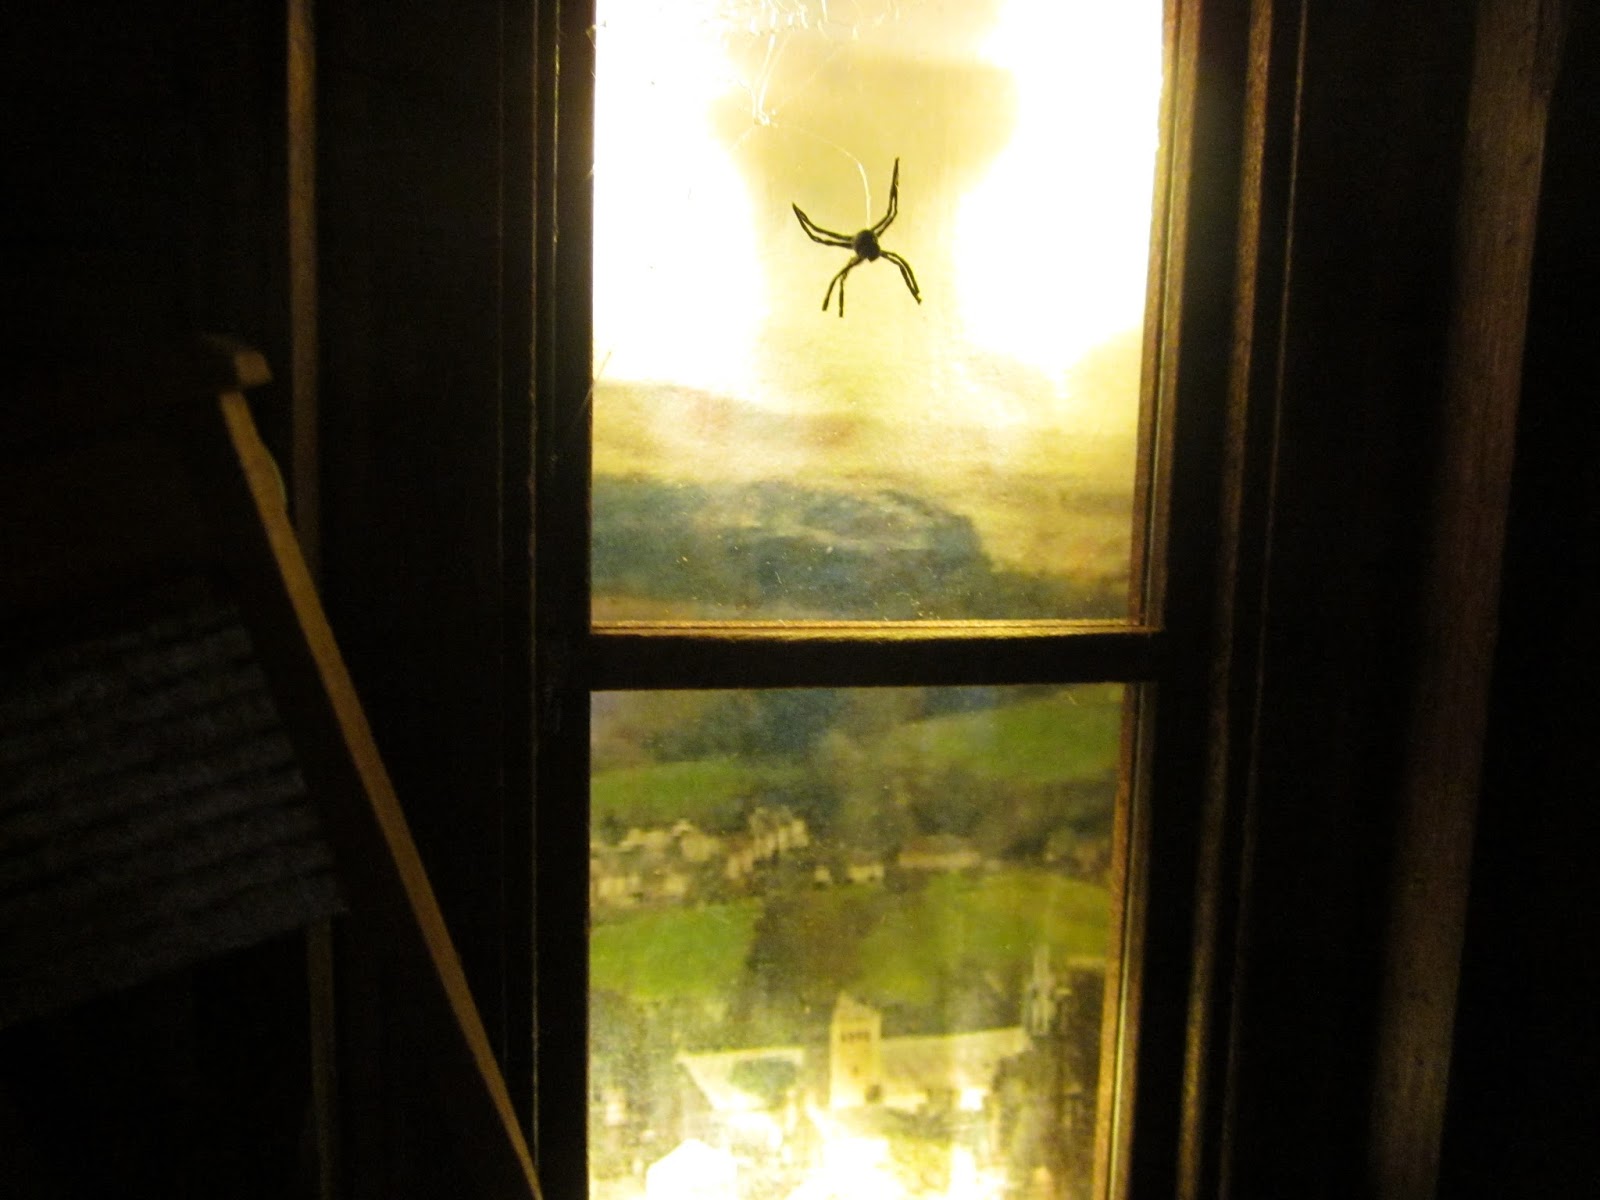
Moving on, remember my Dorian Grey attic scene? When you last saw it I mentioned I was going to put chimney pots on top of the chimney I built to hide the wiring. I went online to a chimney pot manufacturer to find images of the various kinds of pots. I found this one:


They call this style "The Bishop". Now, why they don't call it "the Rook" is beyond me!! Anyway- of course that's exactly what it looks like to me so what could be easier than dragging out the old set of hand-turned and cut chess pieces I bought at Value Village last year? They're quite rustic - not a very practiced hand made these but. that's what I like about them. Measuring the length of the top of the chimney, I decided I would use 3 chimney pots. I want the middle pot to be taller than the other two so I chose two rooks and a king to use. I will cut off the top of the king, of course, then will paint them to look like natural terracotta. All in all I am quite pleased with them and will show you a picture when I have them done.


Switching directions again - anyone watch the latest video on "Creating Dollhouse Miniatures"? It's a three minute video showing a miniature dollhouse store. So cute - and very well done with all of the boxes of dollhouses, accessories, finished dollhouses, etc. Lots of inspiration here.

And, to finish today's post with more inspiration, I mentioned the two books of Brian Nickolls that I own and love. Each of them have about a half dozen plans for constructing different buildings along with detailed instructions for cutting, constructing and furnishing. The first is "Making Dolls' Houses in 1/12th Scale". I love all of the projects in this book but I think my favourite is probably the fisherman's cottage. Another one I would love to put on my list but even Santa doesn't have a list as long as mine is beginning to get!


The second Brian Nickolls book is "Making Character Dolls Houses in 1/12th Scale". Another great book with easy to follow instructions and lots of drawings and pictures - I like lots of pictures! I think it's a hold-over from my kindergarten days. Anyway, I do love the pub in this one, as well as all the other plans but, I think my favourite plan in this book may be for the cider house. He even gives plans for making the apple press and cider mill.


The last one I'll show you is a new one I just got in last week. I haven't had time to go through this one in any detail yet. Written by Julie Warrren, "Step-by-Step Dolls' House Furniture Projects in 1/12 scale" is, strangley enough, exactly what the title says it is!! Go figure!! Seriously though, it does seem to have detailed cutting, construction and finishing instructions for a couple of dozen projects which look like they should be fairly easy for even a beginner to follow. Whenever I get around to making something, or even reading through it in more detail for that matter, I should be able to give you a more informed opinion about it!


I end this post with another suggestion that everyone out there think about what inspires them most, in this mini hobby, and then share it with us. We can never have too much inspiration! TTFN!!!


Saturday 23 April 2016

You can't buy happiness....

...but you can buy books, and that's kind of the same thing!!

This is something I once saw on a poster and thought to myself "no truer words have ever been spoken!" I have no idea who actually said this but he or she was obviously a very intelligent person!

I love books of all kinds - but when they're books about miniatures, well, how much better can it get??? I just received a new one I ordered a couple of weeks ago and thought that I would share some of the others I own - my favourites.

I'll leave the newest to last and start with my very favourite one: The Big Book of a Miniature House by Lea Frisoni.


Originally published in French, this book was re-released in English late in 2014 or early 2015 and I bought it as soon as I could get my hands on it. In my opinion, this is the most stunningly beautiful and well-written miniature book I have seen to date. Not only does she provide detailed plans and instructions for constructing this incredible house, but she includes all the finishing details as well as instructions for building some of the main pieces of furniture and wonderful French accessories as well, such as flowers, mirrors, folding screens, etc.


I love all of the details and know that I will use each and every one of them in one project or another at some time in my "mini" future. Right now I am particularly fixated on the design of the front door of this building. I know exactly where I want to use it eventually. Remember my list? - Well, it's actually written on elastic bands - makes it so much easier to expand!!!

Tomorrow I'll talk about the two Brian Nickolls books I own and love. In the meantime, anyone out there have some favourite mini books they'd like to tell us about?? I'm always open to buying more happiness....I mean books...well- same thing!!! TTFN!!


Wednesday 20 April 2016

I Can See the Finish Line From Here!!

My "Attic of Dorian Gray" is almost completely finished! I have only a few little details left so hopefully tomorrow I can check it off my list. Yeah, me!!!

I'd like to welcome Jodi Hippler to our followers here. Jodi is a miniaturist from west coast U.S. who shares her amazing work with us on her own blog: My Miniature Madness. Right now she is working on a project using Greenleaf's Sugarplum Cottage. It's going to be amazing when she's done, I'm sure.

As for the progress of my Dorian's Attic project, I did get everything glued inside so I won't have to worry about it shifting around any more. Then I gave some serious thought to the outside back of the room box. I really hated the plain white wall, the boxed-out area that holds the window you can see inside, and the wiring and batteries just hanging there. I'll first share some more pictures of the interior and how it looked after everything was glued down, then show you what I came up with for a solution to the ugly back view. Remember that if you want to see the pictures better, just click on them for a larger view.

First - I have a better picture of my spider and his spider web, as well as the view I chose for showing outside the attic window. I took the time to check out dozens of pictures until I found one that actually looked like it was a view over neighbourhood rooftops and distant scenery. In the second picture, I have leaned the back wall out so you can see the wide wood planks, and the wall studs I chipped and gouged so they looked more aged - like you would expect to find in the attic. Also, you can clearly see the lath and plaster wall that covers the right hand, opening cover of the box.


I actually really like how the lath and plaster turned out but, I must say, it did take a fair amount of time. I first had to slice all the coffee stirrers in half, lengthwise, because, even though these were the thinner wooden stirrers, they still looked too wide to be in scale for proper lath. Then I had to stain them all. I used the coffee stirrers in their full width, end on, to create the "studs" behind the lath, stained those as well, then started applying the lath. I wanted it to look as realistic as possible so I made them different lengths and staggered the joints. I also purposely broke some of them and applied the broken pieces because - I don't know about you but, I've never seen a lath and plaster wall that was completely intact. To install the lath, I glued the first few rows from the bottom up, then, using a small metal "spatula" to squish regular crack filling compound between the lath and the wall, and making sure there was plenty "leaking out" - also the way I have seen it in real life, I slowly made my way up the walls.


In the next photo I have leaned the back wall in the other direction and you can see how I installed the mirror on an angle by placing a wedge on the floor and the ceiling for the mirror to rest against (glued in of course). Then I went through the whole lath and plaster thing again - this time using larger pieces of wood to form a door frame, then built the lath around this. I think it does make you look twice when you're looking through the front of the room box - well, I think a lot of things I guess, but hopefully this thought isn't as crazy as most! - before you realize there really isn't another room beyond.


So, now we have everything done that I wanted done inside - time to tackle that ugly back wall! As with most problems I have, the solution came to me a few days ago - about 3 o'clock in the morning, as I'm laying wide awake thinking - "What am I going to do to finish that d**n wall?!? How can I still have access to the switches and still cover everything up?!? Aha!! I got it!!"

I decided to make the back wall brick, using some of the textured brick paper I get from Grandpa's Dollhouse. I added this brick paper to either side of the window jut-out. In the first picture I have the wires and batteries picked up and placed on top of the books. I like the look of the bricks but just adding more to the centre portion would still leave the bare wires and the batteries showing outside. So - this had to be solved as well. I built a little box on the back of the window wall to hold the batteries off the table.


Then I taped the wires down to the window wall, making sure the switches were close to the top and facing outwards for access. I built a framework for a chimney that would cover all this mess and covered the chimney in the brick paper. I used two pieces of 1/4" MDF, painted them to simulate large pieces of solid slate (or maybe concrete?? - I don't know, but it seems to work!), and installed them over the angled portion and across the top. Sliding this whole assembly against the back wall hides all the unsightly mess but, simply by pulling it away from the wall, I still have easy access to change batteries and to turn the lights on and off.


So, what do I have left to finish? I will be adding some trim to cover the edges of the gator board that shows at the top and bottom, on either side of the chimney, and installing magnets to both of the opening covers to make sure they stay closed when access is not needed. I also printed off some excerpts from The Picture of Dorian Gray to glue onto the side of the box and inside of the cover on the left hand side of the box (left - when you're looking at it from the front). I took a few paragraphs from early in the book, and a few from the very end, to put inside the cover - just to add a little interest (and also for all those people who have no idea what the heck this book is about anyway *tee he he*).


I think I will also buy some terracotta-coloured Fimo and make two or three chimney pots to glue on the top of the chimney. So - none of these little finishing touches will make a very big visual difference to the actual finished project, so this will be the last entry for The Attic of Dorian Gray. I'll probably finish it off tomorrow then move on to the Irish cottage. So much to do on that one!!!! Thanks for following! TTFN!!!


Monday 18 April 2016

Keeping My Promises

A few days ago, when I finished taking stock of all the projects I have on the go, and those I have planned, I said I would go back to the project that is closest to being complete, then work my way forward. Never let it be said I don't keep my promises! So our journey begins with my project from Camp Mini Ha Ha 2015: my room box in a set of books that I call The Attic of Dorian Gray.

We were provided with the pre-cut gator board for making the actual insert, and a set of 7 books that had been cut as needed for the project. Five of the books had only the spines and tops left - they would fit over the top of the insert. One book was left with a right-hand cover and one with a left hand cover, to form the ends that also fit over the insert. Unfortunately, I didn't take any pictures during construction!!! In the picture below, I tried to produce a diagram of how the centre 5 books were cut. The end books were cut the same except a cover was left on the ends. (Please ignore my squiggly lines - the books really were cut straight - I just can't draw a straight line, I guess).


We then started by building the insert so we could try the books over them to get a good fit. We taped the books together in the order we wanted them, For most of us, we had to remove some pages to get the books to fit tightly enough over the room box insert. Once that was settled, we determined where our front window should go and traced around it, in preparation for cutting the opening. For those of us who used the large window in the front, it involved cutting complete pieces from the three centre books, then, for the book on either side of these centre three, we cut half way through horizontally at the level of the top and bottom of the window, then cut vertically between these two points. I hope this makes sense to you. It does to me! Once everything fit the way we thought it should, we then used glue, a lot of glue, to coat the tops and cut edges of the book pages. The glue seeped into the pages a little and made it so the pages were glued securely together. These were left to dry well. Then, using Wellbond glue, we glued the books together, used very thick elastic to hold them tightly, and left them to dry overnight. Once dry, most of us aged the pages using a wet tea bag. Some also aged the books themselves through sanding and staining (before they were glued together). I didn't age the books, just the pages.

In my project, I made the small window in the back extend outside the room box because I needed all the floor space I could get! I printed out a picture of a roof-top view to put outside the small window, and installed LED lights, hidden by the edge of the window frame, to simulate daylight. So, at the end of Camp, I had the attic pretty much done and Dorian's picture inside, along with other attic-like pieces.

Remember the painting I told you about from "The Picture of Dorian Gray"? The one he kept in his attic so it would age and he wouldn't? Well, this is how I interpreted it. This was one of the many versions I found online when I googled this Oscar Wilde book. I printed it, framed it and placed it on an easel.


As I've mentioned before, I am a big lover of using "perspective" in a project. Because the attic space was small, I wanted to have the illusion of more space. I had a mirror cut the depth of the insert and installed it at an angle. I installed a door frame over top of the mirror and then filled in the rest of the wall with "lath and plaster" like you would find in at attic. By using the angled mirror, it actually appears that there is another room beyond the one where Dorian Gray stores his painting. I then applied lath and plaster to the other end wall, wide wood "planks" on the back wall and the floor, and bare wall joists on the back wall.


Although there is access through the right end of my books, I did not permanently install my back wall because I feel it will make it easier for getting inside to clean it or make changes. When I brought it home at the end of Camp, I was still not satisfied with having the back of it look so unfinished, with the wires for the lighting showing, and the batteries just laying on the table top. I was determined I would find a way to clean that up a bit.

So - today I started by removing everything inside. The pieces had just been placed using tacky putty to keep them in place and, it seemed that every time I moved the darn thing, two or three pieces would fall over or shift. I decided I would glue everything down permanently and be finished with it. The following pictures show you some of my inside work. Again - I apologize for the quality of several of these photos but, hopefully, you will be able to get an idea of how it came together.


You can see the lath and plaster wall, both on the short wall on one end, and on the wall on the other end that is reflected in the mirror I installed, hopefully making it look like another room beyond. Then, I emptied everything out and got to work. I sanded a swath from the "other room" to in front of where the picture would be standing, and used black pastel chalks along the edges of this area, and cream to highlight the centre, to make it look like there was a path worn on the floor from Dorian coming to the attic so often to check the progress of his picture. Then I started to glue things back in place again.

I must say that my two favourite things in my attic (and also the most expensive - splurges worth every penny, in my opinion) were the bare bulb light fixture (after all, what other kind of light would you have in an attic), and the wonderful spider on a web, created by Elizabeth Reid, which I installed in the corner of the window.


Tomorrow I will share some more pictures of the progress I made today, the solution I came up with for the "unfinished" outside back wall, and hopefully, whatever work I manage to fit in tomorrow. I hope you'll like what you see - I had fun doing it and still like the actual project itself. TTFN!!


Sunday 17 April 2016

Brown Paper Packages Tied Up With String....

...these are a few of my favourite things!!! In my case - it was actually a box filled with all the goodies from our Daily Deals and Awesome Buys from this past January. I mentioned that our mini club got together to open the packages and ooh and ahh over everybody's purchases. I thought today I would show you a few of my buys and explain why I bought them.

The first two pictures are of items I purchased that will be used in my greenhouse/potting shed. The barrel will be aged and finished appropriately and set as a rain barrel at the corner of the potting shed. The garden hose will be inside the greenhouse along with the watering can. The birdhouse will be found somewhere in the landscaping outside the buildings as will the bucket and the adorable Reutter rabbit hutch. Don't you just love those bunnies?!?

The second photo shows a ceiling fan which will probably go in the potting shed, a bicycle planter for the garden, two large ceramic planters to flank the garden doors of the greenhouse, and a long strip of led lights that I will be using to make hanging fluorescent lights above the planting tables in the greenhouse. See - all bought with a purpose in mind!


The next two groupings are also for planned projects - the two hanging lamps are for the pub I will get to some day, and, of course, the quilting shop will benefit from the items in the second picture.


Once again, I broke my own rules with the purchase of these next two groupings. I have a weakness for porcelain from Reutters, even though I have no idea what I will use this luncheon set or the canning set for. I just thought they were beautiful. And the boat and other maritime items - what the heck - I have no idea why I bought them. My guess is it was a little bit of nostalgia for the island home I came from. Who knows? Not me, that's for sure!


I also have several other items I bought during the daily deals that I am ashamed to show you because they also break my rules. I have no idea what I'll do with them! But, I'm a true mini-believer who knows that some day, maybe not tomorrow, or next week, or next month, or next year, but some day - I will find a use for them!!

And, if you think that today's post is some kind of a stall to keep your mind off the fact that I didn't do any minis today - you're absolutely right. Didn't work though, did it??? *smile* However - I have plans to spend 4 hours tomorrow working on my Picture of Dorian Gray room box so tomorrow evening, I may actually have a progress report for you. Until then -- TTFN!!!

Saturday 16 April 2016

Tim Hortons Is Everywhere!!!

Remember my friend Louise had a birthday last month and I gave her a couple of signs for her Via Rail railway station? Well, I knew there was a surprise birthday party planned for a few weeks later when other friends got back from vacation but I gave her the little signs on her actual birthday to "throw her off the scent", as it were. Anyway, tonight was the party her husband had arranged for her. It was a great evening and she actually never suspected - I suppose coming a month after her real birthday made it easy for it to come as a surprise!

Anyway - knowing that tonight was the party and that, in her upcoming project she also plans on including a ubiquitous Tim Hortons, I thought I would do something along that vein for today's "better late than never" birthday. I had some Fimo modelling clay I had bought years ago but never got around to using. I have never made anything with Fimo before but thought this would be a good time to give it a try. I decided to make doughnuts, bagels, cookies and TimBits for her planned project.

I started by trying to figure out what to make the trays out of. My first try was with some Penelope cloth but that looked too much like wicker baskets. Then I bought a cheap splatter screen at Dollarama and cut out the screening, thinking I could fold the edges and form rectangular trays. I found that the edges were much too ragged and sharp to either look good, or to keep fingers safe and blood-free. Then my DH suggested I try using a metal wall patch that is used when you have a large hole in your wall board that needs to be patched. We had a couple of pieces of it in the tool room so I thought it was worth a try. I peeled off the plastic mesh that is attached to these patches. It enables it to self-stick to the wall, in preparation for using crack-filler over top of it. Then I cut a strip I thought was the appropriate width, cut this into three lengths, folded up the edges and - Bob's your uncle! - They worked like a charm! Then I cut strips of a beige tissue paper to line the trays, like they do in Tim Hortons.


Then it was time to try out my Fimo and fill the trays. I started by kneading some cream-coloured Fimo, rolling it out, and cutting out 16 cookies. Then I took half of the cookies and, using the back of my craft knife blade, I made cross-hatched lines in these, to resemble peanut butter cookies. For the other 8 cookies, I used the sharp end of a toothpick to "texturize" the top of them a bit. Then I used my pastel chalks to colour the peanut butter cookies an appropriate colour. I did the same with the remaining cookies to make them look like chocolate. Then, I rolled out some more Fimo, thicker than for the cookies, and cut out some circles for bagels, making small holes in the middle - smaller holes than if they were for doughnuts. I used my chalks again to make half of the bagels look plain, and the other half the colour of multi-grain bagels. I used a fine tip black pen to dot over the multi-grain bagels to look like seeds. Then I rolled 33 tiny Fimo balls to represent TimBits. I coloured half of them for plain Timbits, and the other half for chocolate. Then I put these into a 220F oven for 30 minutes.


While these were setting up, I decided that Louise should also have some doughnuts but I didn't want to make more Fimo ones. So, I took some Cheerios cereal and made 16 doughnuts. I left half the Cheerios in their natural state and, having mixed up some pink craft paint with equal parts of Aileen's Tacky glue, I dipped the tops into the mixture to resemble pink icing. I then mixed up half and half dark brown paint with glue and completely immersed the remaining Cheerios to look like Double Chocolate doughnuts.

When the cookies, Timbits, and bagels were removed from the oven and cooled down, I used some of the chocolate "icing" to top the chocolate cookies, then rolled the chocolate TimBits in the icing so they would look "glazed". I rolled the plain ones in a watered down tacky glue so they would also look "glazed". Then I arranged them in the trays I had prepared earlier - gluing them in place, of course. Here's how they looked as I got them ready to be gifted to Louise:


Louise seemed very pleased to receive them. I hope she'll be able to use them in her Tim Hortons. One thing that surprised me, once she had opened up the gift, was that the Cheerios that I had completely immersed in the paint/glue mixture, had shrunk as they dried. They ended up smaller than the ones with the pink icing just on top. Hmmm. Now I may have to go back and make her another set using Fimo so they won't shrink after the "icing" is applied.

So - Louise opened her cards and gifts, we all enjoyed a nice meal and, just in case you don't know about the flamingo collection Louise has accumulated over the years, here's the birthday cake her DH got for her.


Thank you for inviting us, Brian. we had a great time. Happy birthday again Louise - this is the last time this year - we promise! TTFN!