Showing posts with label Montreal Miniatures Show. Show all posts

Wednesday, 5 April 2023

How do you know that spring is here?


…because the Montreal Miniature Show has taken place!! 

Before we talk about that wonderful springtime event, I thought I would share the new look for my home-made tiered tray centrepiece.  With St. Patrick’s Day behind us, I removed everything from the trays and started going through my stash to find items that would give me a springtime boost regardless of how much snow is still on the ground.  Here is how the trays look now.  The view from the ‘back’ of the trays show the small faux white narcissus planted in a broken eggshell. 

From the front you can see the overall centrepiece as well as my attempt at creating a happy spring feel on the top of my buffet.  Of course, you also get good view of the cat tree in the corner.  Unfortunately, there’s not much I can do to make that look any more spring-like!


Taking one tier at a time, on the top layer I placed a tall candle in the back corner and leaned a gold picture frame against it.  I used a piece of a pretty floral napkin cut to size as a picture inside the frame.  I loved the colours and look of these gorgeous roses.  I nestled a large spotted ceramic egg in some greenery in front of the picture and set the small wooden crate I made last spring with the flowers, eggs, and the little bunny butt sticking out.  I love that little crate!


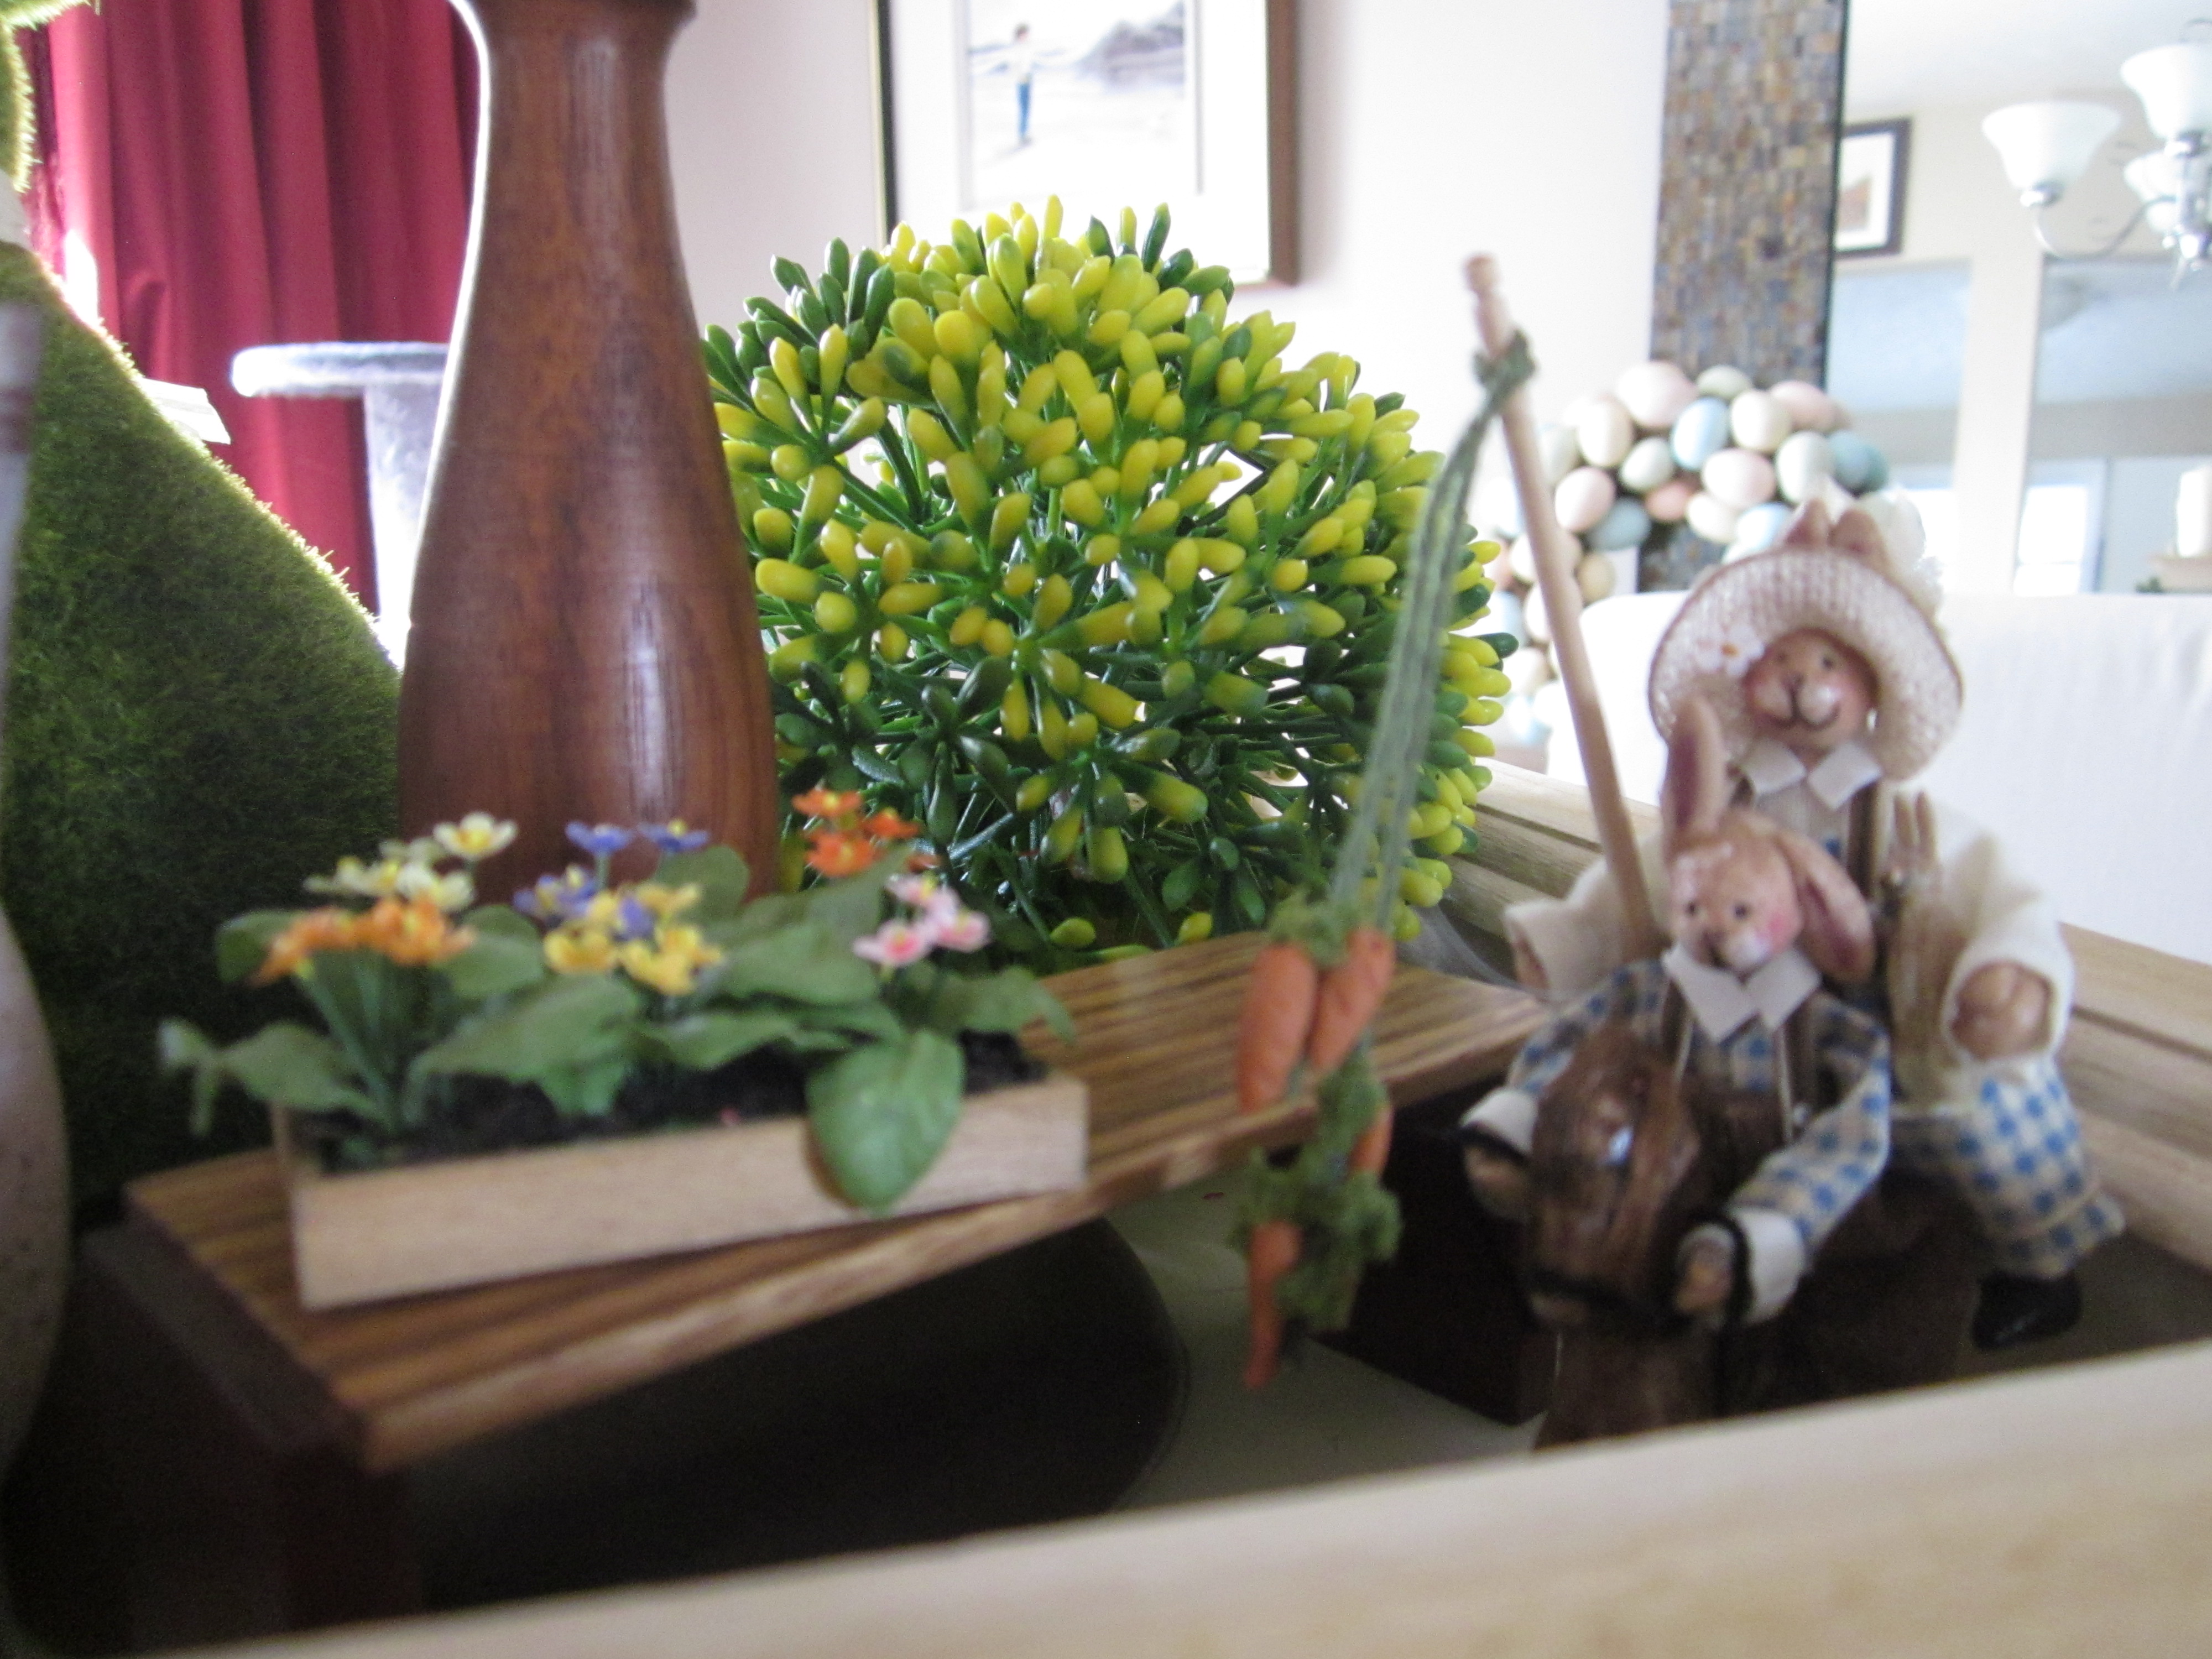
In the next level down, I placed a ball of fake greenery that provides a nice hit of bright yellow in the back corner. In the right corner is the most  adorable set of hand-made bunnies riding a rocking horse which they are leading by dangling  a cluster of carrots in front of it.  I am not sure who the craftsperson  is who created this wonderful little piece of miniature art but my DH, Bruce,  purchased it from the Freedom Miniatures booth at the Montreal show as an early birthday present for me.  He’s my favourite husband ever!!  I will show you more of these little bunnies a little later in this post. 

Next to the bunnies is a tray of incredible primroses made by my good friend, Marijke Hurkens of Pulchinella's Cellar.  The tray is sitting on an incredible bench hand made by Shelley Acker, owner of Freedom Miniatures in Kentville, Nova Scotia.  The bench is made with three different woods – cherry, walnut and oak or maple from the look of it – perfectly sanded and finished.  It is truly lovely.

In the front you can see one of my green turf bunnies and another large speckled egg as well as a beautifully-aged press-backed chair holding a pot of pansies and other mixed flowers.  This gorgeous little piece was made by Debbie Bettaglia-Fawcett and I was lucky enough to receive it as a “giftie” at Camp Mini Ha Ha a few years ago.
Moving to the bottom tier, in one back corner is a ball of a different kind of greenery and the little white narcissus you saw in the overall picture. In the other back corner is the little Irish cottage I had also used in my St. Patrick’s Day display.  You can also see the other turf bunny I have placed in the right front corner and just a glimpse of the back of the beautiful bench that takes up the other front corner.

And here is a better view of the bench with my last speckled egg in front.  The incredible spring flowers in trays that are sitting on the bench were made, of course, by my friend, Marijke.  Her skill in flower and plant making is phenomenal as these pieces show.  There is also a small resin bunny I picked up in Montreal from Grandpa’s Dollhouse.  The bench is made of walnut with a leather seat and was expertly crafted by Iris Sutherland – yet another “giftie” I picked up at one of our Camp Mini Ha Ha events.

Now for my purchases at this year’s Montreal Miniatures Show.

In this picture we see a filled punch bowl with glasses that I picked up at Fay-vourite Minis, and 2 mixing bowls I purchased at Pacific Wood Imports and Miniatures.  I bought the 2 breakfast plates from a vendor who did not put their receipt in the bag so I am unable to give you the gentlemen’s name who made them.  Similarly for the laser-cut Noels and the 3 glass jars – different vendor but I have nothing that can tell me, after the fact, who they were. 

Here you can see items I purchased at Grandpa’s Dollhouse: a kitchen bridge-type faucet in a brushed brown finish, 3 lady figurines that will look great on a mantel in one of my projects, the little resin bunny you saw on the bench on my tiered display, and 4 tiny little wooden houses which will be placed above the window in my Christmas advent room box.  I am hoping I will be able to find a way to put teeny little lights in them as well.

I bought a Christmas dessert table from One Lady’s Art, a first-time vendor at the Montreal show and I picked up an inexpensive basket and two adorable monkeys from Pacific Wood Imports and Miniatures. I have purchased one of these monkeys before because I find them far too cute to ignore!!  I will find a little table or mantel somewhere to put them on.


Now to my purchases from the wonderful Janice Crowley.  I bought a bumblebee teapot and a yellow butter dish which will be going in my honey store project, a gorgeous bunny teapot, creamer and sugar bowl on a leaf platter which is now sitting on the right-hand end of the bench in the bottom of my tiered spring display, a cottage tea pot which I purchased for my friend, Louise, and some blue and white pieces to add to others I have purchased in the past.  I see a display of fine china pieces somewhere in the future!

Behind these is a set of pink glass candle holders purchased from Fay-vourite Miniatures and 4 glass wine glasses from Pacific Wood Imports.

Last, but certainly not least, I give you a couple of closer pictures of the early birthday gift Bruce picked up for me from Freedom Miniatures.  The wheels are already turning and I think I know how I will make a special piece to properly display this piece.  Not only are these two adorable bunnies riding the rocking horse but the larger bunny has a little stuffed bunny under their arm to add to the charm.  I just adore this piece and hope you like it too – but you can’t have it!!!


So that is a look at my Montreal purchases.  In past years I have taken pictures of the display items made by the members of the Montreal club and posted them here on my blog but one of their members, Michele Castonguay, has been taking pictures and putting them online on the Club’s website during the Covid years and he will be doing the same with this year’s actual in-person event so be sure to be on the lookout for them at the official Miniature Enthusiasts of Montreal (MEM) official site.  Also – make sure you start planning to be at the show in person next year.  It’s a great little show with enough vendors to make it well worth the trip without becoming too overwhelming and tiring.  Plus, it is so great to met up with old friends and cultivate new ones.  Always a bonus!!!

I hope you enjoyed this glimpse at my new spring table display and my Montreal show purchases.  Until next time – TTFN!!! - Marilyn

Wednesday, 20 May 2020

A couple of spring projects

I know I've been absent for several weeks but I haven't been completely idle. First of all, thank you to all of you bloggers who aren't as negligent as I am - I have been enjoying reading your posts, for sure.

First, for those of you who aren't aware, after the Montreal show had to be cancelled ( I am SO disappointed!) I had a few emails back and forth between myself and Bev Lunn and Michèle Castonguay of the Montreal Club. I mentioned that one of the things I was going to miss the most because of the forced cancellation was the exhibits from their club members. As a result - we all get to see them. Michèle has provided a "virtual exhibit room" on the website for the Miniature Enthusiasts of Montreal where we can get all get a chance to see examples of the fabulous work done by many of their members. Be sure to pay a visit - such great projects and so inspirational.

So, I have spent my "isolation time" trolling through other people's blogs like Elizabeth's at Studio E, Jodi's at My Miniature Madness, Marijke's at Pulchinella's Cellar...okay, too many to mention you all individually but I just want to say, thank you for the joy and inspiration you have all provided with your posts. Incredible work is being done by very talented people.

As for me, the 15th of March was my friend, Louise's birthday. She had mentioned a few times that she would like to try making miniature wicker furniture. So - I gave her a kit for her birthday and one for myself. Then, with the covid-19 isolation rules, we set a date and time for a Skype call and worked on our chairs together. We both really miss our regular Wednesday mini meeting times but this virtual option was way better than nothing! Here is the chair I was working on.

I used this kit from Barbara Richmond:


It came with a pre-drilled base and pre-cut wires as well as waxed linen thread for weaving. Some kits have larger wire for the 4 corners and smaller for the ones between. This one required you to use 4 wires together in each corner then the single ones for the in between ones. It's important to note that the holes on the corners are, of course, larger and that the back and two sides are drilled all the way through while the holes for the front are drilled partly into the bottom - not all the way through.


I followed instructions to a "T" - not one of my usual strong points as we all know but I thought it might be important for my first wicker project. Turns out I was right. *smile*

I started by weaving the upper level first, regular weaving to start then followed a different pattern for a few rows for a decorative accent. At that point the wires on the sides were to be bent to almost a 90 degree angle, gradually straightening toward the back, and the weaving continued.


When I finished enough rows for the upper part of the chair, I followed the instructions for the lower section, matching the decorative section under the seat as well. To finish off the legs, I added a few wraps to the bottom which were not mentioned in the instructions. Any wicker furniture I have ever owned always had a little "bulbous" wrap to end the legs so I took the liberty of mimicking them. I then cut off the extra wire and made a braid to go around the upper and lower edges to hide the wires and make a more finished look. I made a double braid to go around the edge of the wooden seat.


Now, the kit came with a fabric, already pre-cut for the seat cushion. However, it was a flowery blue which just wasn't my style. I dug out an old silk tie that my husband had thrown away (I have no idea how it could have ended up in my fabric stash) *grin*. It had a dark blue background but had all these really neat squares and rectangles with really attractive designs on them.


Much better! The original blue fabric is next to the finished chair. I really like how it turned out in the end and, with such easy instructions I can see myself doing more wicker furniture in the future. It was really fun.

So, speaking of fun, I was also thinking about a real-life spring arrangement I had seen online and decided I wanted to try to make a mini one. I didn't have any real measurements so just used my usual "fly by the seat of my pants" technique. I cut two ends, a bottom and two sides for the container. I first folded a piece of paper in half to draw out the shape for the ends because I wanted to make sure they were symmetrical and the same size.


Then I put the container together and used some "dirty water" to make it look a little aged. Using a really cheap white facecloth (the thinner, the better), I covered a medium sized bead with glue and stretched a small piece of the terrycloth from the facecloth around the bead. I took a small bit of cotton batten and rolled it with a little glue to form a tiny white puffy ball and glued it to the covered bead. Then I cut two tiny shapes from thin white felt and put three pink dots for toe pads and one for the main foot pad on each little felt foot and glued the little feet on either side of the little bunny butt.


I put a small amount of floral foam in the bottom of the container, glued in the bunny butt and tiny bits and bobs of floral material and Easter eggs I had lying around. I just adore how it turned out. I think I'll make more of these because they are just so cute! I know, I know, we're not supposed to use the word "cute" to describe our minis but hey, I calls 'em how I sees 'em!!!


Here are my two little projects together. I am happy with both of them.


But, if you'd like to see something bigger...I actually have accomplished something else you might be interested in. Of course, you will have to wait a few days for my next post to see! In the meantime - stay safe, stay healthy, work on minis!! TTFN - Marilyn

Wednesday, 25 March 2020

Keeping busy in these strange times

I hope everyone is keeping safe and well while we try to weather this health scare together - while still remaining separate.

Luckily my DH and I returned from Ireland just before all this broke loose on a global scale. We have remained healthy and are limiting activities outside our home. My DH is doing any shopping needed - but then he usually did anyway so that's not such a big change. It's the almost emptiness of the grocery stores that is so surreal.

In the meantime come all of the cancellations. While I didn't mind having my dental appointments cancelled, I was disappointed to have my haircut cancelled as the length of my hair is really starting to bug me. Cancelling our St. Patrick Week festivities was one notch up on the disappointment scale but, the biggest disappointment?? - the cancellation of the Montreal Miniature Show! I so look forward to this show every year. Even though it is an 8 hour drive each way for me and my friend Louise, it's a weekend of pure joy when we hit the sales and exhibit floors.

The members of the Miniature Enthusiasts of Montreal do such incredible work. I love spending hours looking at all of the projects they have on display. Also, the ability to shop at so many different vendors is such a treat for us since the closest miniature store to us is a seven hour drive in the opposite direction (Freedom Miniatures in Kentville). Luckily the owner, Shelley, has a great website so I can still purchase anything I need between her shop and my other favourite - Grandpa's Dollhouse.

I know I have lots of mini tasks that need to be done but, rather than actually making minis, the last several days have been spent trying to sort and organize my craft room. Even though my craft room is all about minis, the task itself is Herculean! The good news is, while I'm mourning the loss of this year's Montreal Miniature show, I came across some of my favourite purchases from past shows. Once of my favourite vendors at the Montreal show is Janice Crawley. Here are some of the things I have bought from her in the last couple of years:

A teapot and two vases in the Jasperware style:


Here are the two vases next to a life-size one I own. The life-size vase is not terribly large as you can see by the Sharpie pen behind it. That gives you a sense of how tiny the two vases from Janice are. Beautifully done!


Here is a gold tea set with a rose design which is much prettier in person. I love it!


Next is a casserole dish in what I think looks like a Belleek-type finish, and a set of pottery beer mugs.


I love these Santa pieces and I'm sure they'll end up in one of my Christmas-themed projects in the not-so-distant future.


Next, I have two of Janice's china figurines. The one on the left looks very like the full-size Royal Doulton dolls my mother used to own. On the right,the porcelain-dipped lace skirt reminds me of the lovely Dresden pieces of my mother. The little china bird in front is a mass-produced piece from one of the other Montreal vendors. I just thought is was so cute.


The last two pieces of Janice's that I am showing you today are so beautiful. Take a close look at the jug on the right. The top of the jug and handle are actually a lovely swan. Janice then used blue on the body of the jug right under the swan to indicate water, with green leaves of water plants below. How gorgeous is that?


I have a few more pieces of Janice's that I haven't come across yet in my craft room clean up but I know they're in there somewhere! Janice - I sure hope you will be at the 2021 show in Montreal! I will have my wallet full and ready to be emptied!!

One vendor I only saw once at the Montreal show was silversmith Greg Matusovsky. His work, as was his father's before him, is beyond words. I was lucky enough to purchase this pair of candlesticks from him a couple of years ago. I would so love to buy more but the website on the business card I got from him does not seem to be active anymore. I hope he is still making as his work is exquisite,


So, after several hours of sorting and rearranging things in my workroom, I decided it was time to quit. Okay, I was greatly encouraged to quit when the two trays of small wooden letters I had set at the edge of my table were knocked off and went everywhere!


I didn't take a picture of the disaster on the floor - I decided to shut the lights off, close the door, and go back to it tomorrow. *sigh* The good news is that I will be sure to find many exciting pieces of eye candy that I totally forgot I had. With that in mind - I will actually look forward to tomorrow's work - even if it means starting off by picking up a couple of hundred little wooden letters and sorting them alphabetically again. Take care everyone and be sure to stay active and safe. TTFN - Marilyn

Thursday, 13 April 2017

First things first...

... I forgot to post my Wednesday Weather Watch pictures yesterday but...good news!! - It's officially spring for me! No snow left on the deck at all and only pockets left on the neighbours' yards. Okay - there's still snow in the pool but I wasn't planning on swimming anyway. *smile*


So, now that I'm doing my happy spring dance (it's not pretty but it makes me feel really good!), I thought I would go back and show you some pictures from the 2017 Montreal Miniatures Show and Sale. Please forgive the quality of the pictures - the exhibit room was very brightly lit and almost all of the pieces suffered from the glare of the lights against the windows of the room boxes. Hopefully you can see them well enough to get a feel for their projects, at least.

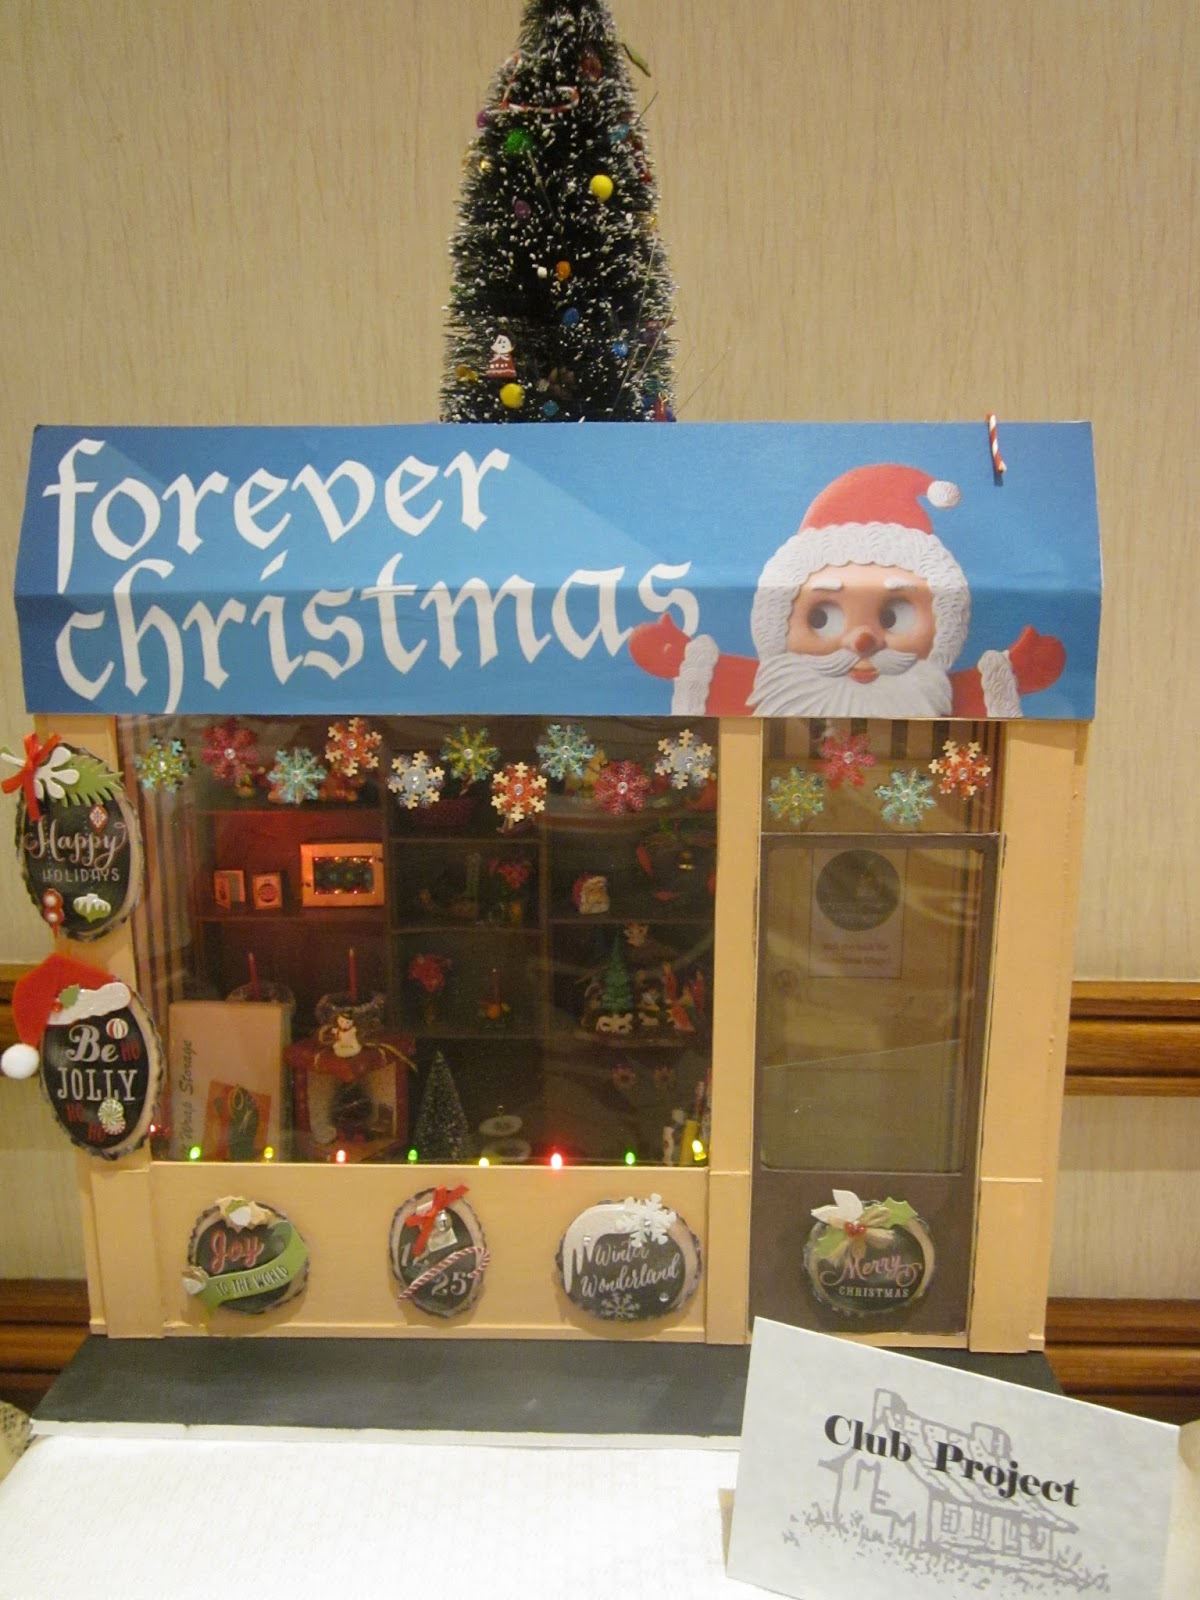
I was quite surprised to find that, this year, their club project was quite similar to our club project - shallow room boxes with shop fronts. Just like our club project, each one is finished very differently, reflecting the artist's individual style.

Shirley McBain used her club project to display some lovely china ladies - beautiful figurines all ready for a night of dancing!


Eleanor Dutton's formal dress shop, titled "Ella", showcases three fine examples is the front window. One can imagine the rest of the dress shop is hidden behind the semi-sheer curtain covering the whole back wall.


Erica Lapiste's project is near and dear to my heart! "The Shoe Box" really speaks to my love of - well - shoes!!! (and purses too!). I love the painted brick walls, the raised platform with the shoes, and all the little "glass" shelves with more shoes and purses. I also really like the way she made her door. It looks just like one you would find on this style shop.


I so wish this next picture didn't have so much glare off the glass because it is truly priceless! It really made me smile. In case you can't read the sign on this box, Inge Cossette named her piece "The Bachelor". I love the old fellow standing in his socks and underwear, ironing his pants, surrounded by the traces of his bachelor life. So much fun!


Caroline de Repentigny and Fernand Rondeau used the club project to produce a row of three shops.


I got better views of the first two shops in this row but, unfortunately, the third one turned out way too fuzzy to really see anything.


The welcome mat is out at Yvette Reid's "Treasures of the Sea". Don't you love those little yellow rain slickers, the coral, and the little model ships? It makes me think of my home province - Prince Edward Island. (Although I have been in New Brunswick for over 50 years now and do love it as well!).


Michelle Castonguay has tried to think of everything anyone could want to decorate their homes for Christmas. I love to see a shop with lots of things to look at!


A customer is happily trying on hats in Suzanne Wiseman's "Jolie Coquette", while the little puppy waits patiently on the sidewalk. He may be waiting a while -- there's lots of hats in there!


The window of Florence Dafter's "Bridal Boutique" is showing some beautiful dresses for the bride and her attendants. The pretty blue walls create a very calm atmosphere - just what a stressed-out bride needs!


Last for tonight, but certainly not least, Jeanette Ottaway has two shops on display. First,"The Mad Hatter". Bet you can't guess what kind of shop this is!?!


The second one by Jeanette made me smile. It's a great shop but I really loved its name. If any of you out there are fans of Coronation Street, the long-running British soap opera, you probably recognize the name, as did I, of the lingerie factory on this show. Jeanette's "Under World" has some lovely lingerie and accessories showcased. Don't you love it?


Well, thus ends this long post for today. Tomorrow I want to show you some more pictures from this exhibit. In addition to the club projects, and many other pieces on display, there was a varied collection of projects which all had a common denominator - which I will reveal to you tomorrow. Now, I'm going to pay closer attention to the hockey game, then go to bed. Go Leafs, go!!! TTFN! - Marilyn