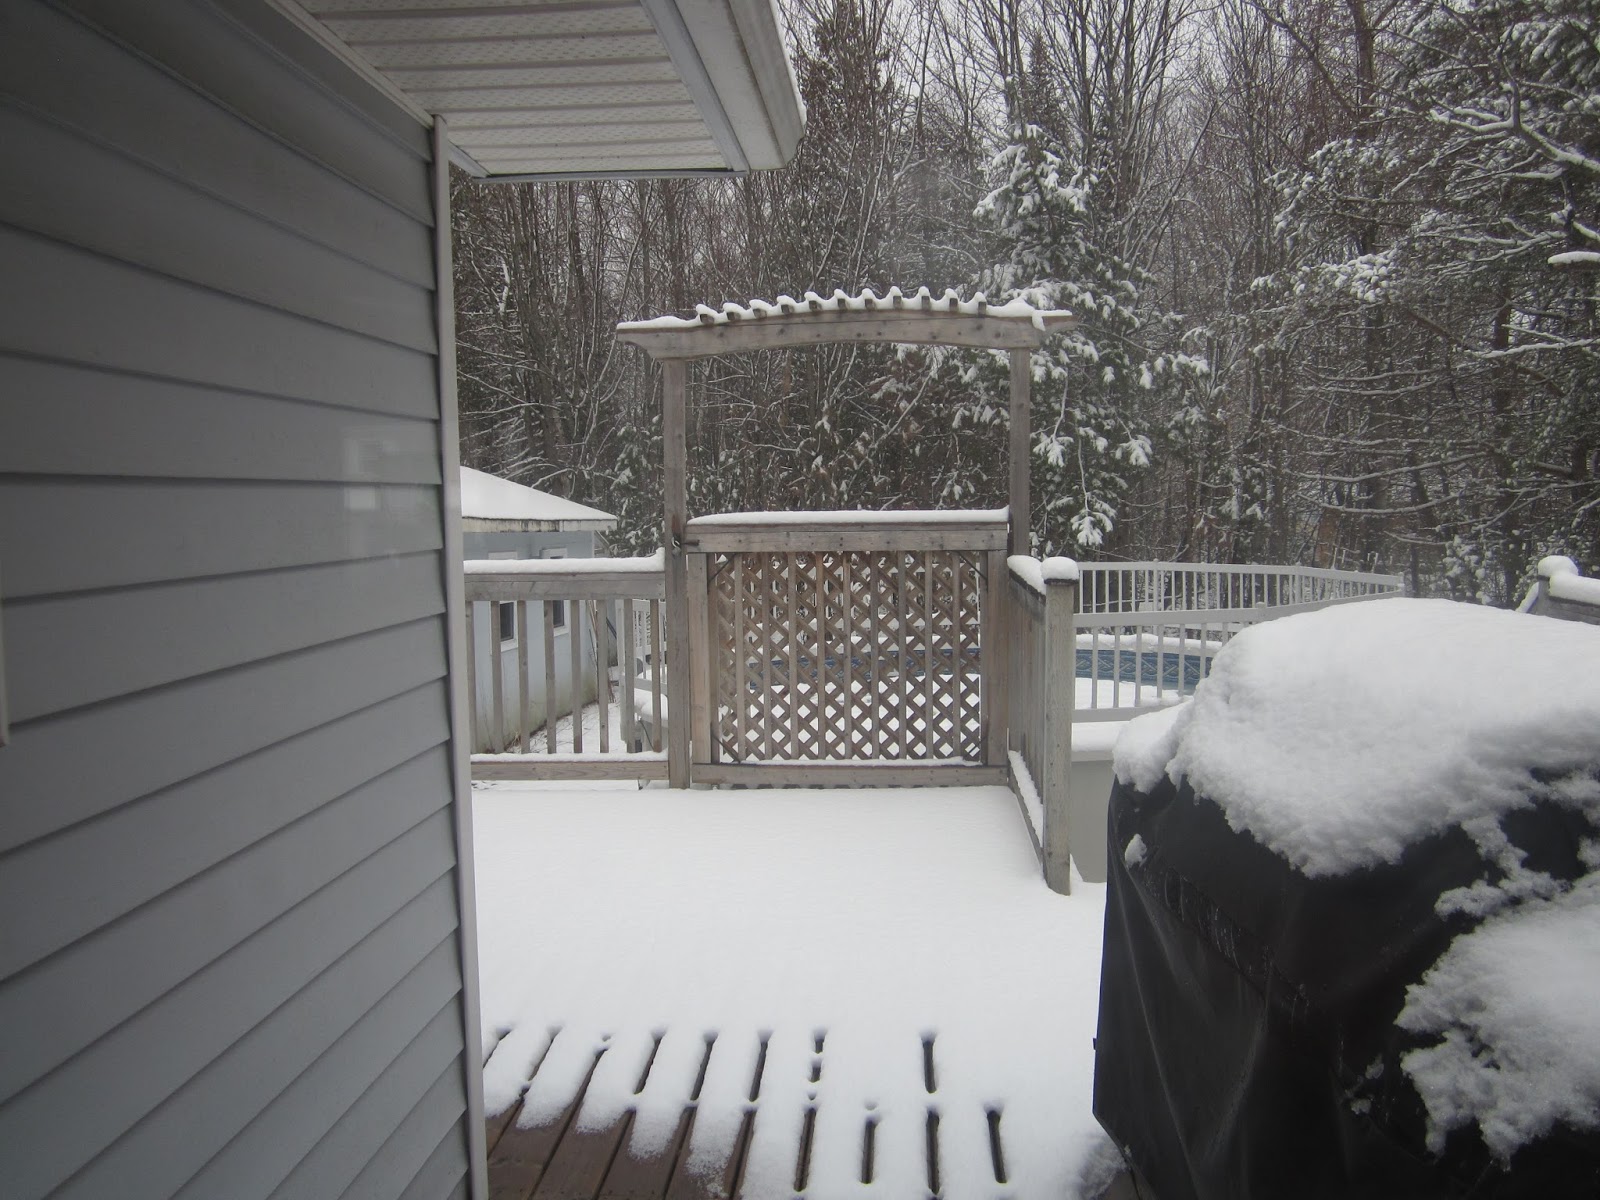
Short post for today - because I just can't face it!
The view out my dining room this morning.
'Nuff said! I'm going to go bury my head until spring actually arrives!!!! TTFN!! - Marilyn
Showing posts with label weather watch. Show all posts
Thursday, 20 April 2017
Thursday, 13 April 2017
First things first...
... I forgot to post my Wednesday Weather Watch pictures yesterday but...good news!! - It's officially spring for me! No snow left on the deck at all and only pockets left on the neighbours' yards. Okay - there's still snow in the pool but I wasn't planning on swimming anyway. *smile*
So, now that I'm doing my happy spring dance (it's not pretty but it makes me feel really good!), I thought I would go back and show you some pictures from the 2017 Montreal Miniatures Show and Sale. Please forgive the quality of the pictures - the exhibit room was very brightly lit and almost all of the pieces suffered from the glare of the lights against the windows of the room boxes. Hopefully you can see them well enough to get a feel for their projects, at least.
I was quite surprised to find that, this year, their club project was quite similar to our club project - shallow room boxes with shop fronts. Just like our club project, each one is finished very differently, reflecting the artist's individual style.
Shirley McBain used her club project to display some lovely china ladies - beautiful figurines all ready for a night of dancing!
Eleanor Dutton's formal dress shop, titled "Ella", showcases three fine examples is the front window. One can imagine the rest of the dress shop is hidden behind the semi-sheer curtain covering the whole back wall.
Erica Lapiste's project is near and dear to my heart! "The Shoe Box" really speaks to my love of - well - shoes!!! (and purses too!). I love the painted brick walls, the raised platform with the shoes, and all the little "glass" shelves with more shoes and purses. I also really like the way she made her door. It looks just like one you would find on this style shop.
I so wish this next picture didn't have so much glare off the glass because it is truly priceless! It really made me smile. In case you can't read the sign on this box, Inge Cossette named her piece "The Bachelor". I love the old fellow standing in his socks and underwear, ironing his pants, surrounded by the traces of his bachelor life. So much fun!
Caroline de Repentigny and Fernand Rondeau used the club project to produce a row of three shops.
I got better views of the first two shops in this row but, unfortunately, the third one turned out way too fuzzy to really see anything.
The welcome mat is out at Yvette Reid's "Treasures of the Sea". Don't you love those little yellow rain slickers, the coral, and the little model ships? It makes me think of my home province - Prince Edward Island. (Although I have been in New Brunswick for over 50 years now and do love it as well!).
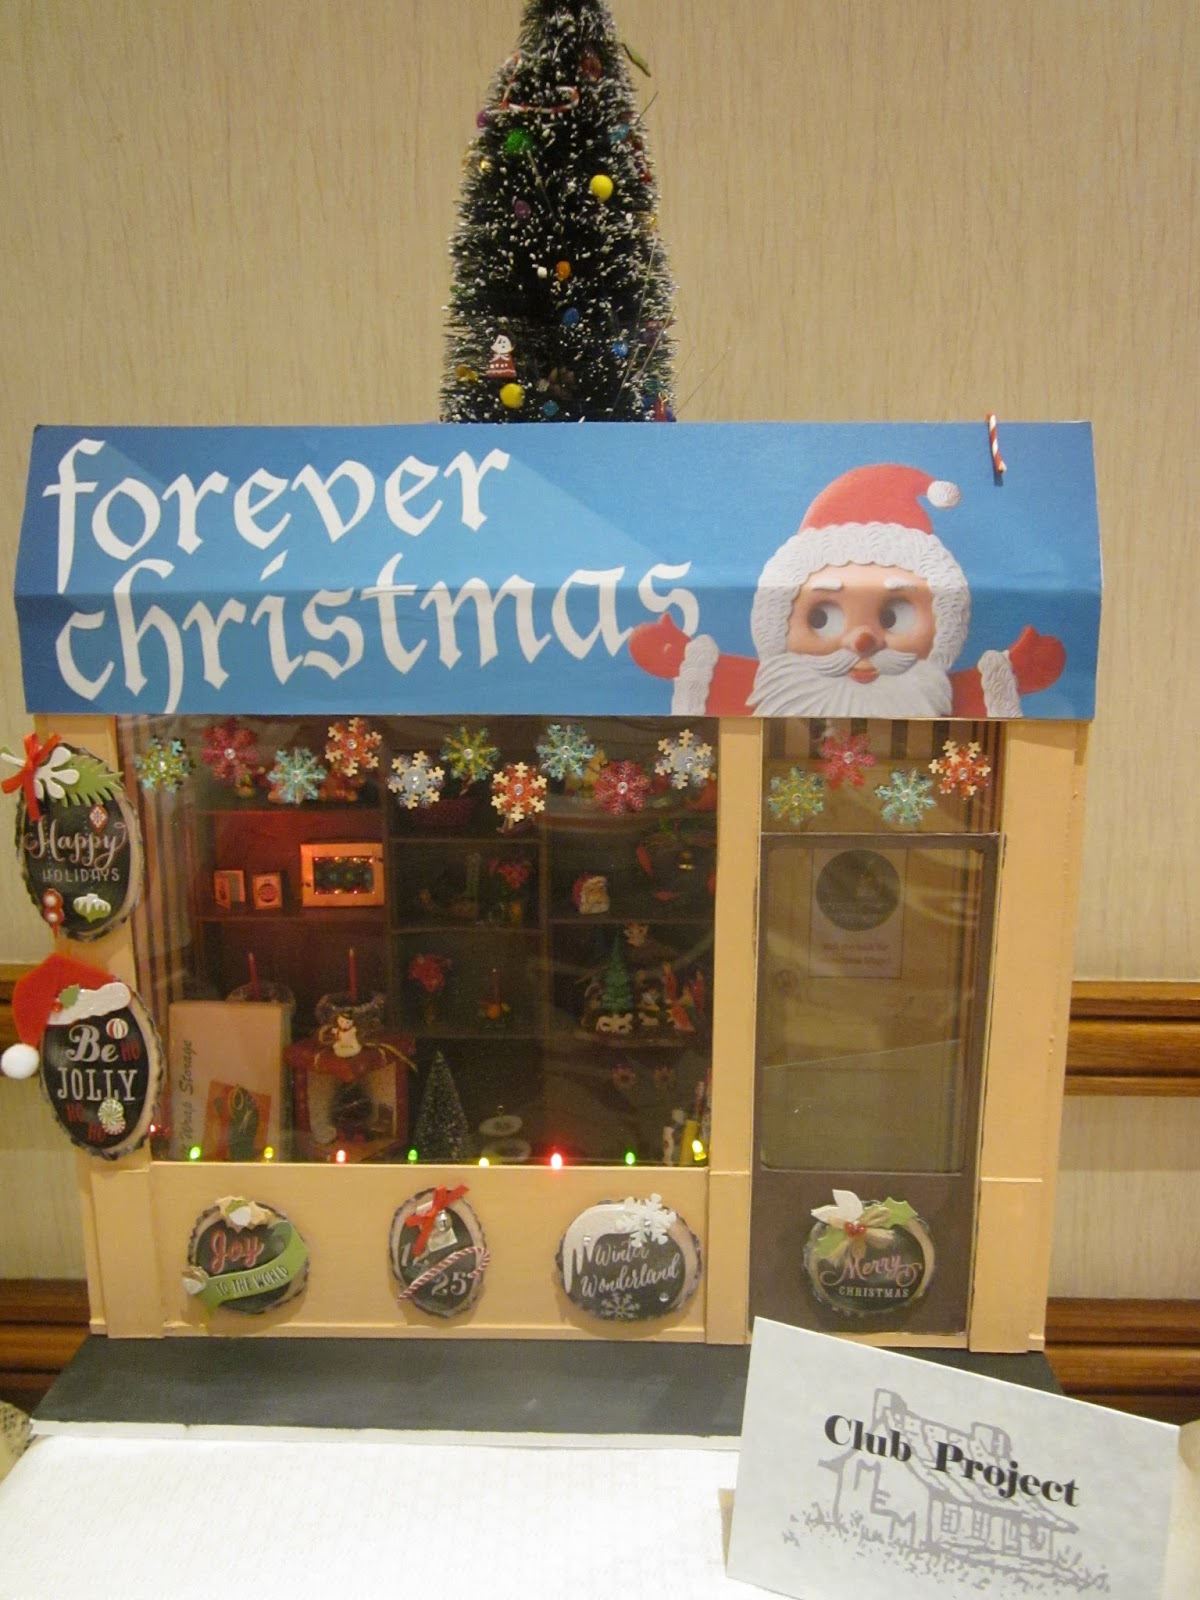
Michelle Castonguay has tried to think of everything anyone could want to decorate their homes for Christmas. I love to see a shop with lots of things to look at!
A customer is happily trying on hats in Suzanne Wiseman's "Jolie Coquette", while the little puppy waits patiently on the sidewalk. He may be waiting a while -- there's lots of hats in there!
The window of Florence Dafter's "Bridal Boutique" is showing some beautiful dresses for the bride and her attendants. The pretty blue walls create a very calm atmosphere - just what a stressed-out bride needs!
Last for tonight, but certainly not least, Jeanette Ottaway has two shops on display. First,"The Mad Hatter". Bet you can't guess what kind of shop this is!?!
The second one by Jeanette made me smile. It's a great shop but I really loved its name. If any of you out there are fans of Coronation Street, the long-running British soap opera, you probably recognize the name, as did I, of the lingerie factory on this show. Jeanette's "Under World" has some lovely lingerie and accessories showcased. Don't you love it?
Well, thus ends this long post for today. Tomorrow I want to show you some more pictures from this exhibit. In addition to the club projects, and many other pieces on display, there was a varied collection of projects which all had a common denominator - which I will reveal to you tomorrow. Now, I'm going to pay closer attention to the hockey game, then go to bed. Go Leafs, go!!! TTFN! - Marilyn
So, now that I'm doing my happy spring dance (it's not pretty but it makes me feel really good!), I thought I would go back and show you some pictures from the 2017 Montreal Miniatures Show and Sale. Please forgive the quality of the pictures - the exhibit room was very brightly lit and almost all of the pieces suffered from the glare of the lights against the windows of the room boxes. Hopefully you can see them well enough to get a feel for their projects, at least.
I was quite surprised to find that, this year, their club project was quite similar to our club project - shallow room boxes with shop fronts. Just like our club project, each one is finished very differently, reflecting the artist's individual style.
Shirley McBain used her club project to display some lovely china ladies - beautiful figurines all ready for a night of dancing!
Eleanor Dutton's formal dress shop, titled "Ella", showcases three fine examples is the front window. One can imagine the rest of the dress shop is hidden behind the semi-sheer curtain covering the whole back wall.
Erica Lapiste's project is near and dear to my heart! "The Shoe Box" really speaks to my love of - well - shoes!!! (and purses too!). I love the painted brick walls, the raised platform with the shoes, and all the little "glass" shelves with more shoes and purses. I also really like the way she made her door. It looks just like one you would find on this style shop.
I so wish this next picture didn't have so much glare off the glass because it is truly priceless! It really made me smile. In case you can't read the sign on this box, Inge Cossette named her piece "The Bachelor". I love the old fellow standing in his socks and underwear, ironing his pants, surrounded by the traces of his bachelor life. So much fun!
Caroline de Repentigny and Fernand Rondeau used the club project to produce a row of three shops.
I got better views of the first two shops in this row but, unfortunately, the third one turned out way too fuzzy to really see anything.
The welcome mat is out at Yvette Reid's "Treasures of the Sea". Don't you love those little yellow rain slickers, the coral, and the little model ships? It makes me think of my home province - Prince Edward Island. (Although I have been in New Brunswick for over 50 years now and do love it as well!).
Michelle Castonguay has tried to think of everything anyone could want to decorate their homes for Christmas. I love to see a shop with lots of things to look at!
A customer is happily trying on hats in Suzanne Wiseman's "Jolie Coquette", while the little puppy waits patiently on the sidewalk. He may be waiting a while -- there's lots of hats in there!
The window of Florence Dafter's "Bridal Boutique" is showing some beautiful dresses for the bride and her attendants. The pretty blue walls create a very calm atmosphere - just what a stressed-out bride needs!
Last for tonight, but certainly not least, Jeanette Ottaway has two shops on display. First,"The Mad Hatter". Bet you can't guess what kind of shop this is!?!
The second one by Jeanette made me smile. It's a great shop but I really loved its name. If any of you out there are fans of Coronation Street, the long-running British soap opera, you probably recognize the name, as did I, of the lingerie factory on this show. Jeanette's "Under World" has some lovely lingerie and accessories showcased. Don't you love it?
Well, thus ends this long post for today. Tomorrow I want to show you some more pictures from this exhibit. In addition to the club projects, and many other pieces on display, there was a varied collection of projects which all had a common denominator - which I will reveal to you tomorrow. Now, I'm going to pay closer attention to the hockey game, then go to bed. Go Leafs, go!!! TTFN! - Marilyn
Wednesday, 5 April 2017
The Difference a Week Makes
Last week, in my extreme desire for spring to arrive, I took pictures of my back deck and out my front window so I could measure the progress by the amount of snow melt. Well, I wish it could have been more but, I am seeing a little more of the deck floor and the neighbours' yards are showing grass around the edges. I guess that's the most I can hope for this week.
We're supposed to get a couple of days of rain, then the temperatures are rising this week so I'm very hopeful for the progress before next week's Weather Watch!
Louise and I were in Montreal this past weekend to take in the MEM show and sale. Besides spending lots of time at the vendor booths and visiting the exhibition room, we were lucky enough to visit with Giac, (English Manor Dollhouse) and view the incredible piece of art that is his massive dollhouse. His talent is unbelievable!!! To really understand the artistry this house exemplifies, you MUST go to Giac's site where you can get a close-up view of each room and witness the transformation. I took one long-range picture but still only managed to fit in 2/3rds of the building.
Giac was also so kind to give Louise and me a mini tutorial (no pun intended) on using paint to produce an extremely realistic-looking wood finish. Here, Louise is trying her hand at producing it. It looks really good - even better in person.
We also talked with him about marble faux finishes. When we went to check out the beautiful finishes in his dollhouse, he showed us a little table he had faux finished with a green marble top. Doesn't it look fabulous?
For those of you who also follow our friend, Marijke's, blog: Pulchinella's Cellar, you would have seen that she made a beautiful, formal floral centrepiece as a commission. Well, the commission was for Louise and me because we wanted to bring Giac a little "thank you" gift that would be suitable for a building as elegant as his dollhouse. Giac loved the piece and is trying it out in his front hall (click on the picture to get a larger view). He may move it around from room to room before he decides exactly where it looks best but, for now, I think it looks beautiful right where it is.
After a wonderful couple of hours spent with Giac, and his husband Jo, it was time for us to leave and head back to New Brunswick - but not without big hugs all around!!! (Louise is adamant that Giac gives the BEST hugs ever!! - I think she's right)
Of course, I consider myself the lucky one because I got hugs from both Jo and Giac at the same time! What a pair of wonderful young men! Their parents must be so proud of them.
Alas - we couldn't stay any longer but we know we'll be back!! Something to look forward to, for sure!
I'm heading away for a few days but, God willing, I will try to post a few pictures from the Montreal exhibit room over the next couple of days then before you know it, I'll be back to mini work of my own!! TTFN! - Marilyn
We're supposed to get a couple of days of rain, then the temperatures are rising this week so I'm very hopeful for the progress before next week's Weather Watch!
Louise and I were in Montreal this past weekend to take in the MEM show and sale. Besides spending lots of time at the vendor booths and visiting the exhibition room, we were lucky enough to visit with Giac, (English Manor Dollhouse) and view the incredible piece of art that is his massive dollhouse. His talent is unbelievable!!! To really understand the artistry this house exemplifies, you MUST go to Giac's site where you can get a close-up view of each room and witness the transformation. I took one long-range picture but still only managed to fit in 2/3rds of the building.
Giac was also so kind to give Louise and me a mini tutorial (no pun intended) on using paint to produce an extremely realistic-looking wood finish. Here, Louise is trying her hand at producing it. It looks really good - even better in person.
We also talked with him about marble faux finishes. When we went to check out the beautiful finishes in his dollhouse, he showed us a little table he had faux finished with a green marble top. Doesn't it look fabulous?
For those of you who also follow our friend, Marijke's, blog: Pulchinella's Cellar, you would have seen that she made a beautiful, formal floral centrepiece as a commission. Well, the commission was for Louise and me because we wanted to bring Giac a little "thank you" gift that would be suitable for a building as elegant as his dollhouse. Giac loved the piece and is trying it out in his front hall (click on the picture to get a larger view). He may move it around from room to room before he decides exactly where it looks best but, for now, I think it looks beautiful right where it is.
After a wonderful couple of hours spent with Giac, and his husband Jo, it was time for us to leave and head back to New Brunswick - but not without big hugs all around!!! (Louise is adamant that Giac gives the BEST hugs ever!! - I think she's right)
Of course, I consider myself the lucky one because I got hugs from both Jo and Giac at the same time! What a pair of wonderful young men! Their parents must be so proud of them.
Alas - we couldn't stay any longer but we know we'll be back!! Something to look forward to, for sure!
I'm heading away for a few days but, God willing, I will try to post a few pictures from the Montreal exhibit room over the next couple of days then before you know it, I'll be back to mini work of my own!! TTFN! - Marilyn
Wednesday, 29 March 2017
Wednesday Weather Watch
Okay - it's official - I am completely fed up with winter when it's supposed to be spring. While I am incredibly happy to be living just outside of Fredericton, New Brunswick, where the worst of any weather patterns seem to pass us by more often than not, and I am sorry for people in the other Atlantic provinces who are continuing to get pummeled, I am, nonetheless, more than ready for spring! It is, after all, officially 9 days into it. It's time it started acting it's age!
So - knowing how quickly things can change in our neck of the woods,I have decided to occupy myself by tracking the changes once a week until spring finally well and truly shows up. Here are two pictures - one taken from our patio doors out to the back deck, and the next taken out our front window up the road.
As you can see - this weather sucks!!!!!
I'll post two more pictures next Wednesday just to compare, then the next Wednesday, and so on.
Now, on the miniature front - things are looking a little better there! The sleigh bed I am making for Louise's birthday gift - yes, she knows it's coming - once her birthday had come and gone I thought I'd better show her what I was working on so she wouldn't think I had actually forgotten her special day.
The last time you saw it, I had the foot board curved around a marker to try to set the shape properly while the glue dried. It worked! Once I took the tape off and repaired the places where the tape had pulled off some bits of paper, I cut and glued on 1/4" strips as trim around the edges of the bed. That turned out quite well but I still have to apply a trim to cover the edges of the paper layers on the head board and the foot board.
The next step was to make the sleigh runners that would take the place of regular legs for the bed. I toyed with a few different ideas, including making them from wire, or having someone cut them from wood with a laser cutter. In the end, I cut Bristol board (poster board?) into 1/4" strips, glued two strips together for the thickness I wanted, then started to work with the strip before it dried too much. I drew the shapes I wanted on graph paper, using a heavy line from a black marker. Then I placed wax paper over top of this so I could still see the lines but wouldn't inadvertently glue the runner to the paper pattern if there was some glue seeping out the sides of the doubled strip. I started with the long, main part of the runner then started to fill it in with the smaller curlicues.
Here is the beginning of it:
This seemed to work fairly well so I continued on, trying to make sure I kept the space even between the bottom of the bed and the bottom of the runner. Okay - I may not have been entirely successful with that part but I think it's fairly even. Once all the curlicues were in place, I cut off the extra length on the bottom runner and left it to try for a few days.
So - tomorrow I will be flipping the pattern over to get a mirror image, and start on the second runner. Once that is done I only have to add the extra finishing trim I mentioned above, apply a few decorative elements, gesso the whole thing, paint the runners and trim with metallic paint, paint the body of the bed with a pearlized paint, amd make the bedding - 2 Euro pillows, two bed pillows, sheets, comforter..... That's all!!! Don't worry Louise - I promise you'll have it before your next birthday!!! But, if so, I'd better get back to work! TTFN! - Marilyn
So - knowing how quickly things can change in our neck of the woods,I have decided to occupy myself by tracking the changes once a week until spring finally well and truly shows up. Here are two pictures - one taken from our patio doors out to the back deck, and the next taken out our front window up the road.
As you can see - this weather sucks!!!!!
I'll post two more pictures next Wednesday just to compare, then the next Wednesday, and so on.
Now, on the miniature front - things are looking a little better there! The sleigh bed I am making for Louise's birthday gift - yes, she knows it's coming - once her birthday had come and gone I thought I'd better show her what I was working on so she wouldn't think I had actually forgotten her special day.
The last time you saw it, I had the foot board curved around a marker to try to set the shape properly while the glue dried. It worked! Once I took the tape off and repaired the places where the tape had pulled off some bits of paper, I cut and glued on 1/4" strips as trim around the edges of the bed. That turned out quite well but I still have to apply a trim to cover the edges of the paper layers on the head board and the foot board.
The next step was to make the sleigh runners that would take the place of regular legs for the bed. I toyed with a few different ideas, including making them from wire, or having someone cut them from wood with a laser cutter. In the end, I cut Bristol board (poster board?) into 1/4" strips, glued two strips together for the thickness I wanted, then started to work with the strip before it dried too much. I drew the shapes I wanted on graph paper, using a heavy line from a black marker. Then I placed wax paper over top of this so I could still see the lines but wouldn't inadvertently glue the runner to the paper pattern if there was some glue seeping out the sides of the doubled strip. I started with the long, main part of the runner then started to fill it in with the smaller curlicues.
Here is the beginning of it:
This seemed to work fairly well so I continued on, trying to make sure I kept the space even between the bottom of the bed and the bottom of the runner. Okay - I may not have been entirely successful with that part but I think it's fairly even. Once all the curlicues were in place, I cut off the extra length on the bottom runner and left it to try for a few days.
So - tomorrow I will be flipping the pattern over to get a mirror image, and start on the second runner. Once that is done I only have to add the extra finishing trim I mentioned above, apply a few decorative elements, gesso the whole thing, paint the runners and trim with metallic paint, paint the body of the bed with a pearlized paint, amd make the bedding - 2 Euro pillows, two bed pillows, sheets, comforter..... That's all!!! Don't worry Louise - I promise you'll have it before your next birthday!!! But, if so, I'd better get back to work! TTFN! - Marilyn
Subscribe to:
Posts (Atom)