Wednesday 31 March 2021

T2T Challenge - It's been a long day

 How is it possible that little teeny things take so long to make???  Whatever the reason, this has the potential to be a long post - but I will make it reasonably short for you instead.

Before I update you on the progress of my T2T project - a Parisian balcony scene, I will provide a list of the items that were allowable and we'll see if I managed to use a minimum of 25 of the 35 items:

1. 4 feathers  - used a couple in the plant pot on the shelf unit

2. 10 Beads - 6 for the door handles, 2 as decoration in the door pediment, one in the pedestal for the bird bath, and one to make a teapot.

3. 3 cotton balls - I used 1 to provide volume inside the chair seat and back.

4. 10" sq wrapping paper -  did not use

5. Eraser - made a double bird house

6. 5 stir sticks, popsicle sticks or tongue depressors - used long tongue depressors for balcony railing

7. Small box (no side longer than 3") - used top for the frame of the shelf unit and bottom for the shelves

8. 2 stickers - used to look like buckles on the yoga mat

9. 4 bottle caps (any size) - used 1 for the bird bath and 3 for the chair-side table

10. Greeting card - used a small portion of the plain back of a card to make the tea cup and part of the cover for the teapot

11. 6" fun foam sheet - used for the yoga mat and a small birdhouse in the shelving unit.  Used small strips as frame around the mirror/tray (painted it black), used around base of birdbath

12. 6" Felt square - used a small piece for a cushion

13. 6 Toothpicks - used the tops of 2 decorative toothpicks for the drawer handles in the side table and as part of the teapot cover.  Used lower parts for stems for the flowers.  Used 2 others as handles for the garden tools.

14. 2 sheets of paper (8.5 x 11) - used one for the French doors and one for the apartment interior.  I printed a box of fertilizer and some seed packets and leaves to the side of the apartment picture since it didn't take up the whole sheet of paper

15. 1 full sheet of cardstock (any colour) - I used a dark green cut into strips as "siding" on the balcony walls.  Yes, I am aware that this type of siding would be very unusual for downtown Paris but - you work with what you have!

16. 4 Q Tips - used the sticks to support the acetate panels of the balcony railing

17. 3 Thumb Tacks or Push Pins (any type) - used wooden push pins as part of the pedestal for the bird bath.  Used two of the pins I pulled out as perches in the double birdhouse.

18. 6" length of ribbon or lace - used a narrow suede trim as straps around the yoga mat.

19. 2 Toothpaste caps (or any toiletry lid) - plant pot in shelf unit

20. Small mirror (under 2") - used as a tray for the teapot and cup

21. Tea Bag or coffee grounds - soil in planter and in garden

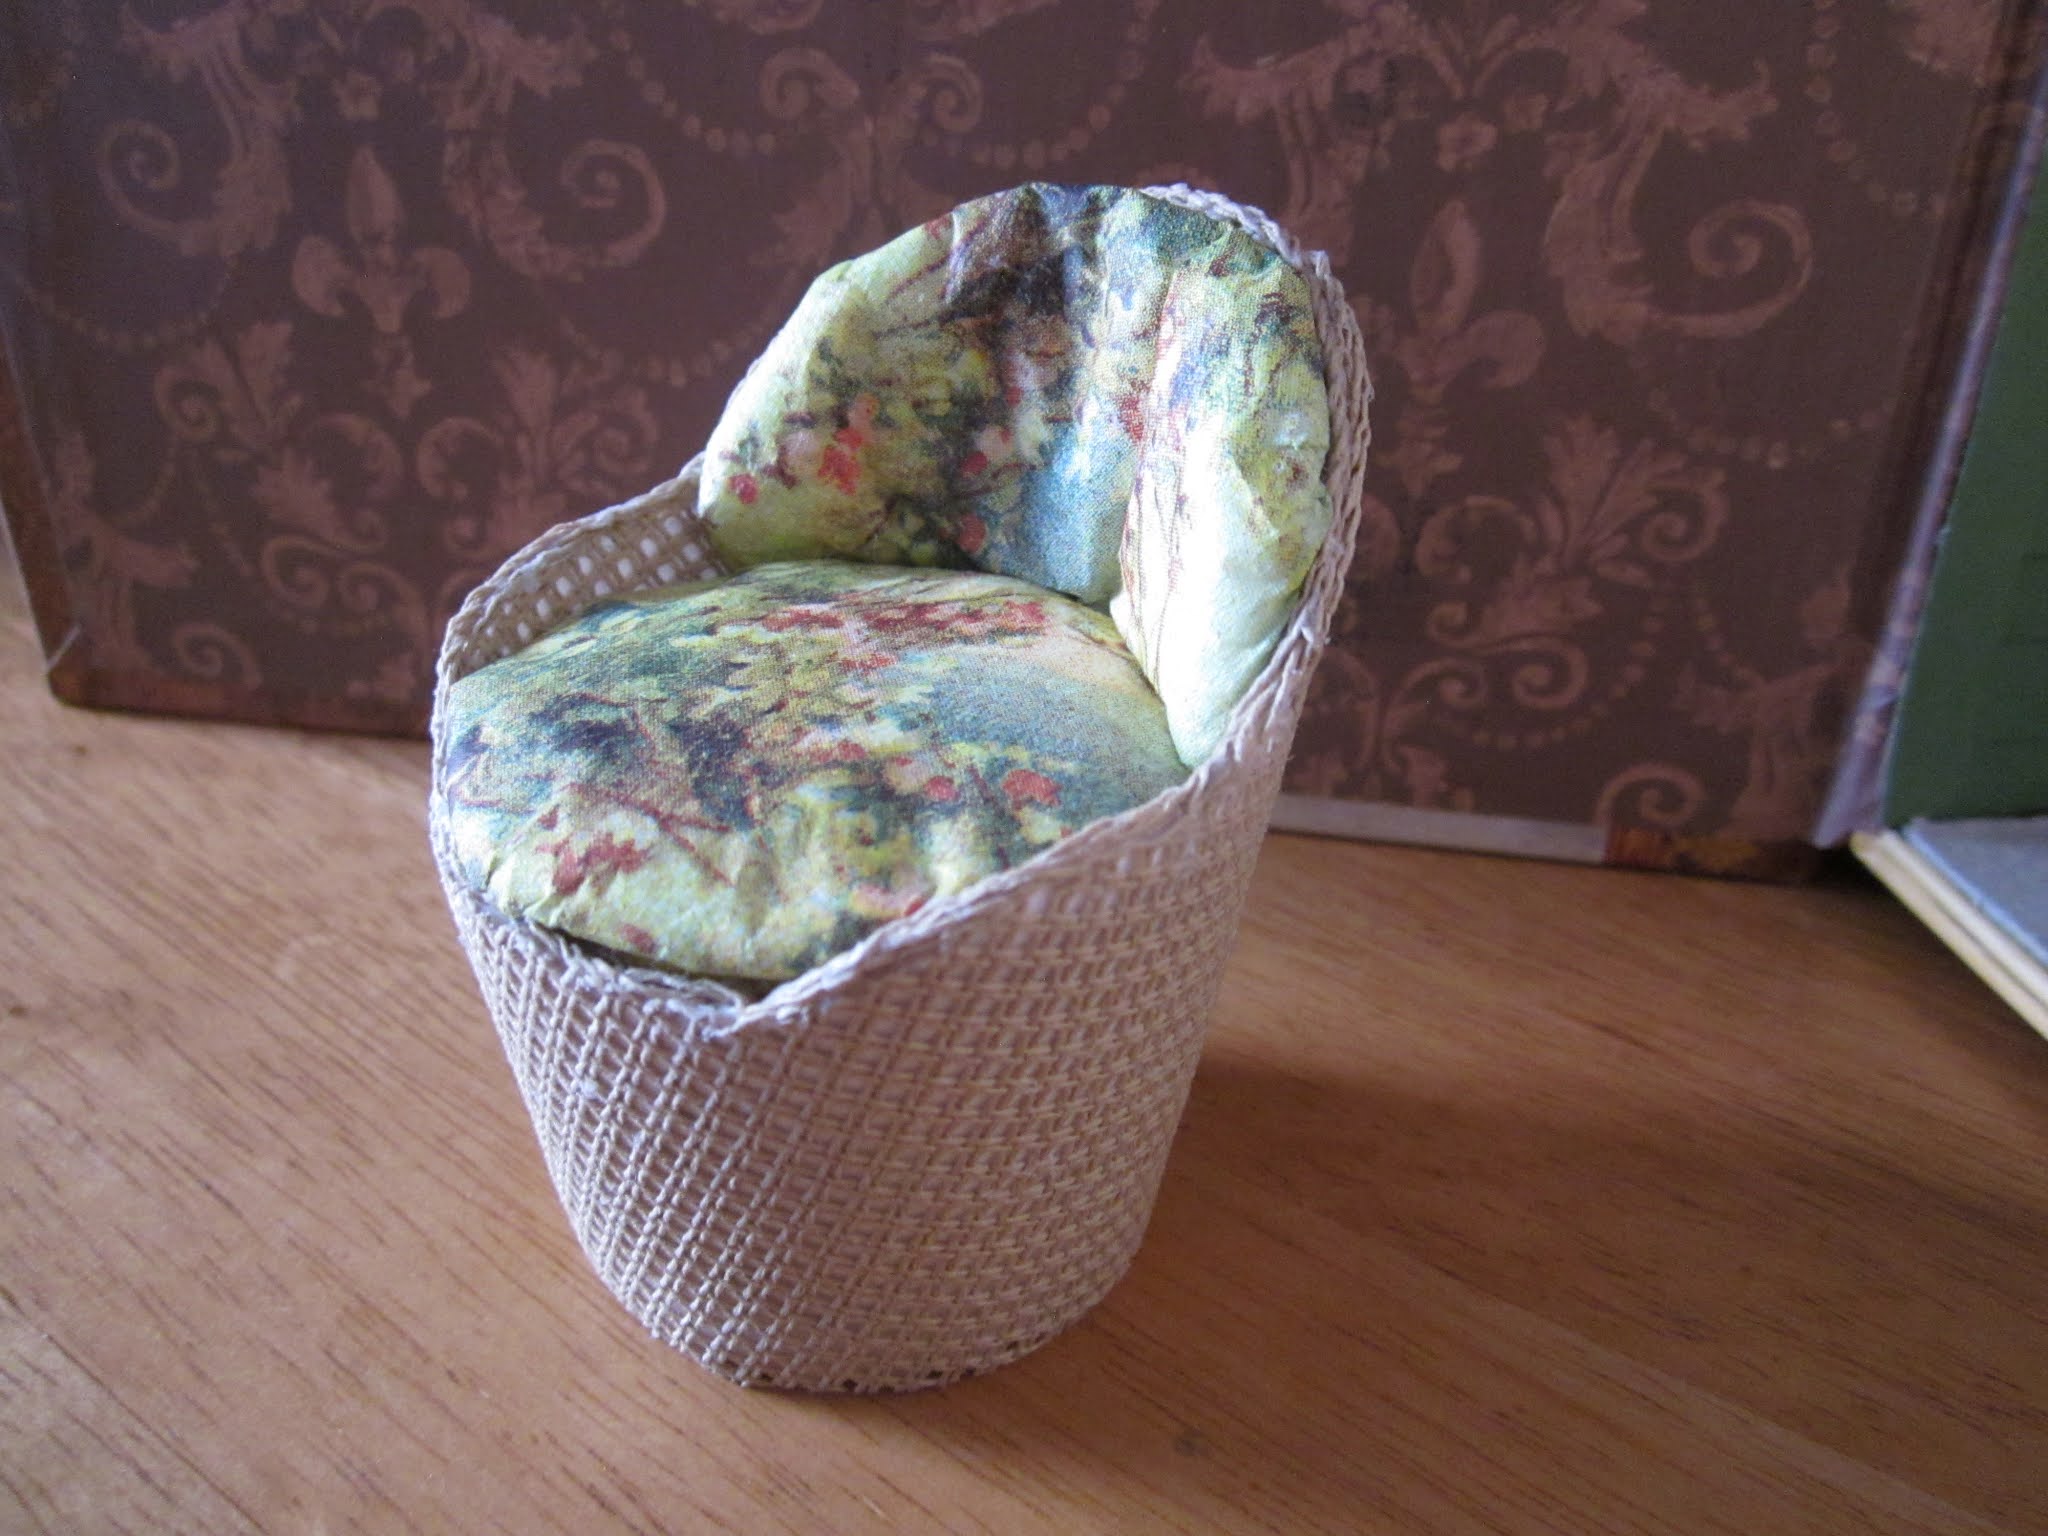
22. 6" Sq fabric (any print or solid) - penelope cloth for the faux "rattan" chair

 23. 2 Paper or binder clips (any size/type) - used white coated paper clip for the door handles and the teapot handle and spout. Used regular metal paper clip to make tines for the garden cultivator

24. 6 Straight Pins - did not use

25. A Napkin/paper towel - used instead of fabric on the seat and back cushions for the chair

26. 2 Straws - used paper straws as uprights for the balcony railing

27. 2 Pipe cleaners - used for the celosia flowers and for the greenery in the garden

28. 1 Styrofoam or paper 8 oz cup - used to make the barrel chair

29. 1 Lid from yogurt/sour cream container - used to contain the balcony garden

30. 2 nut shells (pistachio, walnut, peanut) - did not use

31. Aluminum foil 2-inch square - used to make the garden trowel

32. 6-inch square of sandpaper - cut into blocks for the wall on either side of the French doors

33. 1 Egg carton - covered the frame around the French doors, used as patio stones, used as a book cover.

34. 6-inch square of foam core - used to build up pediment and door trim, small piece inside book 

35. 5 sequins - used one as part of the top to the teapot.

Bonus supply from stash - piece of acetate for the "glass" in the French doors and in the balcony railing.  Also small piece to simulate water in the birdbath.

 So, I guess I used enough of the items listed.  Here are some of pictures of how they were used:

You already saw in last week's post how I had made the French doors, so this is how I finished that wall.

I cut a decorative shape for a pediment over the door out of my piece of foam core.  I cut two

 pieces so I could stack them, then I cut out a layer so I could insert a couple of fleur-de-lis beads I had.  Once I glued them in place I covered the whole thing (except the beads) in egg carton.  Then I cut short four  strips to go part way down the sides of the door, 2 single strips, and two strips of egg carton.  This gave me a stepped-down profile for the door surround.  


Once I had all of the pieces covered in egg carton, I painted them all with a Ceramcoat colour called "putty".   The I used a gentle hand to pounce on a darker brown, a caramel colour and a bit of white. Here are the colours I used to simulate the granite stone.  Yes, I know - I am definitely the messiest miniaturist you've ever seen!


Once these dried I glued them in place.  Then I cut my square of 150-grit sandpaper into 1 inch wide strips and glued these on the rest of the wall to look like granite blocks.  I went on to paint them the same as the door frame, which you will see in the final pictures.  


I then turned my attention to the balcony where I ran a stylus around the pieces of egg carton floor to look more like the spaces between stone blocks pieces, and painted these as well.  Now it was time to build the balcony railing.  

I used one of my paper straws to cut into 1/4" spacers which would go between the horizontal railings.  I used the other one to cut into 2" posts.  I split 3 of my tongue depressors into 1/4" strips to use for the horizontal pieces and also for the 2" vertical pieces that would support the acetate "glass".  I glued 2" pieces of Q-tips to the supports to provide the lip on which the acetate would be glued. 


Once I put all the pieces together I dry fit them to the balcony and discovered that, once the chair was in place, because of the railing it stuck out a wee bit so I couldn't close the box.  I then very carefully whittled out the bottom rail in the top portion of the railing until the chair would slip in and the box would close.  Then I painted the whole assembly black, like wrought iron. Yes, again I know you would not likely see such a modern railing like this in a downtown Parisian apartment.  They have beautifully ornate railings that have been around for hundreds of years.  With the materials I was allowed to use, I wasn't able to replicate one of those railings but...some day...

So - I know I was supposed to show you the finished project tonight but there a still a few things to be finished up in the garden area.  I will be busy tomorrow but I will definitely be able to post the final items I made, and show you the overall finished piece on Good Friday - just in time to wish all of you the very best Easter, or whatever spring celebration is special to your family.

So sorry for yet another delay but - I will be back on Friday!  TTFN!!! - Marilyn

Tuesday 30 March 2021

Patience is a virtue....

 ...or so I've been told.  It's never been one of my strong points but I'm hoping, dear readers that is is yours.  I promised you I would be posting tonight with the final version of my Trash to Treasure Challenge project but I just have a few teeny things to finish up.

So, instead of my usual Tuesday night posting, I will be showing you the finished project tomorrow night, after I spend my Wednesday afternoon with my usual weekly mini session on Skype with Marijke and Louise.  Just 24 more hours and I will post the finished project - honest!!!!

See you tomorrow night! - Marilyn

Tuesday 23 March 2021

Trash to Treasure Throw down Take Two

 I would have said "Challenge" but it just didn't work with the alliteration I had goin' on there.

So, as I am sure you guessed by now, I have not finished my T2T piece yet - but I do have until April 6th!  I really need to stop overthinking things!

Marijke finished her piece which you can see on her blog at Pulchinella's Cellar.  It's a wonderful little mid-century modern piece and I just love it - especially the mirror on the wall.  I want one of those for real!

Louise also finished hers but has been so very busy getting her house ready to go on the market that she has not been blogging so I promised I would show a couple of pictures of her end product.  It depicts a wind-swept derelict shack on the beach that has been blown over by a big storm.  The flamingos have now taken over (of course!) and there is a little site set up where someone has obviously been taking shelter under the side of the tipped over shack.


On the back of her piece she pasted a list of the T2T items she used to make her scene.


It is truly amazing what a person can do with just little bits and bobs of things, isn't it?

As for my entry - sadly I feel like I got very little done this week.  Well, I did do a lot of thinking and changing my mind on ideas, as usual.

The easiest thing to show you is my little eraser project.  I used a white/blue eraser for something to add interest to one of the balcony walls (once I install it!)


I angled the top of the eraser, painted the whole thing green - although that colour might change before my project is finished - added two little roof portions that I painted a terracotta colour, used two of the pins I pulled out of the push pins I used for the base of the bird bath, to act as perches, and added two dots of black for entrance holes.  And there was my bird house for my balcony.  Child's play!


On to bigger and better things!  

I mentioned in my last post that, on the inside cover of the book box I am using to house my project, I wanted to post a picture of an apartment interior and maybe add some French doors that one could imagine lead from the apartment to the balcony scene I will be creating.  I chose a picture from the internet and used one of my allowable pieces of computer paper to print it out.  Since I did not need the whole sheet to print out the size I wanted I made sure to take advantage of the blank space on the page to also print out some leaves that I could use in my corner garden on the balcony.

The other piece of computer paper would be used to simulate French doors.  I still had a "free" supply item I could choose from my stash so I chose a piece of acetate to act as "glass" inside the French doors.  Here I am, just getting started.  I have drawn an outline of the faux doors I planned on making.


Okay - it's at this point that I think I lost my mind.  I must write on the blackboard 500 times "I will not obsess over the tiniest of details!"  

I cut out the basic door shape then, in my addled thinking, I thought I could add layers of paper to frame out each section to provide more detail in the final product.  I painstakingly cut out 1/4" strips and glued them around the two doors, the windows in the doors and the transom window above the door.  Then I cut out 1/8" strips and centred these on all of the 1/4" strips to make it look like a stepped trim.  I didn't have enough paper to make more than one layer of each size but, when I was finished adding a double layer molded panel to the bottom panels, I thought it all looked pretty good!  Here it is in process:


Now, I know there are many of you out there chuckling right now because you already know what happened next, don't you?  Of course, I painted the whole thing and let it dry.  That was when I realized that, because the paper was so thin, once the paint hit it, it all became a single layer with no definition whatsoever.  Do you have any idea how long it took me to trim that all out?????

Well, not to be deterred, having come this far, I got out my trusty Crayola pencils and started adding definition and shading to try to make the doors have a little bit of personality.  I used a light brown and a dark brown to add the shading and outline some of what should have been the architectural features.  It may not have been what I had in mind at the start but I think it turned out okay in the end.


So now I needed to add the "glass", attach the picture behind the doors and make some handles.  For the handles I used a total of 6 of my ten beads and small pieces of a white coated paperclip.  Okay, the handles may be a little wonky but, in the end, people will be looking at the balcony, not the door, right???


So, here is the finished door along with the chair I made last week and the little bird house I made earlier this week.  Take a quick look then I will point out a couple of things that truly confirms how ridiculously focussed I can be on the teeniest of things.  Man, this b&%ch be crazy!!!


Why do I think I must be crazy??  Because I cannot let the little things go, even for a simple T2T challenge.  When I covered the chair cushions with the napkin paper I had, I looked at the colours in the napkin and really could not allow myself to just make things randomly.  They all had to tie in with the fabric or some other part of the overall design. So, even though no one other than me will probably notice, the roof of the birdhouse perfectly picks up the orange/terracotta colour in the chair fabric, and the green as well.  I chose this particular picture of an apartment interior because the colour of the floor also picks up the colour as does the terracotta coloured leather chair in the room.  The corner of the sofa you can just see on the left inside the French doors picks up the lighter beige-yellow colour in the balcony chair cushion.  It would have driven me absolutely crazy if these things didn't tie in to each other.  What is wrong with me???  Is there any cure out there for this madness??? *sigh*

Well, hopefully my madness isn't contagious but, then again, I'm very suspicious I may have caught it from some of you perhaps????  Oh well, we'll all be good company for each other.  So, I'll be off now with hopes that I will have the finished project to show you next Tuesday.  Stay safe, stay healthy!  TTFN!! - Marilyn

Tuesday 16 March 2021

Happy Birthday, Louise!!

 Yesterday was Louise's birthday so I finally get to show you what I made for her.  But first......

(I know - I truly am a pain in the neck, aren't I?)

I hadn't mentioned it earlier but, back in the December issue of Dollshouse and Miniature Scene, my small Christmas shelf was featured.  They had apparently noticed the North Pole Postal Service and wanted to have that in the December issue but, at the time, I knew there wasn't a hope I had enough time to finish it before then.  So I offered them this first little Christmas project.  


I showed the whole process of making the shelf in posts that can be found under the label "Christmas Shelf" in the list on the right - or clicking on the label at the end of this post.

The second thing I wanted to mention is that I have been encountering an interesting issue caused by my Norton security application.  For some reason it doesn't seem to like blogger because when I try to link to another person's blog to read the latest entries, it blocks it and tells me that the site contains possible malicious material that could be harmful to my computer.  Then it gives me the option to "submit a dispute".  I am slowly working through the ones I visit most often and submitting disputes to Norton.  I label the material as "art/culture" because it is the closest category they provide for it, then add the comment that it is a blog about the art of making dollhouse miniatures and does not contain malicious material.  A few days later I get a confirmation from Norton stating that my dispute has been reviewed and the site has been recategorized as a safe site.  Eventually I hope to have Norton acknowledge all of your sites as safe so I can actually leave comments on them.  I am slowly making my way through each one!  Security software can be so finicky!

Thirdly...Louise's birthday pressie!!!!

Louise is currently building a replica of the large farmhouse she and her siblings grew up in.  For her birthday, I decided I would make something for her farmhouse but every time I thought of something to make, I would get a text from her saying "Look what I just finished!"  Every piece she made - washing machine, stove, sofa and chair, cupboards, etc. was beautifully made and captured the 1950s period perfectly - I'm sure much better than I could have done!   I was getting desperate trying to figure something out when I found out that she had ordered several window boxes online for her farmhouse, only to find out that they were too large for her windows.  Also - I know how much Louise hates to make flowers so how would she have filled them anyway?  Now I had the right gift!

Her farmhouse has eight windows that needed window boxes so first I made and painted the boxes, then got started on filling them.  I glued small round Paperclay balls on the end of floral wire to act as the base for geranium flower heads.  I painted the balls a deep rose colour so, if there were any spaces showing between the tiny florets, they would not really be noticeable.  Then I started adding the teeny florets.  Each flower head took between 30 and 36 florets which each had to be shaped before being glued on.  Each window box contained 2 geranium plants with 3 flower heads in each (x 8 window boxes).  Okay - - you can do the math.  I then shaped and glued two leaves on each flower stem and added 3 individual leaves to the plant before adding the remaining flowers.  Here are some pictures of the process.

The window boxes in their assembly line:


The flower heads in process:


The leaves on the left have had a coloured margin added to them (before shaping them) as do real geraniums (really these are pelargoniums as true "geraniums" actually refers to a perennial plant which does not have coloured margins on their leaves and the flowers are different as well)


AND THE FINAL PRODUCT (or 5 of them at least):


So, my dear friend, Louise - HAPPY BIRTHDAY!!!!  There are two things I need you to remember:

1. You are my "bestie" and I love you to bits! and
2. You'll always be older than me!!!! *smile*

So, with Louise's birthday over for another year - I'm off to finish the T2T Challenge which you'll see more about next Tuesday.  My wish for everyone- stay safe, stay healthy, and keep on mini-ing!  TTFN!!! - Marilyn


Wednesday 10 March 2021

Up for a challenge!

 As I mentioned a few days ago, I noticed on Maureen H.'s blog, St Albert Minis, that the Miniature Enthusiasts of Edmonton (MEE) had launched a Trash to Treasure (T2T) Challenge for their club members.  They provided a list of 35 items from which participants had to choose 25 to include in their challenge entry.  Also, they can use one supply item of their choice from their own "stash" but it can't be a piece of furniture or miniature accessory.  Participants can  use however much they want of colouring supplies (paint, coloured pencils, chalks, etc.) and glue to complete their entry and they can choose the container in which to display their final product.

This sounds like such a fun idea that I talked my mini cohorts, Marijke and Louise, to join me in trying the challenge ourselves, even though we are ineligible for the "contest" part of the challenge since we are not members of MEE.  We'll send pictures of our final pieces to Maureen to share with her members.  If you want to check out the "rules" of the challenge and try it out for yourself, visit this post: "Hello again! Good to be back!"

So, with my energy and enthusiasm renewed, I went downstairs to my craft room, list of the acceptable 35 items in my hand, and started trying to choose 25.  At first I gathered together about 15 or so items, with no idea exactly what I would do with them.


Then I paused for a moment to figure out what I would use to put the project in.  I found a few possibilities but, when my eye landed on one of those boxes that look like a book I had my Aha!! moment.  I had purchased this "book" box at Michael's on sale about 5 or 6 years ago and it has been sitting on my shelf every since.  I was drawn to it because of the picture of Paris on the outside, and again on the inside.  


Now my brain was percolating!  In my head I could see a balcony scene looking out over the square below (so the railing would be up against the back, not at the front).  In the picture above you can just make out, at the bottom of the side wall, that I have started using one of my 25 choices, a piece of textured, dark green card stock paper, to look like overlapping pieces of siding on the side walls of the balcony.  On the facing cover of the box, I will be using my allowable 2 sheets of computer paper.  I will print an apartment interior view on one sheet and use the other to look like French doors or some kind of door that leads from the interior to the balcony. 

I plan on using some pieces from the egg carton to make square stones for the floor of the balcony, and also blocks for the wall on either side and above the door on the facing cover. I will use a portion of the lid from a sour cream container as a small balcony garden space in the right corner.

Well, without telling all of the planned details, here is what I accomplished today when Louise, Marijke and I met for our Wednesday afternoon mini session via Skype.

After finishing the siding on the walls, I looked at the small white Styrofoam coffee cup and thought I could probably turn it into a chair for the balcony corner.  I first marked a tiny line on the bottom edge of the cup and one that matched it on the top.  I placed these two marks at the edge of a piece of scrap paper and started tracing as I rolled the cup along until the marks were back where they started.  That gave me a pattern of the correct arc I needed to cover the cup. I cut the rim off the cup since I didn't want it to be too high, nor did I want it to have that "bump" at the top.  After cutting off the same amount from the top of the arc pattern,  and wrapping it around the cup as a dry fit, I folded it in half so I could figure out the exact centre of the pattern.  Knowing that a standard small chair would be 18" wide between arms and the seat would be 18" from the floor, I first marked these lines in from the sides of the pattern. Then, on one half, I continued to draw a design I thought would give me a rounded back, arms at the side and an opening at the front.  I cut it out, and used the resulting pattern to mark the shape on the cup and cut it out. 


I shortened the piece I had cut from the rim of the cup and glued it to the inside of the chair, to provide support for the seat, which I was going to make from a small piece of fun craft foam (we are allowed a 6"x6" piece).


My plan was to use the allowed 6" x 6" piece of fabric to cover the outside and upper inside of the chair.  My choice of fabric was penelope fabric, a material used mainly for decorative needlework but, in this case, would look a little like rattan.  It was at this point that I thankfully noticed one little issue.  By using the pattern I had to cut out the fabric, the seam would be at the front of the chair.  That would definitely not do!!  It is so unlike me to to actually catch an issue before I have gone too far that I was quite taken by surprise!!  So, with my new-found sense of confidence and amazement in myself, I recut the pattern so the seam would be at the back, but saved both patterns for the steps to follow.


CHEAT ALERT!!!  Okay - it's a good thing I am not actually eligible for the challenge anyway because, once I had the patterns ready it became obvious that they would not fit on a piece of fabric 6x6, so, I cheated!  I cut a new piece that was 6x7 instead.  I'm sorry, Maureen!  I just couldn't make it work!

Once I had wrapped the chair in penelope cloth, front and back, there was, of course, a gap between the two (the thickness of the Styrofoam) so I pulled individual strands out of the leftover penelope cloth, twisted them into a cord, and glued them into the gap around the edge to finish it properly.  

Then I arrived at problem #2.  We were only allowed 1 piece of fabric, how was I going to make the cushions for the chair?  We do have a choice of a piece of felt but I didn't feel it would be the right look.  We were also allowed a paper napkin or piece of paper towel.  I happened to have a couple of pretty Easter napkins left over from a meeting I had been at so I peeled the 2-ply napkin apart, and found the pretty patterned part to be very soft and pliable.  Perfect!  I cut pieces of egg carton in the shape of the cushions I needed, pulled apart a couple of the cotton balls we are allowed and glued the pieces to the egg carton, centred them on a pretty part of the napkin and glued.  I actually quite like the result.


Not too bad for a Styrofoam cup, some penelope cloth, fun foam for the seat and egg carton, cotton balls and a pretty napkin for cushions.

So, what else did I get done toward the challenge?  I used a strip of fun foam, two 3" pieces of narrow suede trim and two tiny nail stickers to make a rolled up exercise mat for the fit-conscious resident of this Parisian apartment.


I also glued together an Advil cap (we're allowed 4 bottle caps), one of my ten beads, and three wooden push pins together to form the column and top of a bird bath.  For the base, I used three small circles cut from the leftovers of the Styrofoam cup and a narrow strip of leftover fun foam glued together to form a base for the bird bath.  I will wait for the glue to be well cured before attaching the base to the rest of the bird bath, then paint it appropriately.


So that's it for today and I will be spending the next few days working tirelessly to try to complete a birthday gift for a certain someone by her special day on Monday.  After that, I will get back to work on the T2T challenge that needs to be completed by April 6th.

I hope everyone is finding a new bounce to their step and enthusiasm in their craft as we inch closer and closer to spring.  I'm sending bug hugs to everyone ( in the hopes we'll soon be allowed to actually hug people again!).  TTFN!!! - Marilyn

Sunday 7 March 2021

Bits and pieces

Okay - I still have very little to show you because I am working on Louise's birthday present(s) so can't show those until after March 15th!  There are a few things I wanted to clear up though. 

First, in response to some questions I got about why I chose the 5 artists I featured in my last post - not that anybody didn't think they were completely deserving, just that the process to choose among so many excellent ones must have been difficult.  Indeed, it would have been but the ones I featured were chosen because they were the first 5 I had actually stumbled upon back in 2014 when I hadn't yet made the jump into making miniatures myself.  I found them so incredible to look at and they gave me the push I needed to start in this hobby myself.  For that I will be eternally grateful to them.

Then, for any of you who see me commenting on your own wonderful posts, I thought you might wonder why I sign off with my name, even though it is shown next to my profile picture, and also why I include where I live.  Well, by reading the number of blogs that I do, I quickly discovered that there are two other Marilyns who post comments on mini blogs and one of the others also has the letter D. as the initial for her last name.  So, mystery solved!  I put my name and location in my sign off just so you know which of us it is!

So - back to things I find inspirational.  I love to look at different architecture in real life to find ideas for things I might like to include in my mini projects.  I am particularly drawn to stonework and to unique doors or windows.  As such, I have collected a number of pictures over the last several years - and don't lie to me - I know you all do it too!

This is a picture I found of an incredible entry door with window above and to the side.  I just love, love, love this door and go back to the picture often.  I have never figured out what project a door like this would be appropriate for but I am now thinking perhaps I should just make the door itself into a small wall-hanging, framed piece.  I will definitely give this one a try one of these days!


Another picture I have that I dream about duplicating some day is, of course, of a stone exterior - very European looking.  I'm thinking probably Spanish?  Anyway, I love everything about this.  I would include the slant to the cobbled street, the terracotta pots filled with plants, the bougainvillea, even the downspout.  In my mind everything works together to make a beautiful, warm and welcoming vision.


I also love this beautiful entry courtyard that I found on the "magic puzzles" I used to get on my computer.  Doesn't it look cool and cozy?


All this to say that there is inspiration all around us - way too many inspirations given the time we have to work but just think of the hours of fun we can have trying to bring them to life in miniature.

I would love to hear where everyone else finds their inspiration.  What makes your heart sing when looking at it or when thinking about it and want to recreate it in miniature? 

So, while I finish off Louise's birthday gift, I find myself with lots to think about.  I want to finally finish off the North Pole Postal Service and start something new but, in the meantime, I read on Maureen H.'s blog that the Edmonton miniatures club is having a trash to treasure challenge with entries due on April 6th.  
Even though the challenge is for her club members as there is a prize for someone at the end, I thought perhaps some of us out there might want to give such a fun idea a try as well.  If so, we could send our pictures to Maureen just for fun instead of actually entering the challenge.  I think it would be a great way to show just how connected our mini community is.  To find out how her club is running this challenge you can go to this post on her site:  http://stalbertmini.blogspot.com/2021/03/hello-again-good-to-be-back.html 

Basically you have a list of 35 "trash" items and you have to use your choice of 25 of them to produce your "treasure".  I think it sounds like a lot of fun and a good way to get some of us motivated and to get our thinking caps on.  Anyone else in??

Now I will let you go to think about that last little challenge.  I think I am going to try it out myself and will send Maureen pictures at the end.  Thank you MEE for such a great idea!  TTFN!!! - Marilyn