Showing posts with label FAME group project. Show all posts

Thursday, 24 January 2019

Better late than never!!

Yes - you're absolutely right - it has been well over a year since you've seen anything from me. You know how you always INTEND to do something but before you know it, it's bedtime again and you promise you'll get to it tomorrow?? I had a lot of that going on. *smile*

So, I have so many things to tell you!!! Where to start? Where to start? Hmmm....

How about if we work our way backwards - what am I working on now? What was I doing before that? And so on..

For those of you who also follow my friend Marijke's blog at http://pulchinellascellar.blogspot.com/ you'll already know that our mini group is working on a single project that we plan on donating to our local military museum when completed.

For our project we are following the instructions we found in the August, September and October 2014 issues of Dollhouse and Miniature Scene. Titled "We will remember them...", the project was designed and created by Celia Thomas and Robin Britton of Nostalgia in Miniature Workshops.


A very poignant scene, this project portrays a long-abandoned military bunker from WWI, lying hidden and forgotten, unbeknownst to the aging veteran strolling through the poppy fields above, many decades after his harrowing experiences of wartime.

Marijke, Louise, Susan and I will be following the instructions for the project but will change some of the details to better reflect our Canadian viewpoint. Since Canada went to war in 1914 as part of the British Empire, the Union Jack is appropriate in this project. At that time, Canada's flag, the Red Ensign, was basically changing every time a new province joined Confederation. The Union Jack was a constant and frequently represented all of the Empire. We will try to find other little ways to identify our Canadian theme.

So, our plan was to divide and conquer. Each of us will work on pieces of the project, then come together to put the finishing touches together. As I mentioned above, check out Marijke's blog for the accessories she's been working on. It will be these accessories that really bring the realism into the project.

As for my contribution, I've started by putting the actual box together. From the DHMS magazine, August 2014, here is a picture of the basic pieces.


While I could have cut out the pieces myself, my darling DH volunteered to do it and hey, I wouldn't want to disappoint him now, would I? I'm such a good wife! We used 1/4" MDF. Here, in the Fredericton area, the only place I can buy 1/4" MDF is at Kent building supplies. It's really inexpensive (around $24 for a 4 ft. x 8 ft. sheet) and I always buy a full sheet because I know I will use it up anyway so why not? I have them cut it in two at Kent's to make it easier to get home. This time I shared it with Louise who took one of the 4x4 pieces for her own use. That size goes a long way in mini projects.

And then the build began. I used my favourite Lepage's carpenter's glue to put the pieces together. Then I began the process of applying rough-cut boards to the walls, and added 1/2" square wall studs. Marijke's DH, Chris, cut out a bunch of 3/4" by 1/8" strips for me out of some rough wood. I interspersed these with narrow widths cut from craft sticks since the soldiers would have used whatever they could have put their hands on.
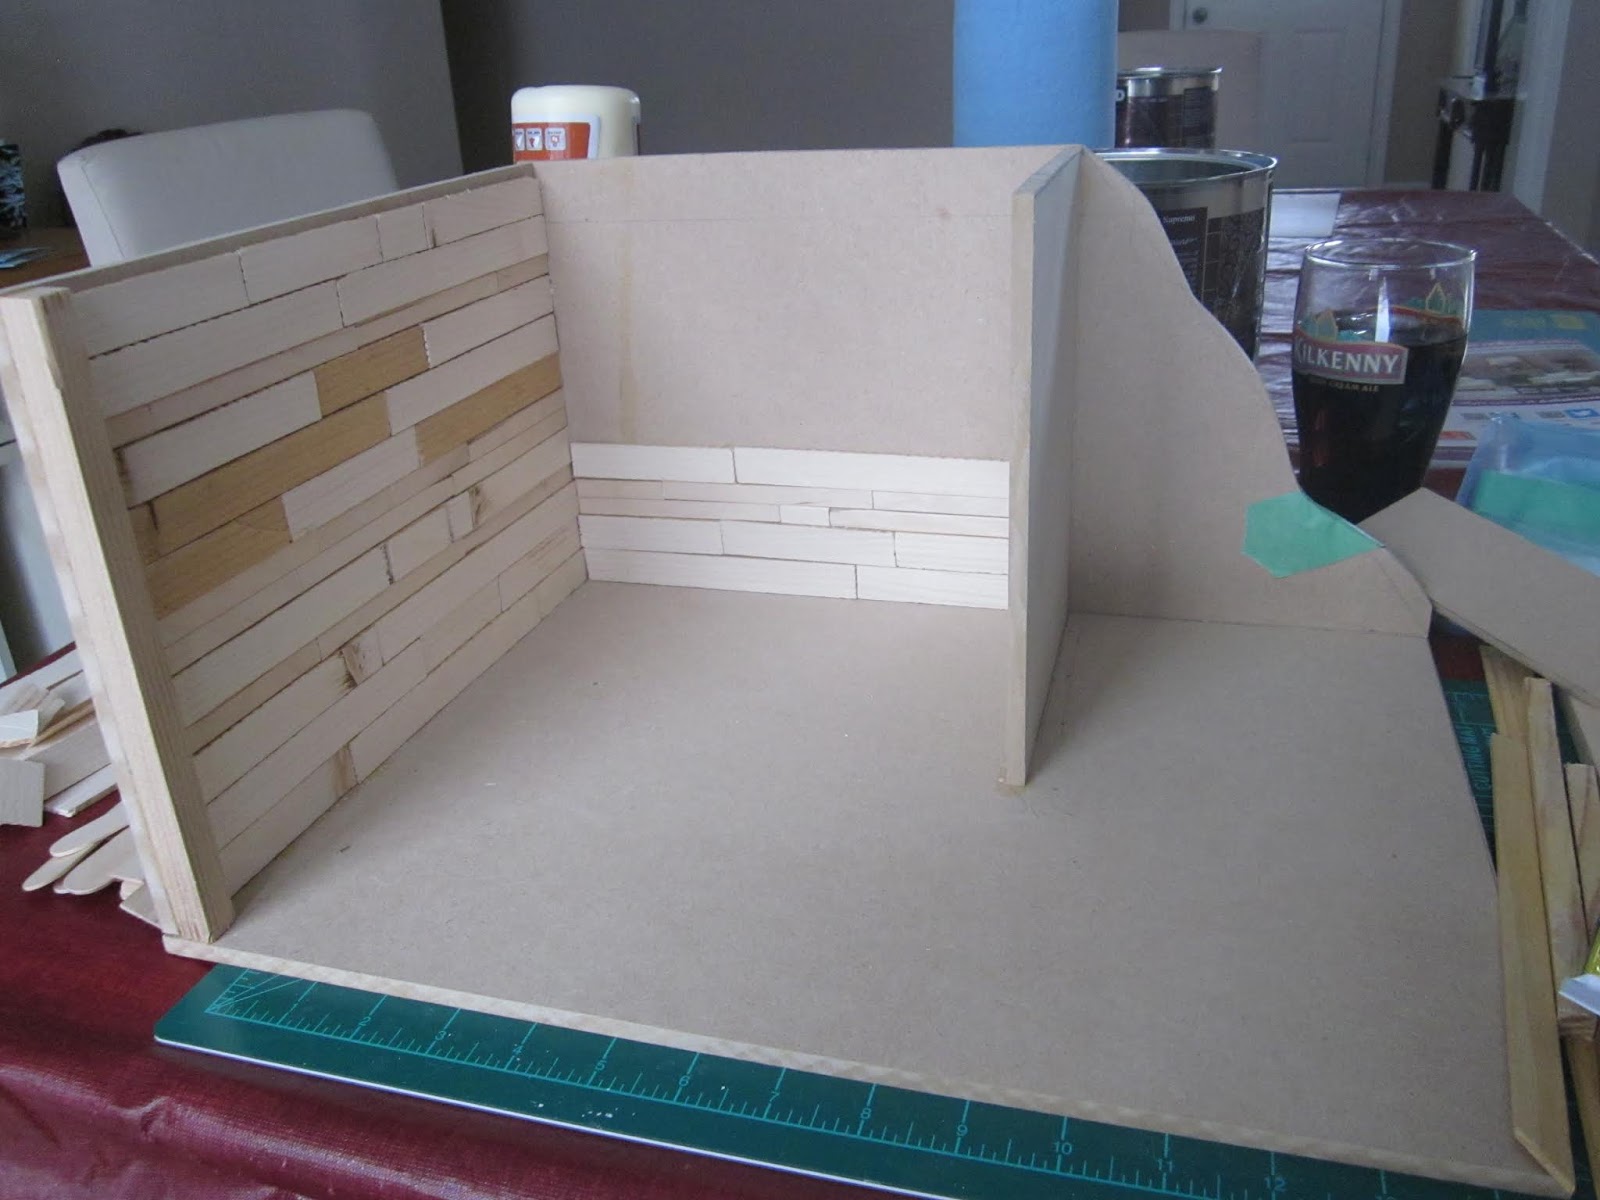

Once all the wood strips were in, I installed the doorway and glued in the last wall piece, which will be covered in faux corrugated steel. The doorway and small wall piece are installed at a slight angle, not just to provide a more interesting look, but also to allow for better viewing of the inside once completed.


Next step - rough up all of the boards even more than they already are, cut out some wood for shelves, roof supports, and a support post, then start painting the inside.

So - stay tuned! There is more to come. I will try to post every few days to let you know of the progress of our group project, and to catch you up on other things I've been working on in my long absence from posting. Until then...TTFN! - Marilyn


Thursday, 4 May 2017

Another day closer.

I worked all day on the library room box. At this point I would like everyone to do me a favour and forget what I said yesterday about what I was planning on accomplishing today.

I did get the rest of the sidewalk laid. I did get two coats of polyurethane on it to make it easier to wipe off the grout once it's applied. I did not get the grouting done because I have to let the second coat of finish dry until tomorrow. Grouting is first on my list in the morning.

I mentioned yesterday that I had sponged the sides of the base to make them look a little like concrete. I haven't yet dry brushed the white over top but hope to do that tomorrow. It'll tone it down and "belnd" it better, I think. This is what it looks like right now.


I did get the lighting all installed - the coach light by the door, the street lamp on the corner of the sidewalk, and the strip lighting inside to provide plenty of light for viewing. I have the street lamp taped up in place because I have to lay it down to do the grouting under it tomorrow.

You can also see that I have gotten started on the signage on the front. I definitely have to finish that tomorrow.


The rest of these pictures show that I have done some work on the wainscoting on the inside walls. I have installed a bookcase as well. I also sealed the wood floor but you can't see it in these pictures. I sat a little replica of one of my darling kitties, who is no longer with us, on the window sill. I think I may just leave her curled up in the window. Shouldn't every library have a resident kitty??


I hope you like the picture I've chosen for the back, removable wall. I really like the visual depth it gives to the room box which is really only 4 or 5 inches deep inside.


This next picture shows a view of the little bench I placed on the side of the library. I originally planned to have my battery pack inside this little structure but, once I finished adding lights I had two battery packs so had the base built to house both of them, and add some viewing height to the roombox itself.


Here you can see that I actually did get some of the interior wainscoting done. You can also see the finish on the floor.


So -- a full day's work doesn't seem to have accomplished much, does it?? To end the day, I started trying to make a very narrow librarian's desk for the front of the library. It was already closing on 10:00 pm and I should have known better. I finished the first version, thinking it was ready to paint, but when I stood it up I couldn't believe how completely wonky it was. I was sure I had squared everything up. Apparently I was wrong - big time!!! On to attempt number two. I got that one completely finished then realized I had covered over the little section where the library patrons would interact with the librarian. Attempt number three??? I don't think so! It's definitely time to quit and go to bed when you start making that many mistakes. Tomorrow is a new day.

By the way, I'm not worried about not having it finished for Saturday's show because Jodi Hippler suggested a great solution -- just hang a sign in the window that says "Opening Soon!". I love it!! What a great idea.

So, I'm off to bed with visions of lots more work ahead of me tomorrow. TTFN!! - Marilyn


Wednesday, 3 May 2017

Putting a push on!!!!

I'm sorry I've been negligent with my posting lately but I cannot even begin to tell you how busy I have been - with non-mini things unfortunately. Well, I could tell you but, trust me, you really don't want to know. I think I'm going to come out of retirement and go back to work so I can get a rest. The problem with retirement is that everybody thinks you have lots of time on your hands and, if you're like me, you find it difficult to say "no!" when asked to volunteer for things. I need to become more heartless so the next time someone wants to tear me away from working on minis I can adamantly say "Hell, no!!"

So, today I got back to work on my FAME club project that I am turning into a memorial library in memory of my father. I have a lot of work to do but the Moncton show is on Saturday and I plan on displaying it there along with our other members' projects. Even if mine isn't done I figure I can display it as a "work in progress".

I buckled down this afternoon and started by staining the floor. In my stash I had a set of three stain sticks that are used for furniture repair. The three pens come in a package for $1.25 at Dollarama. I started by using the lightest colour first.


It dries very quickly. Then I covered this colour with the medium brown. I think you can tell the difference in the two colours in this photo. You could really see it in person.


Finally, I added the third, darkest colour. You can see the strip in the middle has only the first two colours on.

I really like the depth of colour achieved by using the three different colours. Once it was completely dry, I buffed it up some which made it come up quite nice. I will probably cover it with matte finish but I haven't decided yet. I better make up my mind in a hurry since the clock is ticking!

Now, about this time I decided I wanted a base that the room box could sit on to hide the battery packs underneath. My darling hubby measured, cut, and put the base together very quickly. Did I mention he's the best!!?? I placed the room box on top of the base and traced around it, then painted the top, outside where the box will sit, and the edges black.


Then I sponged two shades of gray on the edges of the base to make it look a little like concrete. I think I may dry brush some white in places to finish that off. Then I started laying bricks on the black area of the top.

The square in the from left corner needs to have a hole drilled for wiring before I finish the bricking there. Tomorrow I will finish putting down the rest of the bricks but here is what it looks like so far with the unfinished box in place.


So tomorrow, I will finish the bricking, seal the bricks, grout them and wipe off the excess, seal them again. I also plan on having the lighting all installed. I am putting some strip lighting at the inside top of the front wall which will light up the inside really well. I will also have a coach lamp on the wall by the door, and a street lamp in the front left corner of the sidewalk.

What's left after that? Well, let me see - the wainscoting, door and window trims, baseboards, furniture, and shelving. Then, I have to make the desk for the librarian, add the bookcase and fill with books, print out some signage and posters, set up a display in the bay window and, one thing I can't forget - I still need to finish off the front where the sign goes. OMG, I guess there's not much hope I'll have this done for Saturday morning. Well, in that case, the last thing I need to do is print a sign that says "work in progress". :-)

I've managed to tire myself out jst thinking of all I have left to do. Time to go to bed and rest up for tomorrow. TTFN!!! - Marilyn


Tuesday, 11 April 2017

Talented F.A.M.E. Members

We had our monthly F.A.M.E. meeting tonight and had a few of our finished projects on display. Hopefully we'll have them all on display together at the Moncton Show next month but - you lucky readers - you're going to get a little preview right here!

First up, we have Sharon B.'s beautiful piece titled "Blue on Blue". Sharon has been collecting blue and white ceramic and pottery pieces for several years. She has certainly shown them to great advantage with her Group Project.


My favourite piece is the large blue and orange piece on the table just to the inside of the door.


A view of the items on the top shelf.


I also really love the blue and white plates on the wall...and the blue tile floor...and the blue wallpaper. It may be a lot of blue but it goes together perfectly!


Sharon used jumbo craft sticks to make her own siding. I think they look great and will think of doing this myself next time I need siding for a project.


For those of you who also follow Marijke H.'s blog, Pulchinella's Cellar, you have seen the progress of her beautiful Group Project, titled: "Floriana". She brought her completed project to share tonight and we all oohed and ahed at the skill demonstrated in all of her beautiful plants, flowers and accessories.


A view through the open door:


What a beautiful display window - all decked out for spring. Marijke has the whole display tacked down to a single piece that forms the window shelf. This way she can remove the whole spring display and replace it with a new display for every season. What a fabulous idea! I'm going to steal that idea too! I'm such a thief!


This is a good view of the pots of succulents on the etagere just inside the door. Marijke made the plants from offcuts of scrapbooking card, coloured with colouring pencils to get the different shades of the plant. She also made all the pots. Great display.


Here's an overall view of the back wall - and also the shelf that runs over the whole display. I love all the little touches like the birdhouses, the wind chimes, the hanging plants, the watering cans....this is a flower shop I would visit every day if I could!


Louise McS.'s project, "Lynda's Fabric Shop", was made as a present for a favourite aunt who is a gifted quilter. This is one of the best uses of a "perspective photo" I have seen in a long while. It certainly looks like this little quilt shop is way deeper than it actually is.


Look how the shelving unit in the room box blends right in with the rows and rows of shelves in the perspective photo. Doesn't it work wonderfully?


The black and white tile floor in the room box blends into the one in the picture. What a great effect.


Of course, for any of you who have come to know Louise through this blog, you would recognize that this is her room box, simply because of the sign on the side.


I've said it before and I'll say it again - Louise has never met a flamingo she doesn't like - and want to take home with her!

Speaking of which - yes, I am still working on the sleigh bed I am making for Louise's tropical getaway for Mr. and Mrs. Claus. The bed is made and painted. Now I have to make the bedding. So, I decided it had to feature flamingos somewhere. Unable to find a fabric with flamingos that were small enough for minis, I decided to try to make it myself. I took my ironing board out on my deck because it's a good height to work on and because I didn't want to be spraying glue indoors. Then I laid out a strip of parchment paper to protect the top of the ironing board, and placed two sheets of printer paper, side by side, on top of the parchment paper. I then used a can of spray adhesive on the printer paper, let it try for five minutes, then smoothed my chosen 100% cotton fabric onto the paper which, by now, was nice and tacky. I left this whole thing to dry for an hour or two while I prepared the document on my computer.

I searched for flamingo prints and found a wallpaper sample for real houses. Of course, the picture only showed a small square so I copied this into my PowerPoint program, made the background colour transparent so all you could see were the flamingos, not the blue background, then I copied this one square over several times on the page, making sure to overlap the squares so they lined up properly with the repeat of the pattern.

Once this was done I then went back to the fabric pieces and cut them out to the size of the computer paper they were glued to. I put one sheet of this fabric/paper into my printer. I set my printer to best quality and selected high-quality photo paper with no border, hit "print" and held my breath! It went through just fine! Alas, once printed, I thought the first try was just a little too small so I put the second sheet in the printer, went back to my program and enlarged the flamingo print, and the three cushion prints I was also printing, and hit print again. This time I was satisfied with the result - right size, colour is good - works for me! Here you can see the final product on top of the first try. You can really notice it with the cushion covers - the resize really makes a big difference for them! (Click on the picture if you want to see a larger version).


If you want to try this method yourself you MUST have an ink-jet printer, not a laser-jet printer. The ink-jet literally "shoots" the colour into the fabric. Tomorrow I think I will iron these pieces from the back and then the front to hopefully heat set the colour a little more.

Then, of course, I will get Louise's bed finished. Honest!!!! I will have it finished!!! For which of her birthday's I'm not really sure.....right now - I'm going to bed! TTFN! - Marilyn


Tuesday, 28 March 2017

Club Projects moving along

I'm afraid I haven't been doing too much with minis lately. I missed our club meeting this month because I was out of commission for three days with a very bad back, then eased my way upright again - taking another 3 or 4 days to do that. However, I have the very best of mini friends! Marijke took pictures of the progress on our group projects so, thanks to her generosity I thought I would share them with you today.

First, we have Liz's "in progress" room box. Liz is the newest member of our group and, before making the crazy decision to join up with us, had never done miniatures like this before. Many years ago Liz made porcelain dolls, in a couple of different scales, so was, at least, familiar with the miniatures hobby. In this, her first project, she has painted the outside a beautiful shade of dark green with cream trim. She has plans for her floor and, of course, how she is going to bring in the elements of a dress shop, which is what her project will end up as.


Krista has been collecting miniatures for years - all kinds of miniatures, in a variety of different scales. She wasn't familiar with the "scale" concept but knew what she liked. And when she found something she liked, she picked it up before it was gone! As a result, she has an amazing collection of beautifully wrought little things - from brass pieces to ceramic pieces, to wooden pieces, to musical instruments...and on, and on. Since joining our group, she has learned a tremendous amount about scale and also is learning a variety of techniques through several small projects that eventually led to this, her first room box she has built herself, with advice and assistance from the rest of us, especially Garry, who is so generous with his time and experience.

Krista's project is, for all intents and purposes, finished although, if she's like the rest of us, she'll probably keep making changes and adding things. Her project is, quite obviously, a sign shop. I love how she has included a bin of scrap wood around the side of her shop. I think she's done a great job on this, her first build.


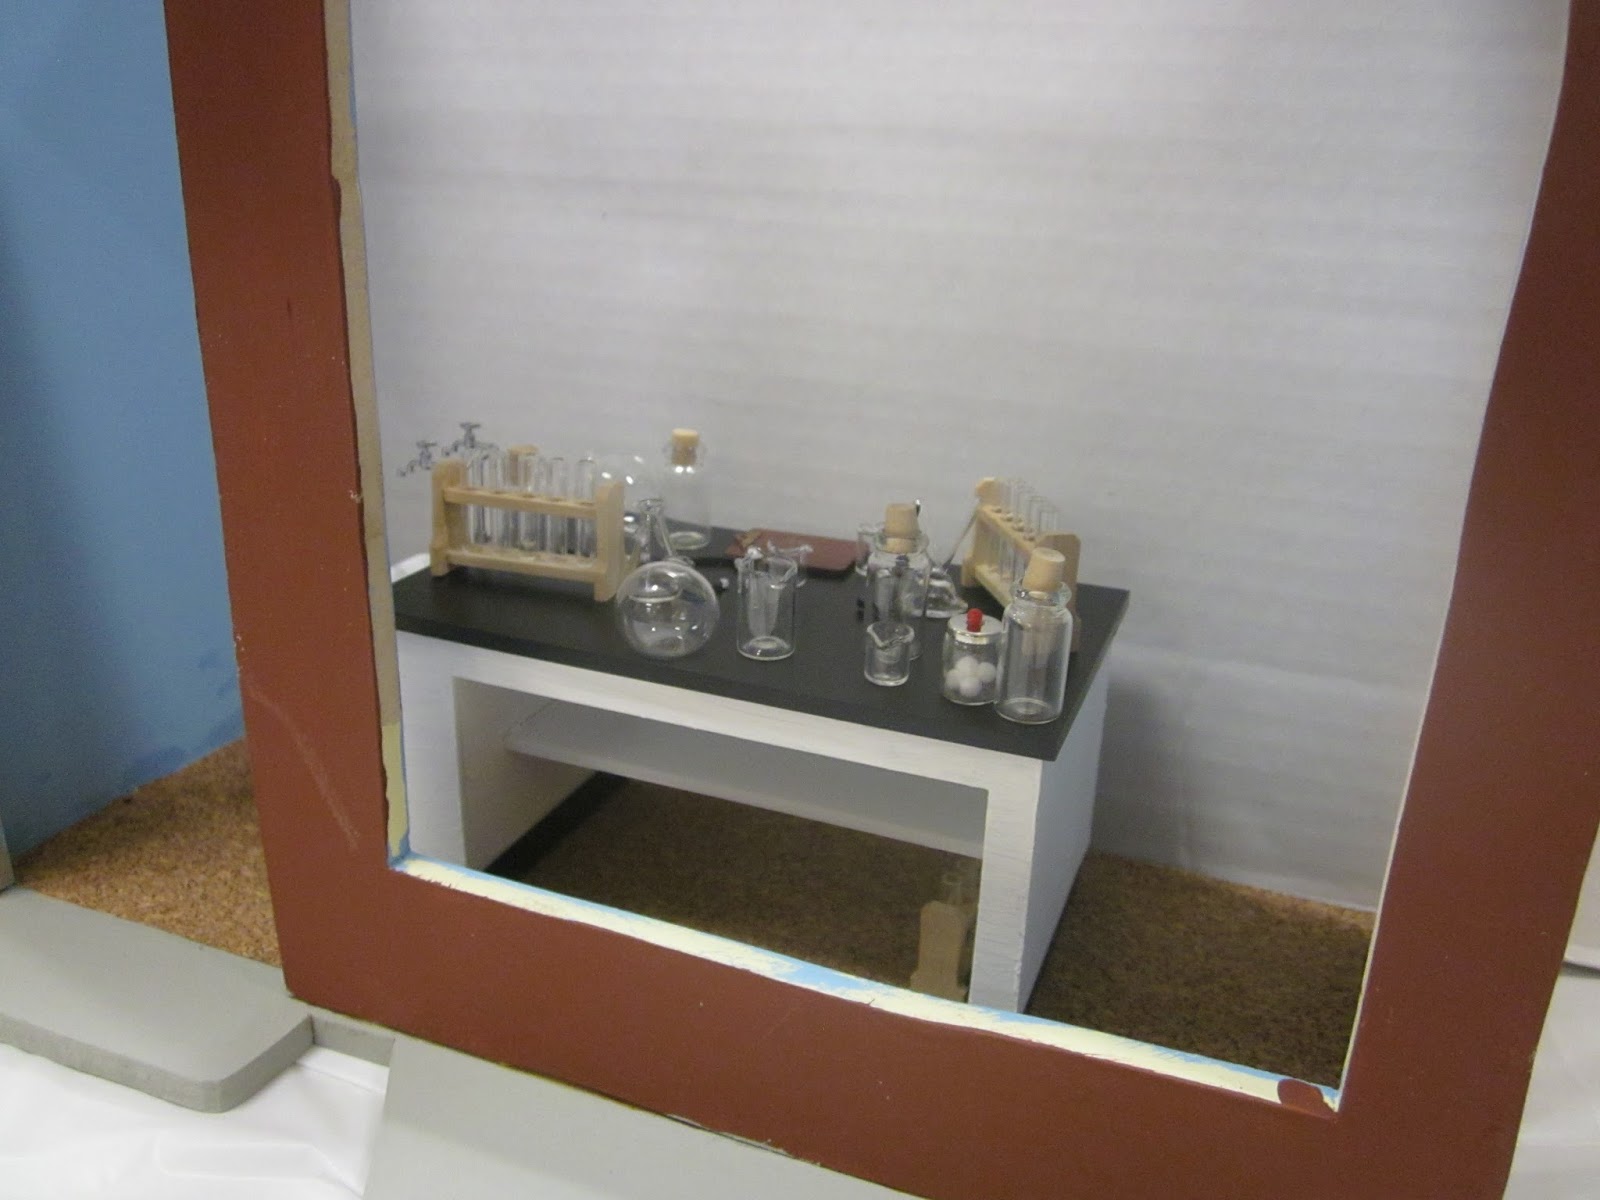
Lynn's project started out as a science lab. A couple of posts ago I showed you some of her wonderful glass pieces she was putting in it. However, she decided that such a great collection of science equipment really needed a larger space to create a complete scene around it so, her project has become a Christmas shop. She repainted the structure, both outside and inside, and has started to look at the furnishing and decorating of the inside. This will make a wonderful decorative piece to display at Christmas each year - or to keep out all year as a conversation piece. Lynn has been making miniatures for several years and has so many great ideas - I know this room will end up packed full of really beautiful things for Christmas.


Next we have Louise's quilt shop. She is making this as a gift for her aunt who is a phenomenal quilter and has been so good to Louise and her husband. It's still a work in progress but is coming along really well. Don't you love the picture she chose for the back wall that makes it look like the room is actually way deeper than it actually is? I also really like how well she matched up the black and white tile floor n the picture with the same tile look in the actual room box. It just adds to the illusion of depth. She still has some finishing touches, including the sign over the window, but its easy to see how beautiful this will be when completed.


Next, we have Garry's project. As I mentioned before, Garry is a very experienced miniaturist and his work is amazing. With this project, he expanded the box to make it deeper and made a few other little changes to bring his vision of an Old West bath house to life. He did a fantastic job. I see, since the last pictures I showed you of this one, he has completed the attached outhouse - and it looks like it's a two-holer!
When working on this, he contacted the rest of us looking for some miniature corn cobs - just the cobs - with no corn on them. He said that "back in the day" some people used them in their outhouses. They used the cobs from regular white (yellow) corn and those from red ones. Apparently one used a red one for the first - well - "swipe", I guess, then the white one to make sure everything was, well -- do I really have to explain this???? I had never heard of it before, even though I was very familiar with outhouses in my young years. However, it didn't take me any time to understand what he was trying to tell me about the use of corn cobs. So - moving right along, here is what hs project looks like from the oustide now:


Marijke is really coming along with her shabby chic flower shop. I'm not going to put any pictures here because you really should go to her blog to see how it has progressed. It is going to be really beautiful. I can hardly wait to see it completely overflowing with her incredible flowers. I love watching her work on her flowers. I have to say, I have seen miniature flowers made by many different artisans and I can't say I have seen any that are better than Marijke's. There may be some out there but I haven't found them yet! Anyway - to follow the progress on her flower shop, please visit her blog: Pulchinella's Cellar.

So - that's probably enough for tonight. Now that I am mobile again I will have to actually work on my own club project room box so I can add some pictures of it to my posts. Soon - I promise -- soon! But, for now, I'm going to finish watching the hockey game(s) and go to bed. TTFN! - Marilyn

Saturday, 18 March 2017

Better late than never!

I've been so busy lately, it's been hard to find time to post. Our mini group- F.A.M.E., did hold our monthly meeting in February, although it was delayed by a week because of a major, major snow storm. Oh - you already know this since I did post pictures of the snow in our yard and covering my car.

Having said all that, last month was our second time to work together on our shop projects. We are all at varying stages of completion but are aiming to have as many done as possible before the Moncton Miniatures Show in May. We will have a display table there and would like to showcase our latest pieces.

Here are some pics from our last meeting. The first one shows Marijke's work in progress in the forefront with Louise and Sharon chatting in the background. Marijke is making her project into a shabby chic florist shop. You can follow her progress on her blog at Pulchinella's Cellar.


This next picture shows Sharon's work in progress. I love the look she is developing here but - I'm having a senior's moment and can't remember what kind of shop she is building. A little voice in the back of my head tells me it's a chocolatier but, I could certainly be wrong. My voices tell me all sorts of things ....but we won't go there right now!


The decorative iron pieces on the roof are just placed there in the picture above. They will be permanently installed later.

Lynn's project is going to be a laboratory - she's still debating whether it will be a mad scientist's lab or another kind of lab. Notice the little stethoscope sitting on top of the room box in the first picture? It'll find a place inside for sure.


In the next two pictures I've provided a close up of the incredible pieces Lynn has picked up online for this project, including glass beakers, test tube holder (complete with the glass test tubes), glass storage containers, and so much more! I'm really looking forward to seeing the final product for this one. What a great idea!


The last one I'll show you this time around is from our newest F.A.M.E. member. Garry is such an incredible talent and generously shares his wealth of knowledge and experience with the rest of us. What a great addition to our group he is!

Garry expanded on the original project to make it a little deeper, then turned it into an old west bath house. Incredible! It's still a work in progress as well but already looks amazing.


He also added a small piece on the side which will become an attached outhouse (and possibly a place to hide his battery pack if he chooses to light his room).


The next two pictures show the wonderful array of accessories he has already managed to fit in his piece (with more to come before it's finished, I'm sure). In addition to the water pump and the bowl and pitcher, he has so many small items scattered around including other bowls, straight razors, combs, a mirror, the bucket of water heating on the stove, vintage pictures, signs and notices, two old-fashioned and well-used tubs for bathing, and, of course, his signature dog. Every one of Garry's pieces has a dog in it somewhere. Isn't his work inspiring?!


Garry has the most wonderful collection of vintage signs he has made up. There's always something for every occasion and he's always willing to share. He allowed me to pick one for myself last time we met and I picked an old 1950s-style sign of a woman from that time saying "I understand the concept of cooking and cleaning - just not how it applies to me." I just love it! I will definitely find a place to use it in the future. Hope you enjoyed this posting, regardless of the fact that it was almost a month late in coming. - Story of my life - a day late and a dollar short! TTFN - Marilyn