Well, a very busy September morphed into a very busy October...and November's not looking too relaxing either. So - time to catch up so I can move on to the fun stuff.
September started with our F.A.M.E. club taking part in the annual Fall Expo at C.F.B. Gagetown. As I mentioned in the last post (yes, I know it was so long ago you don't remember!), each year the nearby military base holds a day where many groups come together to provide information to newcomers to the area so they will have an idea of the activities available in the area. The exhibitors ranged from sports clubs to service clubs to hobbyists, exercise classes available....you get the idea.
It was an extremely warm day but Marijke, Louise and I persevered and made it through the day. We set up an exhibit of some of the work of our club members on two long tables. We attracted a lot of attention since we were very different from any other exhibitor present.
On another table nearby I set up the Irish cottage that I have been neglecting and spent the day applying a stucco finish to it and talking to anyone who stopped by to ask questions.
We received a couple of requests to do children's workshops and/or displays in the new year. We'll fit them in as we get time - they're good ways to spread the word of our hobby and, in particular, our club.
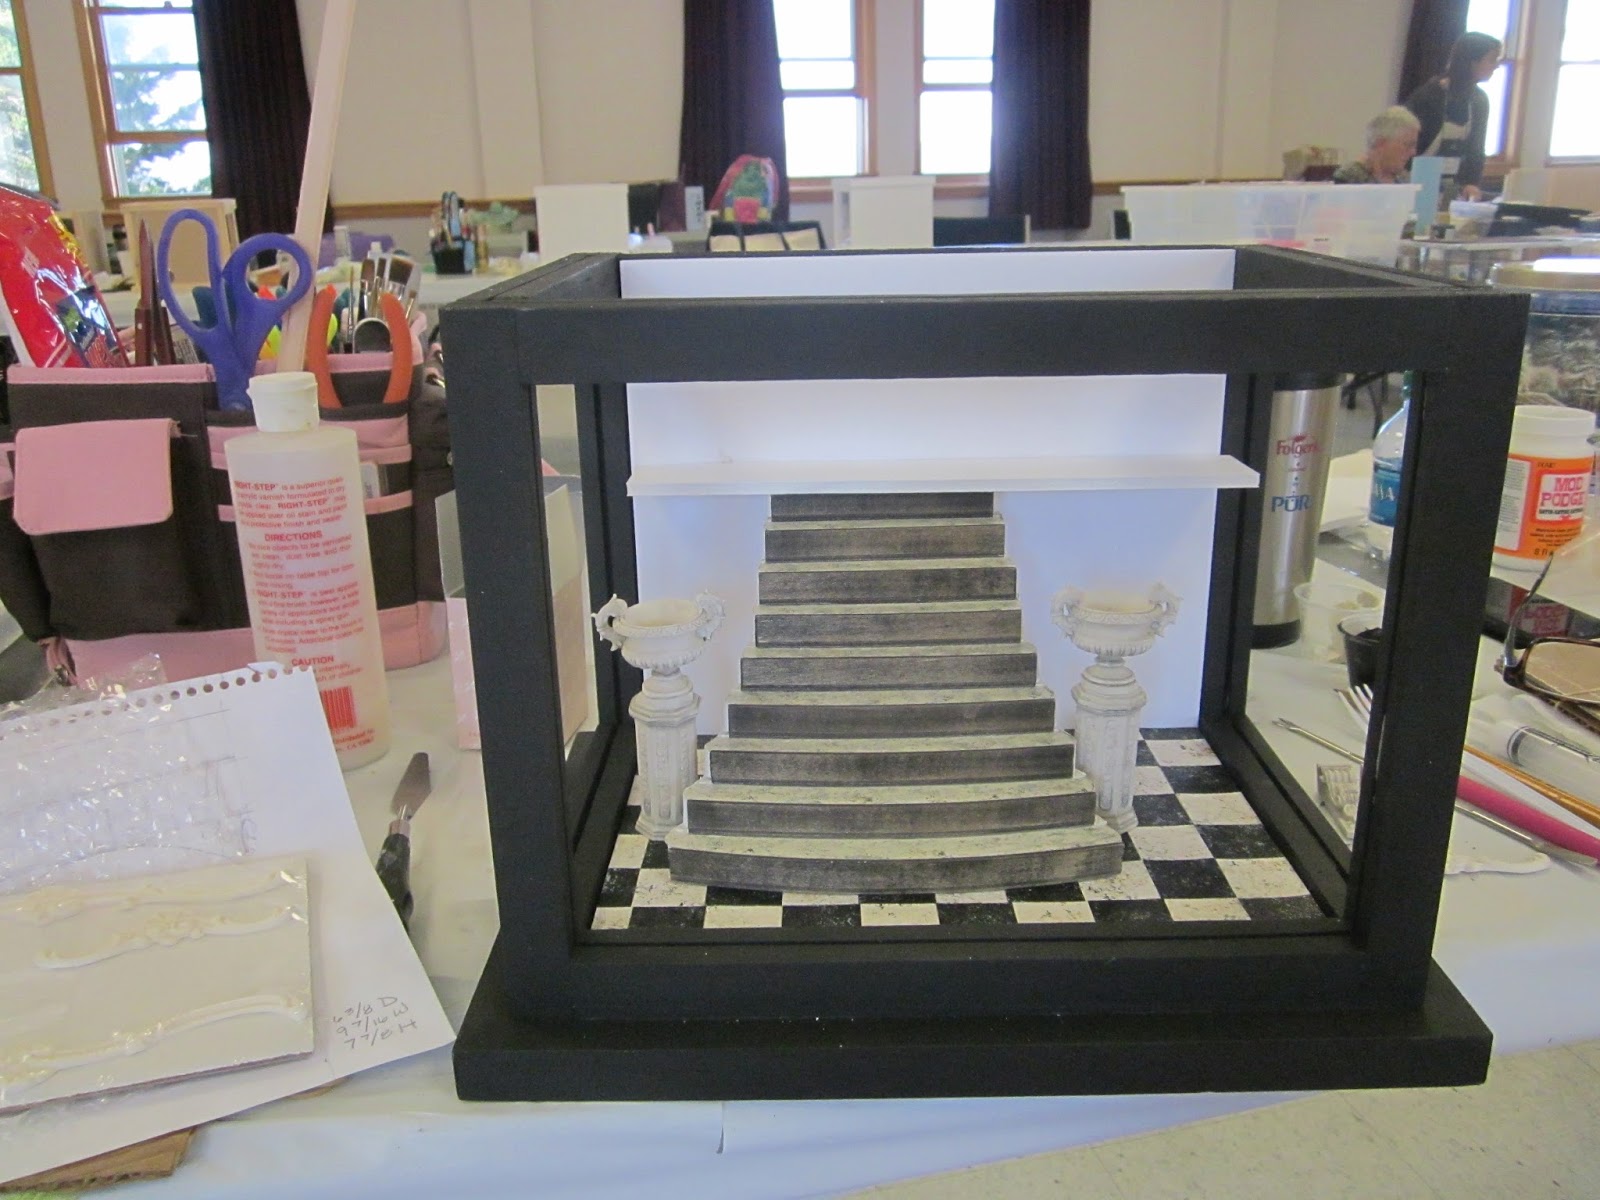
Later in September came my favourite - Camp Mini Ha Ha!!! It was a really neat looking project however, as usual, by the time I was finished making my alterations to the original design, it bore no resemblance to the intended project. But the good news is -- I think I'm going to love it when I actually get it finished (more on that a little later).
So, 31 Campers attended this year. The Annapolis Basin Conference Centre is the perfect spot for our annual Camp - large work room, good food, great company - what more can we ask for!!??
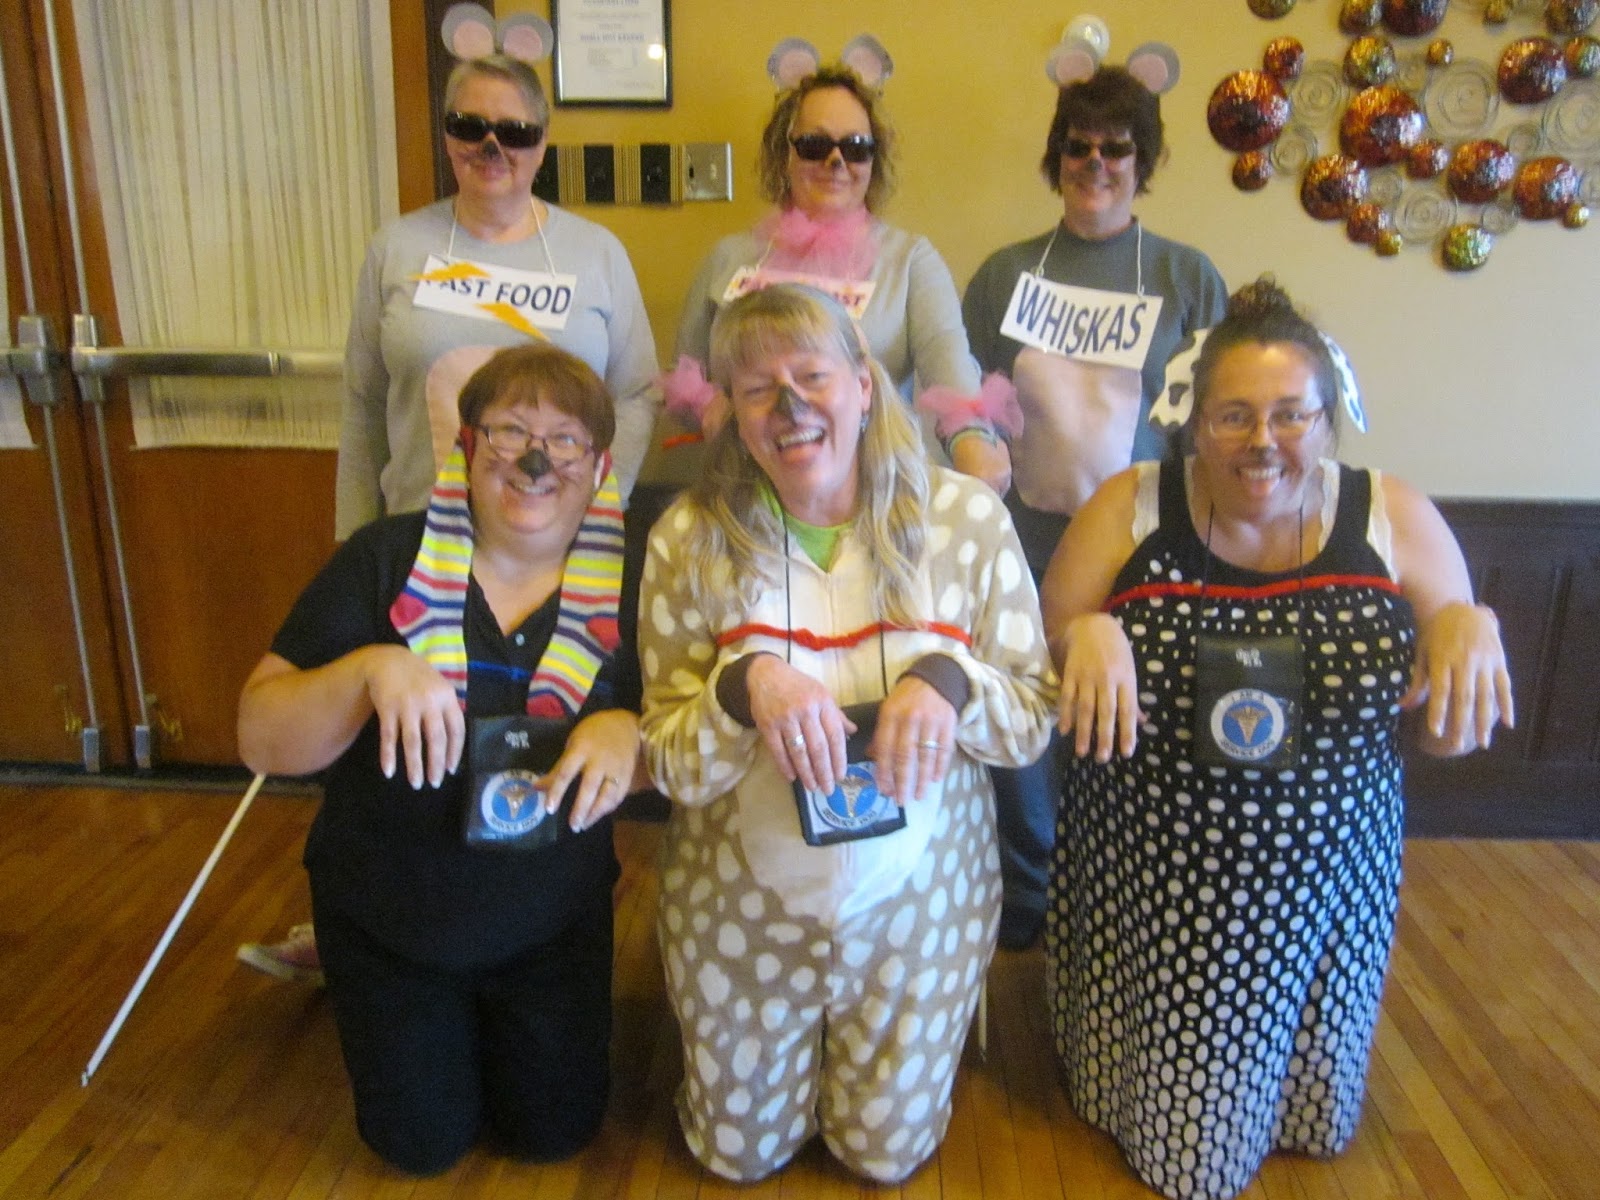
This year's theme was cats. Some of the costumes on Sunday night were really great - everything from cats, dogs and mice to crazy cat ladies and a "puss in boots" ...or, in our case...a puss in sneakers.*smile*.
Overall, I have to say my favourite was the three blind mice with their seeing-eye dogs....Strike out the "Crazy cat ladies" comment and just call us all crazy ladies in general!
As usual, my friend Louise had her project concept completely thought out before arriving at Camp and had many accessories already made in advance. Her finished project will be a Via Rail station with a Tim Horton's on the 2nd floor (remember the doughnuts, cookies and bagels I made her for her birthday in March?)- can't get much more Canadian than that!!! Unless she then builds a Canadian Tire store to go next door with a poutine restaurant on the corner! In the picture below you can see the work in progress. She does have the elevator doors in on both floors but doesn't have the upper floor and Tim Hortons in yet in this picture. I will be sure to get a few pictures of it when she's finished it. So far it looks amazing - she's my hero!
What's that you say - what's my project look like?? Well, it doesn't have the intended shape of an industrial loft. I had new walls cut to my size and shape. I chose the 1/12th scale kit but am building in in 1/24th scale so I would have more room. Tomorrow I will show you the progress on the front and back walls, which will bring me to the end of my September catch-up. Wow - I feel like I'm moving right along at the speed of...well...the speed of government services maybe?? No offence to government workers - it is, after all, a process....with lots and lots of roadblocks and hoops to jump through along the way...just like the way I work! TTFN. - Marilyn
Showing posts with label Camp Mini Ha Ha. Show all posts
Tuesday, 1 November 2016
Thursday, 14 April 2016
Time to Take Stock.
I want to start by saying -- hi Giac!!! I see you've joined the little group here. It was so nice meeting you two in Montreal. I hope we get to meet face-to-face again!
So, I took a few days break after posting all the pictures from the Montreal show. And, on Tuesday evening, our little club got together to open the box of Daily Deals that Louise picked up from Liz while she was at the show. It's just like Christmas!! Unfortunately, I was so excited about looking through all the goodies I didn't get any pictures of all the stuff. Tomorrow I will show you pictures of some of the stuff that I bought but I missed the opportunity to get shots of everyone else's.
On Wednesday I started my "taking stock" process. By that, I don't mean I was literally doing a stock-taking effort to document all my mini stuff, although I really, really should! Instead, I was reflecting on the projects I have done, are underway, or are in the idea stage, just percolating through this little pea-brain of mine. I've been lying awake, wondering how I should proceed. What should I do next? So, I have tried to come up with a prioritized plan based on percentage of completion. Here's how far I got with that thought process:
First - I have one project actually completed - the Mardi Gras lamp/room box you've seen in my earlier posts. I have nothing left that I want to do to that project. Yeah, me!!
The next project I tackled was my second Camp Mini Ha Ha project. The 2015 theme was "literature" and the project was to build a room box inside a set of books. That project is about 85 to 90 percent complete, in my estimation.
Louise and I started work on an Irish cottage and the ball is in my court right now on this one. I would say it is just under 50% complete.
Then, of course, I have the greenhouse/potting shed project which is probably only about 25% done. After that, I have two quilt shops cut out, ready to start construction. Then we have the long list of projects I want to start and have been collecting things for but they are still just in my head - a very lonely place to be since there's not much else in there!
Trying to look at things objectively, it really makes the most sense to concentrate on the one that's closest to completion and JUST GET 'ER DONE!
So - my book project will be the main topic of this blog until it's done. I hope it won't take long! Of course I might have a few side-trips to other topics every now and then - what me -- digress?? What do you mean?!??? Here's a picture of the room box as it is right now - no, that is not an opening in the back of the room - I have a picture in the background behind a window, with lighting between the two to make it look like daylight. I actually quite like the effect.
So - here's the story of my 2015 Camp project. With a literature theme, it took me a long time to get my head around what I wanted to do with it. Then, one day, a few months before Camp, my DH and I were driving into town and I was throwing ideas at him - the usual stuff - library? den? reading nook? Then DH said - what about picking a piece of literature you like, a book or short story, and trying to interpret it within the room box. All at once, it hit me like a thunderbolt - I was going to do an attic scene from Oscar Wilde's story, The Picture of Dorian Gray. For those who may be unfamiliar with this story - it's main theme centres around an extremely handsome young man who worries about growing older and losing his beauty and youth. Through a process we won't go into here, Dorian becomes the owner of a full-sized painting of himself, done at the height of his beauty and vigor. It becomes apparent that, as long as this painting is kept intact, Dorian will stay young and beautiful while every one of his nasty behaviours, cruelties or selfish acts will show up on the painting as it ages and distorts and Dorian remains unchanged. Eventually, after years, Dorian can take no more, He makes his way to the attic and slices through the painting which immediately changes back to the picture of a beautiful young man while a wrinkled and ravaged old man lies dead on the floor beneath it.
So - more details to come - how the project came together, along with detailed pictures of where I am now and ongoing pictures until I feel it is 100% finished. Until then - TTFN!!
So, I took a few days break after posting all the pictures from the Montreal show. And, on Tuesday evening, our little club got together to open the box of Daily Deals that Louise picked up from Liz while she was at the show. It's just like Christmas!! Unfortunately, I was so excited about looking through all the goodies I didn't get any pictures of all the stuff. Tomorrow I will show you pictures of some of the stuff that I bought but I missed the opportunity to get shots of everyone else's.
On Wednesday I started my "taking stock" process. By that, I don't mean I was literally doing a stock-taking effort to document all my mini stuff, although I really, really should! Instead, I was reflecting on the projects I have done, are underway, or are in the idea stage, just percolating through this little pea-brain of mine. I've been lying awake, wondering how I should proceed. What should I do next? So, I have tried to come up with a prioritized plan based on percentage of completion. Here's how far I got with that thought process:
First - I have one project actually completed - the Mardi Gras lamp/room box you've seen in my earlier posts. I have nothing left that I want to do to that project. Yeah, me!!
The next project I tackled was my second Camp Mini Ha Ha project. The 2015 theme was "literature" and the project was to build a room box inside a set of books. That project is about 85 to 90 percent complete, in my estimation.
Louise and I started work on an Irish cottage and the ball is in my court right now on this one. I would say it is just under 50% complete.
Then, of course, I have the greenhouse/potting shed project which is probably only about 25% done. After that, I have two quilt shops cut out, ready to start construction. Then we have the long list of projects I want to start and have been collecting things for but they are still just in my head - a very lonely place to be since there's not much else in there!
Trying to look at things objectively, it really makes the most sense to concentrate on the one that's closest to completion and JUST GET 'ER DONE!
So - my book project will be the main topic of this blog until it's done. I hope it won't take long! Of course I might have a few side-trips to other topics every now and then - what me -- digress?? What do you mean?!??? Here's a picture of the room box as it is right now - no, that is not an opening in the back of the room - I have a picture in the background behind a window, with lighting between the two to make it look like daylight. I actually quite like the effect.
So - here's the story of my 2015 Camp project. With a literature theme, it took me a long time to get my head around what I wanted to do with it. Then, one day, a few months before Camp, my DH and I were driving into town and I was throwing ideas at him - the usual stuff - library? den? reading nook? Then DH said - what about picking a piece of literature you like, a book or short story, and trying to interpret it within the room box. All at once, it hit me like a thunderbolt - I was going to do an attic scene from Oscar Wilde's story, The Picture of Dorian Gray. For those who may be unfamiliar with this story - it's main theme centres around an extremely handsome young man who worries about growing older and losing his beauty and youth. Through a process we won't go into here, Dorian becomes the owner of a full-sized painting of himself, done at the height of his beauty and vigor. It becomes apparent that, as long as this painting is kept intact, Dorian will stay young and beautiful while every one of his nasty behaviours, cruelties or selfish acts will show up on the painting as it ages and distorts and Dorian remains unchanged. Eventually, after years, Dorian can take no more, He makes his way to the attic and slices through the painting which immediately changes back to the picture of a beautiful young man while a wrinkled and ravaged old man lies dead on the floor beneath it.
So - more details to come - how the project came together, along with detailed pictures of where I am now and ongoing pictures until I feel it is 100% finished. Until then - TTFN!!
Thursday, 25 February 2016
So much Talent.....
First - welcome to two more followers: Shauna D. and Louise McS.! Okay, one is my daughter and the other my good friend so maybe I'm cheating if I count them but hey - my family and close friends have always been counted as number 1 on my list so yes, they do count!!!
Onwards and upwards! I've been sharing with you my experience with my first trip to Camp Mini Ha Ha in 2014 and the title of this post says it all. I learned so much in the 5 days I was there, not just by the hints, direction and assistance I got on my own project, but by watching all of the truly talented people who surrounded me with inspiration. I'm sorry I didn't get pictures of all of the other participants' projects but I will show you the rest of those I do have.
In these next two pictures you can see the finished product of one of the dressed mannequin workshops. We each got to produce one of three different styles under the watchful eye of instructor, Judith Blondell. I have pictures of two of the styles but, for some reason, didn't manage to catch the 3rd one. Sorry! The photo on the left also showcases a hand-painted mini piece of art on the easel. I believe that is one of Sherry P.'s beautiful paintings and, if memory serves me correctly, it was a giftie received by the maker of this room box. Another giftie is found in this room box and shown in more detail in the picture on the right. This table was obviously made with the "Mardi Gras" theme in mind and the detail is phenomenal! It shows the workspace of someone getting their masks and costumes ready for the exciting Mardi Gras activities to come. Beautiful! So, you ask, - what's a "giftie"? One of the fun things at Camp is that each participant brings 5 items which would be worth around $15 - $20 if on the retail market and we have a gift exchange each of the 5 nights we are there. We also all bring enough "tidbits" (small items worth around $3 - $5), to provide one for each participant. Then, at lunchtime each day we receive a bag at our seats in the dining room with 6 - 8 surprise little "tidbits". We all get so excited about those little bags, we can hardly wait to get to lunch each day!!
Two more works in progress: the one on the left again shows one of the finished mannequins being temporarily put in place along with a beautiful hand-made shelf unit that was another "giftie", I believe. The insert on the right is shaping up to be very elegant. If I get the chance to find pictures of the finished product of any featured here, I will do a follow-up to let you see how they turned out.
Below is Aleeta's indoor/outdoor scene under construction, then looking very different all decked out! Included are items like her own hand-made luggage, the beautiful chair in the background, her dressed doll - all gorgeous!
I think Lynn, one of our Fredericton contingent, and a first-time Mini Ha Ha participant, was one of the few Campers, if not the only one, who actually managed to complete her project while at Camp. She did a great job on this indoor/outdoor room box (below).
To close off this long post, I bring you a couple of pics of our Saturday night dinner. Each year, participants dress up on Saturday night in keeping with that year's theme so - welcome to Mardi Gras!!! Sorry for the length of the post but I hope you got some enjoyment from it. TTFN!
Onwards and upwards! I've been sharing with you my experience with my first trip to Camp Mini Ha Ha in 2014 and the title of this post says it all. I learned so much in the 5 days I was there, not just by the hints, direction and assistance I got on my own project, but by watching all of the truly talented people who surrounded me with inspiration. I'm sorry I didn't get pictures of all of the other participants' projects but I will show you the rest of those I do have.
In these next two pictures you can see the finished product of one of the dressed mannequin workshops. We each got to produce one of three different styles under the watchful eye of instructor, Judith Blondell. I have pictures of two of the styles but, for some reason, didn't manage to catch the 3rd one. Sorry! The photo on the left also showcases a hand-painted mini piece of art on the easel. I believe that is one of Sherry P.'s beautiful paintings and, if memory serves me correctly, it was a giftie received by the maker of this room box. Another giftie is found in this room box and shown in more detail in the picture on the right. This table was obviously made with the "Mardi Gras" theme in mind and the detail is phenomenal! It shows the workspace of someone getting their masks and costumes ready for the exciting Mardi Gras activities to come. Beautiful! So, you ask, - what's a "giftie"? One of the fun things at Camp is that each participant brings 5 items which would be worth around $15 - $20 if on the retail market and we have a gift exchange each of the 5 nights we are there. We also all bring enough "tidbits" (small items worth around $3 - $5), to provide one for each participant. Then, at lunchtime each day we receive a bag at our seats in the dining room with 6 - 8 surprise little "tidbits". We all get so excited about those little bags, we can hardly wait to get to lunch each day!!
Below is Aleeta's indoor/outdoor scene under construction, then looking very different all decked out! Included are items like her own hand-made luggage, the beautiful chair in the background, her dressed doll - all gorgeous!
Wednesday, 24 February 2016
My Mardi Gras journey continues....
First, I'd like to welcome Diane, from Florida, as my second "follower". It really is nice to know I'm not alone out in the mini-world! Thanks for visiting Diane.
Continuing on from my last post I'll show you the work I managed to get done on my project while at Camp, and give you a look at other Campers' projects to see how differently one project can be interpreted. There were some really beautiful ideas represented, that's for sure. Then we'll take a look at how I finished the project once I got home.
So, with time taken out to complete the secondary workshop with Judith Blondell - the dressing of a mannequin in period dress - that was all the work I accomplished on my lamp while at Camp. Here are some more pictures of Camp Mini Ha Ha 2014 as well as other people's work in progress - sorry I don't have pictures of their finished projects for you but you get the idea, at least, of how very different they all were. I think, if you click on the pictures, they should come up in a larger size in a separate window.
Nancy's project (above): She made her own floor, piece by piece, and brought it with her to be installed in her beautiful room. the floor was absolutely gorgeous!
Well, I think this post is getting quite long enough for one day so, next post I'll provide pictures of other Campers' works-in-progress and, hopefully leave enough room to show you my finishing steps for my own Mardi Gras room box/lamp.
Tip for today:
When using narrow strips of wood, popsicle sticks, coffee stirrers, etc., to lay your floor, do not glue the whole piece of wood as it will be more difficult to make it lay flat after drying. Instead, place dots of glue, spaced 1/2 to 1 inch apart down the length of the wood strip and press it in place. Trust me - the floor stands a better chance of not warping because you will not be wetting down the whole, porous, length of wood.
TTFN!
Continuing on from my last post I'll show you the work I managed to get done on my project while at Camp, and give you a look at other Campers' projects to see how differently one project can be interpreted. There were some really beautiful ideas represented, that's for sure. Then we'll take a look at how I finished the project once I got home.
So, with time taken out to complete the secondary workshop with Judith Blondell - the dressing of a mannequin in period dress - that was all the work I accomplished on my lamp while at Camp. Here are some more pictures of Camp Mini Ha Ha 2014 as well as other people's work in progress - sorry I don't have pictures of their finished projects for you but you get the idea, at least, of how very different they all were. I think, if you click on the pictures, they should come up in a larger size in a separate window.
| This is Marijke H.'s work in progress - I will have finished pictures of this you'll see in a future post. | |
Nancy's project (above): She made her own floor, piece by piece, and brought it with her to be installed in her beautiful room. the floor was absolutely gorgeous!
Well, I think this post is getting quite long enough for one day so, next post I'll provide pictures of other Campers' works-in-progress and, hopefully leave enough room to show you my finishing steps for my own Mardi Gras room box/lamp.
Tip for today:
When using narrow strips of wood, popsicle sticks, coffee stirrers, etc., to lay your floor, do not glue the whole piece of wood as it will be more difficult to make it lay flat after drying. Instead, place dots of glue, spaced 1/2 to 1 inch apart down the length of the wood strip and press it in place. Trust me - the floor stands a better chance of not warping because you will not be wetting down the whole, porous, length of wood.
TTFN!
Tuesday, 23 February 2016
Laissez le bons temps rouler!!!
Okay - I know this is not grammatically correct in French (s.b. Prenons du bons temps!) but this post is all about my New Orleans/Mardi Gras, Camp Mini Ha Ha project from 2014 and that's how they say it in New Orleans! When in Rome, and all that...
...but, before we get to that...I have my very first "follower"! It's Marijke H.! Thank you Marijke. For those who don't know (I have mentioned this before in the "Canada's Minis" Yahoo Group), Marijke H. and I, and a few other like-minded souls, are founding members of the "mini lovers mutual admiration society". It is indeed a rapidly growing list of people who so much appreciate the talent and generosity of these wonderful people we meet while pursuing our hobby - or obsession.
Back to the topic of this post - When I first met up with the people who are now my F.A.M.E. cohorts, Marijke was the person who talked me into my first Camp Mini Ha Ha at the Annapolis Basin Conference Centre in Nova Scotia. I was somewhat reluctant for a couple of reasons:
1. The project for 2014 was to build a room box that would become a lamp base. The theme for the workshop was "Mardi Gras". I couldn't imagine why I would want a lamp with a room box in it, nor could I imagine why I would want anything dealing with Mardi Gras.
2. I have never been a person who goes for a night out or a weekend with "the girls" or to attend group activities - I'm somewhat of a hermit, truth be told. So, the idea of a 5-day workshop was a little intimidating for me. I was worried that I would get to Nova Scotia, feel uncomfortable, and want to come home, after forking over a lot of money to be there.
Well, were my eyes opened! I had such an incredibly great time, met so many wonderful people, and learned so much I can't imagine ever wanting to miss a Camp session again!
As for the project itself, I thought and thought about it for the several months between initial registration and the beginning of Camp. I had a really hard time getting my head around what I would do with a Mardi Gras theme that I would actually like (although the theme is always just a guideline - Campers are encouraged to do whatever they want with their projects). In the end, I came up with a whole "story line" and the room box ideas rapidly fell into place. I'll tell you the story as we go.
This could turn into a really long post so, sorry, but I will break it into two parts. Today - a little more about my Camp Mini Ha Ha 2014 experience.
We arrived on Wednesday afternoon and got settled in. After a great meal in the dining room we retreated to the lounge where our fabulous team of organizers (self-titled "Divas") put together an evening of fun to allow everyone to get acquainted (there were 5 first-timers in 2014, of which I was one, and 31 returnees) and get a feel for what we could expect.
Bright and early Thursday we were up, to the dining room for breakfast, then a short stroll down the hill to the workshop rooms. We were provided with our kits which included the wooden frame for our lamp base, the gator-board pieces for our floor and back wall insert, a lighting kit to turn our room boxes into an actual full-size table lamp, and the materials we would need for our secondary workshop - dressing a mannequin with Judith Blondell teaching. Everyone put their heads down, got their frames glued together and got started on their inserts.
I, on the other hand, went looking for Wayne D., our wonderful all-round craftsman and Camp assistant. I found him in "Wayne's World" - his on-site workshop and explained to him that, for my "vision" to work I needed to have a side wall cut as well as a wall that would sit diagonally across one corner to enable me to have it look like a 2nd-floor apartment with a balcony. Always polite and supportive, Wayne delivered exactly what I asked for, rather than pointing out to me how fine the line can be between a "vision" and a "hallucination", and I was on my way.
So, here was the beginning of my room box insert. The first picture shows the back and side wall attached to the floor and the lines I had drawn on the walls to indicate where the diagonal wall was going to go. The second picture shows the diagonal wall in place, a New Orleans picture installed with a view from a balcony, and textured brick paper installed. I laid floor boards in the balcony area which followed the angle of the floorboards in the picture. I will be staining that portion a weathered grey to match the floor in the picture. I have just begun to lay the floor in the main part of the room.
So I will continue the rest of this saga in my next post. I leave you with a tip for the day. TTFN
Tip for today: Having trouble deciding what your project should look like, or even what it should be? Stop worrying about the actual project and concentrate instead on the story you want to tell. Once you have the full storyline in your head, the project details will quickly fall into place. A room box or mini building without a story is just a static placement of architecture and furnishings. They need their own background story to make them shine!
...but, before we get to that...I have my very first "follower"! It's Marijke H.! Thank you Marijke. For those who don't know (I have mentioned this before in the "Canada's Minis" Yahoo Group), Marijke H. and I, and a few other like-minded souls, are founding members of the "mini lovers mutual admiration society". It is indeed a rapidly growing list of people who so much appreciate the talent and generosity of these wonderful people we meet while pursuing our hobby - or obsession.
Back to the topic of this post - When I first met up with the people who are now my F.A.M.E. cohorts, Marijke was the person who talked me into my first Camp Mini Ha Ha at the Annapolis Basin Conference Centre in Nova Scotia. I was somewhat reluctant for a couple of reasons:
1. The project for 2014 was to build a room box that would become a lamp base. The theme for the workshop was "Mardi Gras". I couldn't imagine why I would want a lamp with a room box in it, nor could I imagine why I would want anything dealing with Mardi Gras.
2. I have never been a person who goes for a night out or a weekend with "the girls" or to attend group activities - I'm somewhat of a hermit, truth be told. So, the idea of a 5-day workshop was a little intimidating for me. I was worried that I would get to Nova Scotia, feel uncomfortable, and want to come home, after forking over a lot of money to be there.
Well, were my eyes opened! I had such an incredibly great time, met so many wonderful people, and learned so much I can't imagine ever wanting to miss a Camp session again!
As for the project itself, I thought and thought about it for the several months between initial registration and the beginning of Camp. I had a really hard time getting my head around what I would do with a Mardi Gras theme that I would actually like (although the theme is always just a guideline - Campers are encouraged to do whatever they want with their projects). In the end, I came up with a whole "story line" and the room box ideas rapidly fell into place. I'll tell you the story as we go.
This could turn into a really long post so, sorry, but I will break it into two parts. Today - a little more about my Camp Mini Ha Ha 2014 experience.
We arrived on Wednesday afternoon and got settled in. After a great meal in the dining room we retreated to the lounge where our fabulous team of organizers (self-titled "Divas") put together an evening of fun to allow everyone to get acquainted (there were 5 first-timers in 2014, of which I was one, and 31 returnees) and get a feel for what we could expect.
Bright and early Thursday we were up, to the dining room for breakfast, then a short stroll down the hill to the workshop rooms. We were provided with our kits which included the wooden frame for our lamp base, the gator-board pieces for our floor and back wall insert, a lighting kit to turn our room boxes into an actual full-size table lamp, and the materials we would need for our secondary workshop - dressing a mannequin with Judith Blondell teaching. Everyone put their heads down, got their frames glued together and got started on their inserts.
I, on the other hand, went looking for Wayne D., our wonderful all-round craftsman and Camp assistant. I found him in "Wayne's World" - his on-site workshop and explained to him that, for my "vision" to work I needed to have a side wall cut as well as a wall that would sit diagonally across one corner to enable me to have it look like a 2nd-floor apartment with a balcony. Always polite and supportive, Wayne delivered exactly what I asked for, rather than pointing out to me how fine the line can be between a "vision" and a "hallucination", and I was on my way.
So, here was the beginning of my room box insert. The first picture shows the back and side wall attached to the floor and the lines I had drawn on the walls to indicate where the diagonal wall was going to go. The second picture shows the diagonal wall in place, a New Orleans picture installed with a view from a balcony, and textured brick paper installed. I laid floor boards in the balcony area which followed the angle of the floorboards in the picture. I will be staining that portion a weathered grey to match the floor in the picture. I have just begun to lay the floor in the main part of the room.
So I will continue the rest of this saga in my next post. I leave you with a tip for the day. TTFN
Tip for today: Having trouble deciding what your project should look like, or even what it should be? Stop worrying about the actual project and concentrate instead on the story you want to tell. Once you have the full storyline in your head, the project details will quickly fall into place. A room box or mini building without a story is just a static placement of architecture and furnishings. They need their own background story to make them shine!
Subscribe to:
Posts (Atom)