Yes, it's been over a month since I last posted about our World War I Remembrance project. I've been very busy with other things although I have been working off and on when I could find the time. If you follow Marijke's blog at
http://pulchinellascellar.blogspot.com/ you can see the amazing items she has been making for the inside of the bunker.
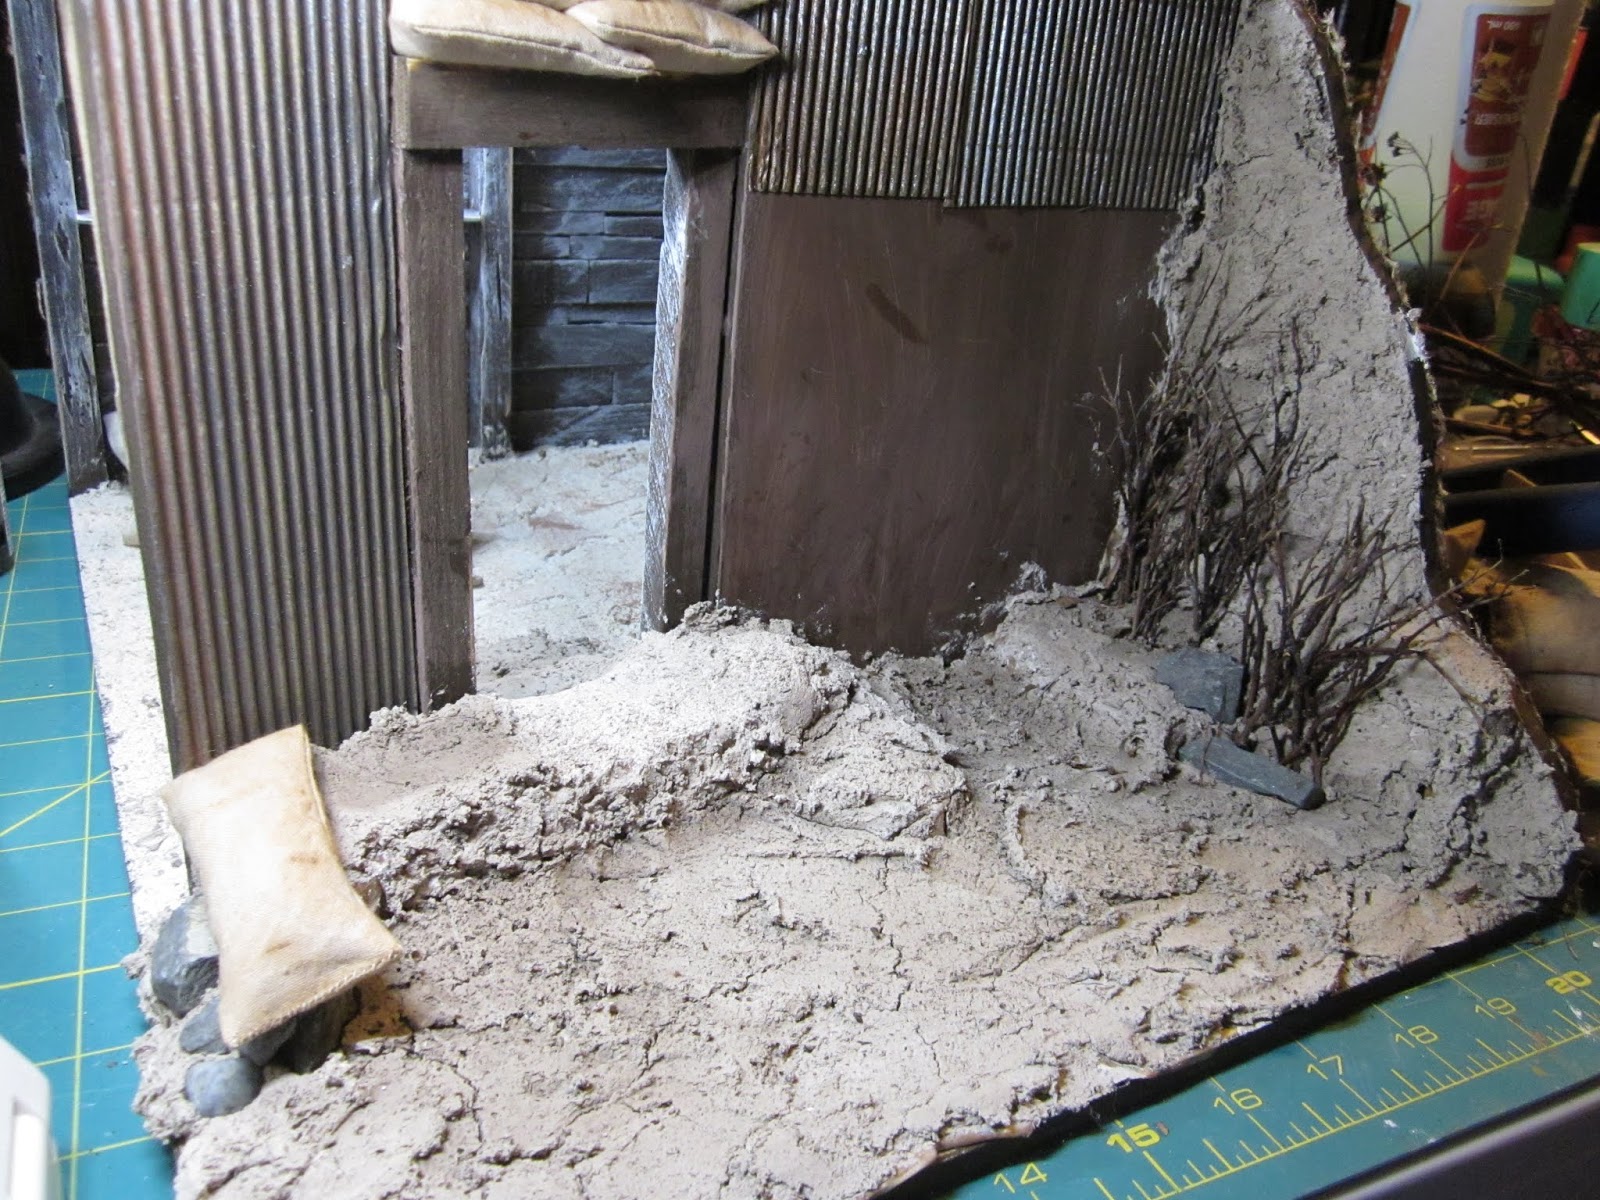
Since my last post I have done some work on the box itself. I built up some raised areas on the outside of the bunker and covered everything with scrunched up brown paper which I coated with a mixture of watered down tacky glue and brown paint.
The outside of the project was still just the bare MDF that was used to build the box. We discussed what to do with it when Marijke, Louise, Susan and I had met to work together and we decided we couldn't leave it like that.
So, following the group's suggestion, I painted both outside walls with brown oxide paint. Once dry, I painted on a mixture of matte finish ModPodge, coloured with the brown oxide, then pressed a sheet of large scale burlap over it. I then painted over this with the ModPodge/paint mixture. Once dry, I trimmed the burlap to fit.
It will need a final trimming but I like the texture and think it looks much better than flat-painted MDF walls.
Louise and Marijke had prepared panels of small-gauge corrugated cardboard and made them look like rusted panels of corrugated metal. These are for the roof of the bunker and for the outside walls, above the stacks of sand bags. To add more strength, I glued these to a piece of cardboard cut to fit the shape of the box. I left a "hole" which will be for a "break through" from the field above to the bunker below.

Now, for the top of the box which is supposed to represent an overgrown field above the hidden bunker: I wanted something to look as realistic as possible and all of the options for grass for miniature projects looked too green, too static, too fake for my purposes. So I consulted with my best friend - Google!!! I found a video online of someone making long grass from fake fur. Yes - fake fur! I thought is was really cool and wanted to give it a try. In the video, after installing their end product, the person did a fair amount of trimming but that project was in 1:24 scale so the grass needed to be shorter.
I went looking for fake fur in a light colour to give this a try. I went to Fabricville and found exactly what I needed. The only problem was that is was faux fur trim on a roll, about 4 or 5 inches wide, and it cost $34.78 per metre. That was definitely not going to happen!!! So - what to do, what to do?
Then I went to Value Village and found a knitted hat with fur ear flaps and partial lining. I forgot to take a picture of it before I took it apart but it looked something like this one, without the pom pom on top.
I have to apologize for not taking pictures of the beginning of the process but, basically, I used a whole bottle of green paint then filled the bottle with water several times and dumped the paint and water into a metal pan. Then I placed the pieces of fur face down into the mixture and made sure they really soaked it in. I left them in the mixture overnight. The following morning I made a big mistake. I thought I should rinse out any extra paint before letting them dry. Unfortunately, having used water-based craft paints, they almost completely rinsed out of the fur. So - I started over again but this time, instead of rinsing any of the paint mixture out, I hung the pieces up to drip dry over my laundry tub. It took about three days before they were completely dry.
Now comes the neat part. Once dry, the fur was all clumped up and stiff, just like the video said they would be. Then you take a metal brush and brush them out well and fluff them up. Behold - long grass with lots of colour variation to make it look even more realistic.
The pictures don't do it justice. It really is much greener than it looks here. I'm very pleased with the end result. Now on to the next stage. The instructions in the magazine we are using to produce this project said to glue bubble wrap to the top of the roof panel, then add more bundles of it to make some mounds and undulations. They were using railroader grass sheets which would have needed something under them to produce some variation in height. So - I did glue the first layer of bubble wrap.
It then occurred to me that, because of the thickness of the material we will be using for the grass, the bubble wrap really won't make any difference. Instead, I will use something else to provide a little more interest to the grassy field - which you'll have to wait for another day or two to see.
Making the grass was really interesting. It's a great technique and I will definitely try it again. I'll be back tomorrow with another update. TTFN!! - Marilyn