I can't believe it's been that long. I haven't been spending nearly as much time on mini projects as I would have liked but, in between many other things I had going on, I did squeeze in some time when I could. So, I thought I had better catch things up to where I am today with my minis.
A long time ago my one of my sisters-in-law had asked me if I could help her replace a piece she lost from a tic-tac-toe game she had. She has always been a big lover of horses and still spends every Sunday afternoon at a local equestrian school where she enjoys a few hours taking a horse or two out for a ride. She has a small tic-tac-toe game with pieces that, instead of being Xs and Os, are cowboy boots and cowboy hats but she lost one of the cowboy boots. She asked if I could make one to replace it. I tried using one of the resin pieces to make a two-part mold but it did not work out well for me. When I tried to use the mold to make a Fimo copy, it did not bring up the details very well at all. A friend of my daughter had just started a business to offer 3D printing and laser cutting services. I turned the resin piece over to him and he created two 3D copies so I could provide a replacement and a spare for my DSIL. Here is the original and the copy. They are about 1.5 inches (3.81 cm.) tall.
The details showed up really well. Then I mixed some custom colours and very carefully painted the two copies. You can tell which is the original because it has been faded over time but I think the two copies turned out well and my SIL was very pleased with them.
So, moving into March, Marijke, Louise and I continued to meet on Wednesday afternoons as often as we could and I managed to work away, little by little on my market stall project. One of our Wednesday mini days was also used to celebrate Louise's birthday. I made her a chocolate cake with cream cheese butter frosting. I decorated the side with large chocolate slivers and the top with her favourite flamingos (and a couple of shamrocks to include her Irish heritage). We had cheese, crackers, deli meats and fruit for a wee lunch then each had a big slice of chocolate cake which everyone seemed to enjoy.
Louise took a picture of the cake before we cut it. Notice the case she has on her cell phone?? Of course it's a flamingo. How could we expect anything else? *smile*
Back to my actual mini work - - -
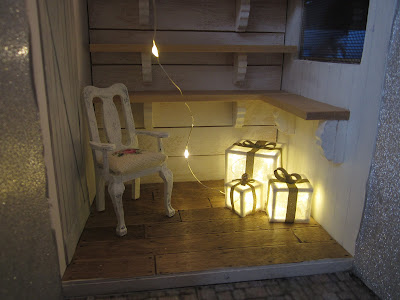
In an earlier post in January about the market stall I introduced you to the decorative mesh Christmas gifts I was hoping to install lights in then find a place for them in the stall, if I could get them to work. Well, I finished wrapping the last one with the mesh ribbon and yes, I was able to fold up some lights to go inside. I glued them into the back corner of the stall. You can see some of the remaining length of light string coming out from them but I had plans for them too!
I also cut out small blocks of wood in sets of three then stained all of these pieces and coated them with a crackle medium.
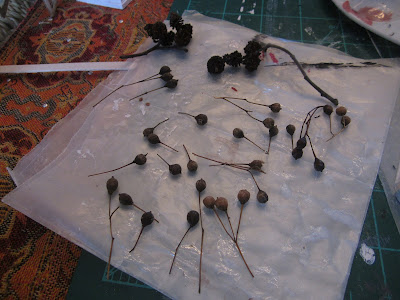
While I waited for the crackle to dry I took some seeds I had collected in the fall and coated everything with glue to keep them from drying out and breaking apart. These were to be used for decorating the pieces I was planning to make. I took a set of three rectangular blocks and painted the fronts of them with ivory craft paint then decorated them with strands of hemp string, tiny pieces of lycopodium, seeds and beads. These will sit on a shelf in the stall. In the second picture you can see I also painted up some wooden words to hang on the walls or sit on a shelf: Welcome; Home; Family; Friends; love.
Then I prepared an arrangement for the shelf on the side wall of the market stall. I used the candle holders, one of the Welcome signs I had made earlier, a large Christmas picture I mounted on wooden sticks, cutting and separating the strips to make it look like a vintage sign, and one of the smaller candle holders I showed you back in January. I think these will look good on that side shelf.
So, now I will show you where I am as of today: I have taken the remaining length of lights and glued them around the edges of the inside, while using six of them to push up through the holes I drilled in those two sets standing blocks of wood. I really like them a lot and will use that idea again in the future, I'm sure. I started filling the shelves with some ceramic pieces from Janice Crawley, some small blue "believe" signs I made, some more of the word signs, a set of the wrapped "presents" I talked about earlier in this post, and some little crystal angels. I still have a lot of things to finish up and add but at least I can now see the "light at the end of the tunnel". As you can see there are still a few lights hanging loose but I will weave those up onto the bottom shelf as I finish adding things there and on the floor beneath.
That brings us to the end of this post. I know I have been including Bruce's cat cartoon contributions in posts and, even though I have not posted in a while he continued to send me his little finds. However, the other night he sent me a different one with the subject in his email saying "This is us". I think it is a good example of how we managed to make it to our 50th wedding anniversary last year.
Enjoy and I hope to be more active on these boards as we move into summer. Love to all! TTFN!!
- Marilyn


