The only thing I like better than a day working on minis is a day working on minis with my friends.
Louise, Marijke and Susan all came over today and we worked on minis together. It was a great day. Though we all worked on separate things, we put our heads together to come up with a solution for this, a suggestion for that, caught up with what's going on in each of our lives and our families, had munchies and, in general, just enjoyed the opportunity to share the time with each other.
I have made some progress on the Remembrance Day room box, although it's not necessarily fast.
The last time I worked on it, several days ago, I left you with pictures of a basic brown box. Today, I heavily sanded all the walls. It certainly added to the rough character of the wood in general. Then I dry brushed over with white, further highlighting the roughness. I installed the shelves then I made up a mixture to cover the "dirt" floor.
The instructions from the magazine say to use equal parts of powdered drywall compound, garden soil and PVA glue, mixed up with enough water to make it spreadable. I wasn't keen on that idea so I started by mixing dry coffee grounds with dry tea from used tea bags. I actually really liked the way the blended colours looked like dirt. I think from now on, when making plants and flowers I will use this mixture as soil instead of one or the other. It looks more realistic in my mind. Then I mixed this dry coffee/tea with pre-mixed drywall compound and spread this mixture over the floor. It will dry quite light but I will be able to dry brush over it to bring out more of the dirt floor look.
You might notice a strange little square space on the floor that has no "dirt" compound on it. That is where the post for the roof support will go when it is time to put the roof on.
I installed 6 sandbags over the door lintel and installed the faux rusted corrugated metal panel to the right of the door. Marijke made the sand bags. Louise had painted the corrugated cardboard a silver metal colour first, then Marijke took over and aged it to look like rusted metal. I think it looks great.
I'm now ready to move on to the space outside the door opening where there will be a whole lot of sand bags and a pile of rocks, dirt and general rubble. I'm looking forward to that.
Not much else to report tonight so sorry for the short post. I'll be back with more on this project in a few days. TTFN! - Marilyn
Sunday, 10 February 2019
Wednesday, 6 February 2019
Gene Hackman's got nothin' on me!!!
I'm the Hackwoman!! The supreme Hackster! The Hackmeister!!
Accordingly I hacked, I cut, I banged, I gouged! I got 'er done man!
Working on the World War I bunker, after making sure all the walls were complete, it was time to rough it up even further. I used my knife and scissors to shave off chunks, slice a series of cracks, and bang in a variety of "worm holes". Then I went on to the next step - painting.
According to the instructions in Dollhouse and Miniature Scene, I was to first put on a heavy coat of raw umber over everything. Yes, it does look very dark right now but it requires a layering of different colours before we're done.
A few days before my hacking and gouging adventure, I went looking for a piece of burlap to use as a "curtain" over the entry. I wasn't worried because I knew I had lots of burlap in the garage that I use to cover some of my garden plants for the winter. However, when I looked at it, I realized the thread count was way too large to look scale-appropriate. So off to Dollarama I went. There I found a little cloth-lined burlap bag that looked perfect. I cut it apart, saving the lining for another project. I think you'll agree, it's the right scale. So now I just have to cut it to size, rip it up, dirty it up, put holes in it, and generally make it look like it's been hanging there for decades and decades.
I let the raw umber dry for about three hours, then went on to step number 2: using burnt umber, thinned with a little water, I lightly went over everything randomly, as they instructed. Question: If you plan to be random, is it really random???? Sorry, I'm in an existential mood right now. *smile*.
The burnt umber lightened it a bit and highlighted more of the rough texture of the wood. Can you see the difference??
I'm going to let it dry overnight before moving on to the next step which is heavy sanding of all surfaces. When that is done, I will dry-brush with white. More white will be added at a later step.
Just after I took that last picture, a hurricane hit my work table. You can just see its imminent arrival in the picture. Notice two little ears just beginning to show up behind the paint bottle on the table?!? She's such a joy!
After cleaning up the wreckage left behind by the retreating hurricane, I decided to call it a day. However, since all I gave you today was views of a dark brown box, I thought I would leave you with a couple of pictures of my very favourite subject - Christmas!!! This is a quick little project I did as a gift to my good friend Louise. I had seen a picture of one very like this a couple of years ago and fell in love with it. Unfortunately, I don't know who made the one that inspired me but I kept it in my head for a long time. If anyone is familiar with this project and can let me know who might have made the original one I hold in my memory, I'd love to give credit where credit is due. Anyway, I'm glad I finally made one - and may even make one for myself eventually. The light actually works and I have both Louise's and her DH's names on the mailbox to personalize it. It has hangers on the back so it can be put on a wall for Christmas, or it can stand on its own on a little shelf or table.
Unfortunately, I didn't have any little flamingos in my stash or I would have added one for my flamingo fanatic friend (I'm also in an alliterative mood tonight!). Surprise, surprise! Louise did have a little flamingo which she was able to set up beside the mailbox. I didn't get a picture of that but now it's perfect!
I hope you enjoyed tonight's post, even though it is quite short. I will be back after the next few steps of the World War I room box are completed. TTFN! - Marilyn
Accordingly I hacked, I cut, I banged, I gouged! I got 'er done man!
Working on the World War I bunker, after making sure all the walls were complete, it was time to rough it up even further. I used my knife and scissors to shave off chunks, slice a series of cracks, and bang in a variety of "worm holes". Then I went on to the next step - painting.
According to the instructions in Dollhouse and Miniature Scene, I was to first put on a heavy coat of raw umber over everything. Yes, it does look very dark right now but it requires a layering of different colours before we're done.
A few days before my hacking and gouging adventure, I went looking for a piece of burlap to use as a "curtain" over the entry. I wasn't worried because I knew I had lots of burlap in the garage that I use to cover some of my garden plants for the winter. However, when I looked at it, I realized the thread count was way too large to look scale-appropriate. So off to Dollarama I went. There I found a little cloth-lined burlap bag that looked perfect. I cut it apart, saving the lining for another project. I think you'll agree, it's the right scale. So now I just have to cut it to size, rip it up, dirty it up, put holes in it, and generally make it look like it's been hanging there for decades and decades.
I let the raw umber dry for about three hours, then went on to step number 2: using burnt umber, thinned with a little water, I lightly went over everything randomly, as they instructed. Question: If you plan to be random, is it really random???? Sorry, I'm in an existential mood right now. *smile*.
The burnt umber lightened it a bit and highlighted more of the rough texture of the wood. Can you see the difference??
I'm going to let it dry overnight before moving on to the next step which is heavy sanding of all surfaces. When that is done, I will dry-brush with white. More white will be added at a later step.
Just after I took that last picture, a hurricane hit my work table. You can just see its imminent arrival in the picture. Notice two little ears just beginning to show up behind the paint bottle on the table?!? She's such a joy!
After cleaning up the wreckage left behind by the retreating hurricane, I decided to call it a day. However, since all I gave you today was views of a dark brown box, I thought I would leave you with a couple of pictures of my very favourite subject - Christmas!!! This is a quick little project I did as a gift to my good friend Louise. I had seen a picture of one very like this a couple of years ago and fell in love with it. Unfortunately, I don't know who made the one that inspired me but I kept it in my head for a long time. If anyone is familiar with this project and can let me know who might have made the original one I hold in my memory, I'd love to give credit where credit is due. Anyway, I'm glad I finally made one - and may even make one for myself eventually. The light actually works and I have both Louise's and her DH's names on the mailbox to personalize it. It has hangers on the back so it can be put on a wall for Christmas, or it can stand on its own on a little shelf or table.
Unfortunately, I didn't have any little flamingos in my stash or I would have added one for my flamingo fanatic friend (I'm also in an alliterative mood tonight!). Surprise, surprise! Louise did have a little flamingo which she was able to set up beside the mailbox. I didn't get a picture of that but now it's perfect!
I hope you enjoyed tonight's post, even though it is quite short. I will be back after the next few steps of the World War I room box are completed. TTFN! - Marilyn
Wednesday, 30 January 2019
2018 progress on Advent room box
On my last post I showed you the Advent room box that I started in 2017. Okay - I'm very aware it was supposed to have been completed from December 1st to December 24th, 2017 But I guess I'm one of those people who move to the beat of a different drum - and my drum beats a very slooooow beat.
So, I did bring the room box back out of storage on December 1st 2018 and started working on it again. The first thing I did was to make a lap blanket to drape across the footstool and some coordinating throw cushions. I tried to use colours and patterns that would go well with the burgundy striped curtains but I particularly liked the way the red velvet ones worked up. Lovely fabric to work with.
Then I started thinking about what other decorations would add the right personality to the room. I needed to fill the large white wall space to the left of the fireplace. In the Dutch magazine, they built three tiny "shelf sitter" Santas and glued them inside small square clear plastic boxes, hung on their sides. I didn't really like them so did my own version. I made one shelf with three tiny Santas that I made from craft sticks (the popsicle stick size). I simply cut lengths of about 1" (2.54 cm., then I marked the centrpoint at the top and cut from the bottom corners to the centre point, leaving me with 3 little triangles. I then added tiny air-dry clay beads at the point, to act as a pom-pom, painted the little triangle red and white to look like a tiny old world Santa, and used a very fine pen to add a couple of dots for eyes. The I glued these three onto the little shelf I had made. This was definitely not enough to fill up that large wall so I proceeded to cut 6 more little triangles which I turned into three little white angels and three little Christmas trees which I also glued to tiny shelves.
Although the white angels blend into the wall, I still like the way the arrangement turned out.
Then I needed something for over the fireplace so I took a piece of artificial greenery that had fallen off my full-size garland, trimmed the needles down so they were very short, and formed a wreath. I added a few little beads for decoration and glued a little sheep into the centre. This will probably be the first thing I re-do next year. I think the decorations need to be larger to show up better and I will replace the white lamb with something that will show up better against the white fireplace.
I trimmed down another piece of my real-life artificial garland and trimmed across the mantle. Again - I need to add some larger decorations next year, plus some candlesticks.
I then wired in a little coal fire which glows red when turned on - adding a little "warmth" - at least visually.
Then I made an accent table for the corner. I used fabrics that were also used for the cushions so that it provided some consistency. These little round tables are so easy to make but, just on the off-chance that there is someone reading this who is truly a beginner, my next post will include a tutorial on the table, including how to make the star-shaped table topper.
I decorated a little Christmas tree, added some presents on the table and on the floor by the fireplace. Then came the "piece de resistance"!
On December 27th, I was in the Hallmark store to see if I could purchase a collector Santa to add to my display for next year (I buy one every year), when I noticed that their collector ornaments, including their "mini" ornaments were on sale for 40% off. I found an adorable little dollhouse which, when you press down on the chimney, the roof lights up with a multi-coloured light show. Adorable! And they also had a little red guitar which plays a Christmas tune (one of 2 or 3 different tunes - it changes each time), when you press the button on the side. I couldn't resist them!! I also added a cross-stitched cushion made by my friend Marijke from Pulchinella's Cellar. So - this is how the Advent room box looked by the end of this Christmas season:
Only one more Christmas season to go and I'll be finished! *smile* Next December I will be adding an advent calendar to the wall to the left of the window, tiny "Putz" houses across the top of the window valance, a Christmas candelabra on the window sill, candlesticks on the mantle, and a few other elements that I will keep secret for now. I love to leave you in suspense!
A little note on my pictures: I have been complaining for a long time now that my camera does not take very good pictures any more. They come out way more fuzzy than I would like. However, recently, when I turned my camera on and the lens spiraled out, I turned it around and took a look at the actual lens. OMG - it was filthy! You may notice that the last two pictures above are much clearer than most I've taken over the last couple of years. When my camera is shut off, the lens retracts and a shield closes over it automatically so I never really looked at it before. I will make sure I keep it clean from now on!
I leave you tonight with another view of our little helper. My DH bought a small work table for me yesterday. It will be easy to carry outside to our deck when the weather gets nicer so I can use it for a small table saw and the scroll saw to avoid all the dust and wood chips inside the house. There were only a couple of parts he had to screw together so, of course Miss Bridie offered her assistance once again.
I do so love it when she's helping her Daddy! It means she's leaving me alone. TTFN! - Marilyn
So, I did bring the room box back out of storage on December 1st 2018 and started working on it again. The first thing I did was to make a lap blanket to drape across the footstool and some coordinating throw cushions. I tried to use colours and patterns that would go well with the burgundy striped curtains but I particularly liked the way the red velvet ones worked up. Lovely fabric to work with.
Then I started thinking about what other decorations would add the right personality to the room. I needed to fill the large white wall space to the left of the fireplace. In the Dutch magazine, they built three tiny "shelf sitter" Santas and glued them inside small square clear plastic boxes, hung on their sides. I didn't really like them so did my own version. I made one shelf with three tiny Santas that I made from craft sticks (the popsicle stick size). I simply cut lengths of about 1" (2.54 cm., then I marked the centrpoint at the top and cut from the bottom corners to the centre point, leaving me with 3 little triangles. I then added tiny air-dry clay beads at the point, to act as a pom-pom, painted the little triangle red and white to look like a tiny old world Santa, and used a very fine pen to add a couple of dots for eyes. The I glued these three onto the little shelf I had made. This was definitely not enough to fill up that large wall so I proceeded to cut 6 more little triangles which I turned into three little white angels and three little Christmas trees which I also glued to tiny shelves.
Although the white angels blend into the wall, I still like the way the arrangement turned out.
Then I needed something for over the fireplace so I took a piece of artificial greenery that had fallen off my full-size garland, trimmed the needles down so they were very short, and formed a wreath. I added a few little beads for decoration and glued a little sheep into the centre. This will probably be the first thing I re-do next year. I think the decorations need to be larger to show up better and I will replace the white lamb with something that will show up better against the white fireplace.
I trimmed down another piece of my real-life artificial garland and trimmed across the mantle. Again - I need to add some larger decorations next year, plus some candlesticks.
I then wired in a little coal fire which glows red when turned on - adding a little "warmth" - at least visually.
Then I made an accent table for the corner. I used fabrics that were also used for the cushions so that it provided some consistency. These little round tables are so easy to make but, just on the off-chance that there is someone reading this who is truly a beginner, my next post will include a tutorial on the table, including how to make the star-shaped table topper.
I decorated a little Christmas tree, added some presents on the table and on the floor by the fireplace. Then came the "piece de resistance"!
On December 27th, I was in the Hallmark store to see if I could purchase a collector Santa to add to my display for next year (I buy one every year), when I noticed that their collector ornaments, including their "mini" ornaments were on sale for 40% off. I found an adorable little dollhouse which, when you press down on the chimney, the roof lights up with a multi-coloured light show. Adorable! And they also had a little red guitar which plays a Christmas tune (one of 2 or 3 different tunes - it changes each time), when you press the button on the side. I couldn't resist them!! I also added a cross-stitched cushion made by my friend Marijke from Pulchinella's Cellar. So - this is how the Advent room box looked by the end of this Christmas season:
Only one more Christmas season to go and I'll be finished! *smile* Next December I will be adding an advent calendar to the wall to the left of the window, tiny "Putz" houses across the top of the window valance, a Christmas candelabra on the window sill, candlesticks on the mantle, and a few other elements that I will keep secret for now. I love to leave you in suspense!
A little note on my pictures: I have been complaining for a long time now that my camera does not take very good pictures any more. They come out way more fuzzy than I would like. However, recently, when I turned my camera on and the lens spiraled out, I turned it around and took a look at the actual lens. OMG - it was filthy! You may notice that the last two pictures above are much clearer than most I've taken over the last couple of years. When my camera is shut off, the lens retracts and a shield closes over it automatically so I never really looked at it before. I will make sure I keep it clean from now on!
I leave you tonight with another view of our little helper. My DH bought a small work table for me yesterday. It will be easy to carry outside to our deck when the weather gets nicer so I can use it for a small table saw and the scroll saw to avoid all the dust and wood chips inside the house. There were only a couple of parts he had to screw together so, of course Miss Bridie offered her assistance once again.
I do so love it when she's helping her Daddy! It means she's leaving me alone. TTFN! - Marilyn
Monday, 28 January 2019
Extra help - not always appreciated...
Yes, I am working away at the Remembrance Day project but will wait to update the progress on that until I have a couple more stages done. So let's catch up on what else is going on.
First of all, this year my DH gave me the best Christmas present ever...which is also the worst!!!
Take a good look at this little face. Study it carefully. Memorize every little speckle and spot. This is her calm and innocent look. It was the first and last time we saw it and don't expect to be seeing it again any time soon.
This is Bridie. Doesn't she look all shy and quiet??? Yes, I do love her to death but it has been about 30 years since we actually had a kitten in the house since we have tended to adopt older cats and each have lived good long lives. We forgot what having a kitten could be like. It took her all of 3 minutes to settle in once we brought her home and the house has not been the same since. Although she was my Christmas present we picked her up early in December so she was so very involved in decorating the house for Christmas, wrapping presents, and taking down the decorations in early January.
In between she has volunteered her services for stripping and remaking beds, working on the computer, sorting laundry, sweeping, dusting and vacuuming (she has no fear of noises at all), drying my hair, showering, herding us out of the TV room and into bed when it's time, waking us up in the morning so we don't miss anything important (like filling her food bowls) ....there is simply no end to her generosity when it comes time to help out around the house.
The icing on the cake is how excited she gets when it's time to help Mommy work on her miniatures. As a result, I cannot tell you how many small pieces, and sometimes even large ones, go missing from my work table, only to be found in the strangest of places anywhere in the house several days later. Reaching into my tool bag has become somewhat of a hazard. Somehow, when I'm not looking, the tools and supplies inside seem to have sprouted fur and tiny, sharp little nails as my hand always comes back out with dots of blood. It has been a truly interesting experience and reinforces our earlier practice of adopting older cats. If only she wasn't so darn cute....
Anyway, I shall persevere and continue to work on my minis - just keep extra bandaids close to hand.
So, before I put this project away until next December, I thought I would finally introduce you to it. Last December (2017 that is), my friend Marijke invited Louise and I to join her in each building our own Christmas advent project. The project was from an old Dutch miniature magazine and involved building a small room box during the month of December. The theory was that the 1st and 2nd of December we would build the box. On the 3rd we would add the window and make curtains. Next we would make a chair, an ottoman, an area rug, etc., etc., adding an element each day until it was complete by December 24th. Okay - that didn't work out so well but I am having fun with it.
Here is the picture of the one in the Dutch magazine:
So Feeling very ambitious, we started our projects on December 1st, 2017. Instead of 2 days, it actually took me 4 days to cut out the pieces, put them together, build out the fireplace, and the window and cover everything in stucco (premixed crack filler). The outside walls are completely covered in stucco but I marked a line where the wainscoting was going and put the stucco just down to that point on the inside.
Before putting it together I cut out the window area and placed a nice winter picture on the outside, giving it a nice depth for the windowsill. I trimmed that out and then I bricked the fireplace by putting textured brick paper on the outside of the fireplace and painted it white, put the textured paper inside and blackened it up, and put in a real brick hearth. I had previously drilled a hole through and plugged it with a toothpick so I could fit wiring through if I wanted to.
Next I laid a wooden floor and installed the wainscoting, then I was prepared to whitewash everything. Okay - - it was at this point when I realized two things: 1. I should have painted all the window trim before installing it, and 2. I forgot to put the plastic in for the window glass before installing the window mullions. I never seem to do things the easy way. I then cut a piece of plastic but was not able to slide it under the mullions in one piece. So I slit it vertically down the middle, slid in one half, then the other. The seam is completely hidden in the area where the middle portions of the frame come together in the bottom section. In the top horizontal section, the seam falls directly in line with a branch in the picture behind it so is almost impossible to see unless you know it's there. Once that was completed I was able to using masking tape over the plastic sections so I could whitewash, then paint the window frame. Good to go - even it it did take several steps more than if I had actually paid attention to what I was doing.
Once this main part of the room box was done, in December 2017 the only other things I completed was making curtains, using a cardboard backing with wooden skewers glued down to it. I then was able to glue the fabric over these skewers so it formed perfect looking little pleats.
Then I used a piece of tea-dyed Aida cloth, pulled out some threads so I could insert some red sparkly ribbon and stitch some green accents down the sides of the ribbon. This became my little area carpet.
I also made a small white chair and ottoman but didn't get pictures of them at that stage.
So - that is all I was able to get done in 2017. On Wednesday's post I will show you the work completed on this "advent" room box in December 2018. It really is coming along! Until then - I have to go drag Bridie out of the treat cabinet! TTFN! - Marilyn
First of all, this year my DH gave me the best Christmas present ever...which is also the worst!!!
Take a good look at this little face. Study it carefully. Memorize every little speckle and spot. This is her calm and innocent look. It was the first and last time we saw it and don't expect to be seeing it again any time soon.
This is Bridie. Doesn't she look all shy and quiet??? Yes, I do love her to death but it has been about 30 years since we actually had a kitten in the house since we have tended to adopt older cats and each have lived good long lives. We forgot what having a kitten could be like. It took her all of 3 minutes to settle in once we brought her home and the house has not been the same since. Although she was my Christmas present we picked her up early in December so she was so very involved in decorating the house for Christmas, wrapping presents, and taking down the decorations in early January.
In between she has volunteered her services for stripping and remaking beds, working on the computer, sorting laundry, sweeping, dusting and vacuuming (she has no fear of noises at all), drying my hair, showering, herding us out of the TV room and into bed when it's time, waking us up in the morning so we don't miss anything important (like filling her food bowls) ....there is simply no end to her generosity when it comes time to help out around the house.
The icing on the cake is how excited she gets when it's time to help Mommy work on her miniatures. As a result, I cannot tell you how many small pieces, and sometimes even large ones, go missing from my work table, only to be found in the strangest of places anywhere in the house several days later. Reaching into my tool bag has become somewhat of a hazard. Somehow, when I'm not looking, the tools and supplies inside seem to have sprouted fur and tiny, sharp little nails as my hand always comes back out with dots of blood. It has been a truly interesting experience and reinforces our earlier practice of adopting older cats. If only she wasn't so darn cute....
Anyway, I shall persevere and continue to work on my minis - just keep extra bandaids close to hand.
So, before I put this project away until next December, I thought I would finally introduce you to it. Last December (2017 that is), my friend Marijke invited Louise and I to join her in each building our own Christmas advent project. The project was from an old Dutch miniature magazine and involved building a small room box during the month of December. The theory was that the 1st and 2nd of December we would build the box. On the 3rd we would add the window and make curtains. Next we would make a chair, an ottoman, an area rug, etc., etc., adding an element each day until it was complete by December 24th. Okay - that didn't work out so well but I am having fun with it.
Here is the picture of the one in the Dutch magazine:
So Feeling very ambitious, we started our projects on December 1st, 2017. Instead of 2 days, it actually took me 4 days to cut out the pieces, put them together, build out the fireplace, and the window and cover everything in stucco (premixed crack filler). The outside walls are completely covered in stucco but I marked a line where the wainscoting was going and put the stucco just down to that point on the inside.
Before putting it together I cut out the window area and placed a nice winter picture on the outside, giving it a nice depth for the windowsill. I trimmed that out and then I bricked the fireplace by putting textured brick paper on the outside of the fireplace and painted it white, put the textured paper inside and blackened it up, and put in a real brick hearth. I had previously drilled a hole through and plugged it with a toothpick so I could fit wiring through if I wanted to.
Next I laid a wooden floor and installed the wainscoting, then I was prepared to whitewash everything. Okay - - it was at this point when I realized two things: 1. I should have painted all the window trim before installing it, and 2. I forgot to put the plastic in for the window glass before installing the window mullions. I never seem to do things the easy way. I then cut a piece of plastic but was not able to slide it under the mullions in one piece. So I slit it vertically down the middle, slid in one half, then the other. The seam is completely hidden in the area where the middle portions of the frame come together in the bottom section. In the top horizontal section, the seam falls directly in line with a branch in the picture behind it so is almost impossible to see unless you know it's there. Once that was completed I was able to using masking tape over the plastic sections so I could whitewash, then paint the window frame. Good to go - even it it did take several steps more than if I had actually paid attention to what I was doing.
Once this main part of the room box was done, in December 2017 the only other things I completed was making curtains, using a cardboard backing with wooden skewers glued down to it. I then was able to glue the fabric over these skewers so it formed perfect looking little pleats.
Then I used a piece of tea-dyed Aida cloth, pulled out some threads so I could insert some red sparkly ribbon and stitch some green accents down the sides of the ribbon. This became my little area carpet.
I also made a small white chair and ottoman but didn't get pictures of them at that stage.
So - that is all I was able to get done in 2017. On Wednesday's post I will show you the work completed on this "advent" room box in December 2018. It really is coming along! Until then - I have to go drag Bridie out of the treat cabinet! TTFN! - Marilyn
Thursday, 24 January 2019
Better late than never!!
Yes - you're absolutely right - it has been well over a year since you've seen anything from me. You know how you always INTEND to do something but before you know it, it's bedtime again and you promise you'll get to it tomorrow?? I had a lot of that going on. *smile*
So, I have so many things to tell you!!! Where to start? Where to start? Hmmm....
How about if we work our way backwards - what am I working on now? What was I doing before that? And so on..
For those of you who also follow my friend Marijke's blog at http://pulchinellascellar.blogspot.com/ you'll already know that our mini group is working on a single project that we plan on donating to our local military museum when completed.
For our project we are following the instructions we found in the August, September and October 2014 issues of Dollhouse and Miniature Scene. Titled "We will remember them...", the project was designed and created by Celia Thomas and Robin Britton of Nostalgia in Miniature Workshops.
A very poignant scene, this project portrays a long-abandoned military bunker from WWI, lying hidden and forgotten, unbeknownst to the aging veteran strolling through the poppy fields above, many decades after his harrowing experiences of wartime.
Marijke, Louise, Susan and I will be following the instructions for the project but will change some of the details to better reflect our Canadian viewpoint. Since Canada went to war in 1914 as part of the British Empire, the Union Jack is appropriate in this project. At that time, Canada's flag, the Red Ensign, was basically changing every time a new province joined Confederation. The Union Jack was a constant and frequently represented all of the Empire. We will try to find other little ways to identify our Canadian theme.
So, our plan was to divide and conquer. Each of us will work on pieces of the project, then come together to put the finishing touches together. As I mentioned above, check out Marijke's blog for the accessories she's been working on. It will be these accessories that really bring the realism into the project.
As for my contribution, I've started by putting the actual box together. From the DHMS magazine, August 2014, here is a picture of the basic pieces.
While I could have cut out the pieces myself, my darling DH volunteered to do it and hey, I wouldn't want to disappoint him now, would I? I'm such a good wife! We used 1/4" MDF. Here, in the Fredericton area, the only place I can buy 1/4" MDF is at Kent building supplies. It's really inexpensive (around $24 for a 4 ft. x 8 ft. sheet) and I always buy a full sheet because I know I will use it up anyway so why not? I have them cut it in two at Kent's to make it easier to get home. This time I shared it with Louise who took one of the 4x4 pieces for her own use. That size goes a long way in mini projects.
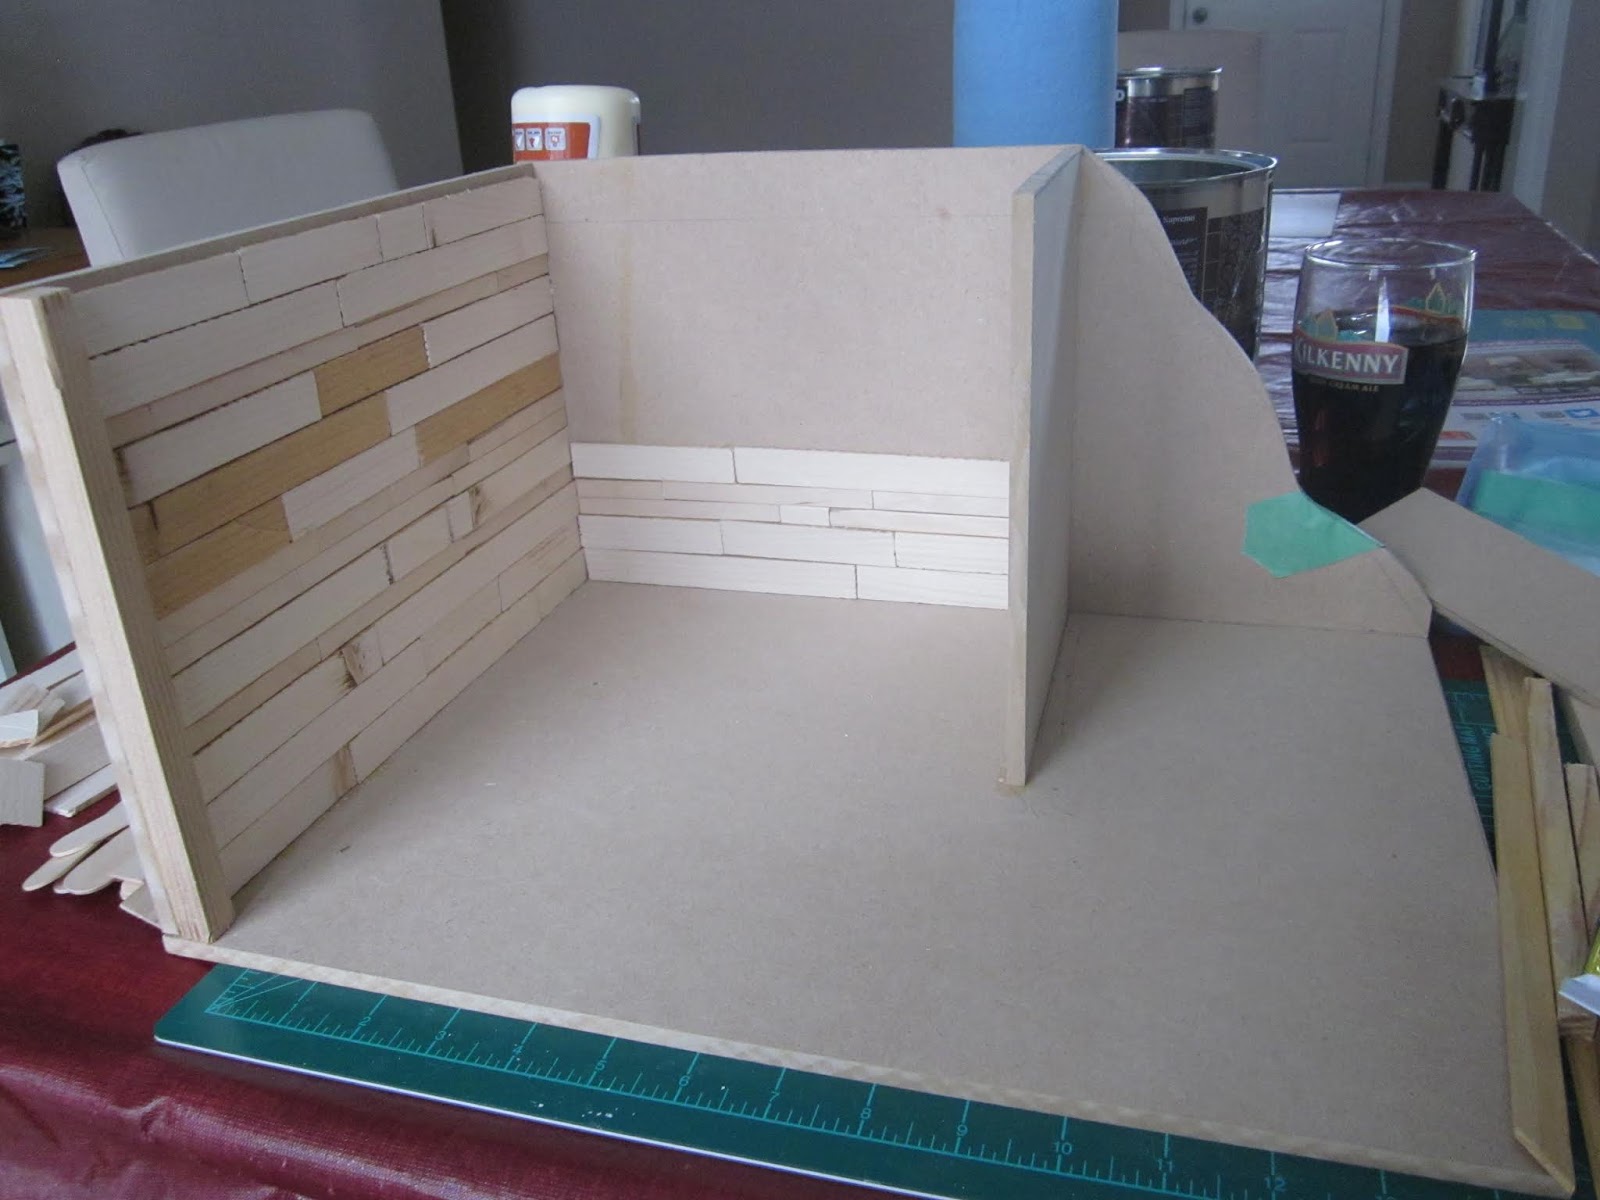
And then the build began. I used my favourite Lepage's carpenter's glue to put the pieces together. Then I began the process of applying rough-cut boards to the walls, and added 1/2" square wall studs. Marijke's DH, Chris, cut out a bunch of 3/4" by 1/8" strips for me out of some rough wood. I interspersed these with narrow widths cut from craft sticks since the soldiers would have used whatever they could have put their hands on.
Once all the wood strips were in, I installed the doorway and glued in the last wall piece, which will be covered in faux corrugated steel. The doorway and small wall piece are installed at a slight angle, not just to provide a more interesting look, but also to allow for better viewing of the inside once completed.
Next step - rough up all of the boards even more than they already are, cut out some wood for shelves, roof supports, and a support post, then start painting the inside.
So - stay tuned! There is more to come. I will try to post every few days to let you know of the progress of our group project, and to catch you up on other things I've been working on in my long absence from posting. Until then...TTFN! - Marilyn
So, I have so many things to tell you!!! Where to start? Where to start? Hmmm....
How about if we work our way backwards - what am I working on now? What was I doing before that? And so on..
For those of you who also follow my friend Marijke's blog at http://pulchinellascellar.blogspot.com/ you'll already know that our mini group is working on a single project that we plan on donating to our local military museum when completed.
For our project we are following the instructions we found in the August, September and October 2014 issues of Dollhouse and Miniature Scene. Titled "We will remember them...", the project was designed and created by Celia Thomas and Robin Britton of Nostalgia in Miniature Workshops.
A very poignant scene, this project portrays a long-abandoned military bunker from WWI, lying hidden and forgotten, unbeknownst to the aging veteran strolling through the poppy fields above, many decades after his harrowing experiences of wartime.
Marijke, Louise, Susan and I will be following the instructions for the project but will change some of the details to better reflect our Canadian viewpoint. Since Canada went to war in 1914 as part of the British Empire, the Union Jack is appropriate in this project. At that time, Canada's flag, the Red Ensign, was basically changing every time a new province joined Confederation. The Union Jack was a constant and frequently represented all of the Empire. We will try to find other little ways to identify our Canadian theme.
So, our plan was to divide and conquer. Each of us will work on pieces of the project, then come together to put the finishing touches together. As I mentioned above, check out Marijke's blog for the accessories she's been working on. It will be these accessories that really bring the realism into the project.
As for my contribution, I've started by putting the actual box together. From the DHMS magazine, August 2014, here is a picture of the basic pieces.
While I could have cut out the pieces myself, my darling DH volunteered to do it and hey, I wouldn't want to disappoint him now, would I? I'm such a good wife! We used 1/4" MDF. Here, in the Fredericton area, the only place I can buy 1/4" MDF is at Kent building supplies. It's really inexpensive (around $24 for a 4 ft. x 8 ft. sheet) and I always buy a full sheet because I know I will use it up anyway so why not? I have them cut it in two at Kent's to make it easier to get home. This time I shared it with Louise who took one of the 4x4 pieces for her own use. That size goes a long way in mini projects.
And then the build began. I used my favourite Lepage's carpenter's glue to put the pieces together. Then I began the process of applying rough-cut boards to the walls, and added 1/2" square wall studs. Marijke's DH, Chris, cut out a bunch of 3/4" by 1/8" strips for me out of some rough wood. I interspersed these with narrow widths cut from craft sticks since the soldiers would have used whatever they could have put their hands on.
Once all the wood strips were in, I installed the doorway and glued in the last wall piece, which will be covered in faux corrugated steel. The doorway and small wall piece are installed at a slight angle, not just to provide a more interesting look, but also to allow for better viewing of the inside once completed.
Next step - rough up all of the boards even more than they already are, cut out some wood for shelves, roof supports, and a support post, then start painting the inside.
So - stay tuned! There is more to come. I will try to post every few days to let you know of the progress of our group project, and to catch you up on other things I've been working on in my long absence from posting. Until then...TTFN! - Marilyn
Friday, 29 September 2017
...and miles to go before I sleep....
...or before I finish...or something like that! Or both!
Arriving home from Camp Mini Ha Ha on Monday afternoon with nothing completed on my project but the portico and my pond (which I still love looking at), I sat down at my dining table on Tuesday and worked away at the tower and the main house while I listened to the banging and stomping of the contractors working away in my basement after the flooding incident from August (about time they got to work, isn't it?).
I haven't had time to work on it since Tuesday but I'll give you a run-down of where I'm at now.
Before I left Camp I had started to glue rocks around the base of the tower to tie it into the style of the front portico. Okay - not my favourite job but it's done now so that's a relief. Here it is with just a small section left to do. Notice that I painted the cylinder black in the section where the stones were going. If there were any spaces visible I didn't want it to show through as light brown or worse - white!
While I was at Camp I had applied tissue paper to the upper walls of the tower and to the inside and outside walls of the house, to make it look like stucco. On Tuesday, I mixed up some paint using "ivory" mixed with white for the first coat. I thought it was way too yellow looking so I mixed up a second batch, starting with the white this time and adding small bits of ivory to get a colour I liked better. I don't know if you can notice the difference in this photo but the tower is still showing the yellowish colour while the front wall of the house has been repainted with the new colour. You can click on the picture to get a larger size if you want.
While still at Camp I had Wayne - our wonderful carpentry assistant and all-round handyman, cut out some circular windows in the tower. Once home I wondered how I should finish these cut edges. The simple answer would be to use paper or a lightweight cardboard but - let me ask you this: have you ever known me to take the easy way??? Of course not! So, while I was painting all the walls, I dropped several narrow coffee stir sticks in a pot of water on the stove and let them boil away.
Yes, you're absolutely right - at one point I was so engrossed in my painting that I forgot they were on the stove and yes, they did boil dry. Luckily the smell alerted me very early so I was able to fill the pot back up and bring them back to a boil without any real damage. I watched them carefully after that. I let them simmer away for a couple of hours and, I must admit, they were still difficult to bend around the inside of these circular windows and the door frames at this point. I probably should have left them for another hour or so. If the diameter of the circles had been larger it would've been easier. First, I took an old small diameter pill bottle and wrapped a stick around that while it was still hot and wet. Then I cut it to length quickly before it cooled down too much, and slid it into the opening which I had already covered with Quick Grip glue. It might not be perfect but all my round openings are now lined with wood:
In the picture above showing the closeup of the rocks on the bottom of the tower, you might notice that I lined the bottom two-thirds of the tower with a peel and stick paper that looked like very narrow vertical boards. I'm going to put a more decorative paper on the top one third since this is where I will be putting a bathroom - even though you will only be able to see it through the windows -that's not the point! The point is that even mini people don't like to have to use an outhouse in the middle of winter or to bathe in the river! My little residents enjoy their creature comforts!
So, this weekend I'm hoping to finish lining the other window frames, plan out my lighting, build a second set of stairs to reach the bathroom level of the tower, and faux paint both sets of stairs to look like limestone rock. Then I have to get serious about planning furniture placement and start putting the walls of the house together. I still have a very long way to go before I get to the landscaping - which is the part I'm really looking forward to because I've never done it before. Have I mentioned this is only the 4th year I have actually been building minis? I'm not sure I have enough years left to become as practiced and talented as so many of you out there but I'm going to give it my best effort. So - if I want to live that long I should make sure I get my "beauty rest". Okay - that's definitely not working for me but, hey, I live in hope. so, until my next post -- TTFN!! - Marilyn
Arriving home from Camp Mini Ha Ha on Monday afternoon with nothing completed on my project but the portico and my pond (which I still love looking at), I sat down at my dining table on Tuesday and worked away at the tower and the main house while I listened to the banging and stomping of the contractors working away in my basement after the flooding incident from August (about time they got to work, isn't it?).
I haven't had time to work on it since Tuesday but I'll give you a run-down of where I'm at now.
Before I left Camp I had started to glue rocks around the base of the tower to tie it into the style of the front portico. Okay - not my favourite job but it's done now so that's a relief. Here it is with just a small section left to do. Notice that I painted the cylinder black in the section where the stones were going. If there were any spaces visible I didn't want it to show through as light brown or worse - white!
While I was at Camp I had applied tissue paper to the upper walls of the tower and to the inside and outside walls of the house, to make it look like stucco. On Tuesday, I mixed up some paint using "ivory" mixed with white for the first coat. I thought it was way too yellow looking so I mixed up a second batch, starting with the white this time and adding small bits of ivory to get a colour I liked better. I don't know if you can notice the difference in this photo but the tower is still showing the yellowish colour while the front wall of the house has been repainted with the new colour. You can click on the picture to get a larger size if you want.
While still at Camp I had Wayne - our wonderful carpentry assistant and all-round handyman, cut out some circular windows in the tower. Once home I wondered how I should finish these cut edges. The simple answer would be to use paper or a lightweight cardboard but - let me ask you this: have you ever known me to take the easy way??? Of course not! So, while I was painting all the walls, I dropped several narrow coffee stir sticks in a pot of water on the stove and let them boil away.
Yes, you're absolutely right - at one point I was so engrossed in my painting that I forgot they were on the stove and yes, they did boil dry. Luckily the smell alerted me very early so I was able to fill the pot back up and bring them back to a boil without any real damage. I watched them carefully after that. I let them simmer away for a couple of hours and, I must admit, they were still difficult to bend around the inside of these circular windows and the door frames at this point. I probably should have left them for another hour or so. If the diameter of the circles had been larger it would've been easier. First, I took an old small diameter pill bottle and wrapped a stick around that while it was still hot and wet. Then I cut it to length quickly before it cooled down too much, and slid it into the opening which I had already covered with Quick Grip glue. It might not be perfect but all my round openings are now lined with wood:
In the picture above showing the closeup of the rocks on the bottom of the tower, you might notice that I lined the bottom two-thirds of the tower with a peel and stick paper that looked like very narrow vertical boards. I'm going to put a more decorative paper on the top one third since this is where I will be putting a bathroom - even though you will only be able to see it through the windows -that's not the point! The point is that even mini people don't like to have to use an outhouse in the middle of winter or to bathe in the river! My little residents enjoy their creature comforts!
So, this weekend I'm hoping to finish lining the other window frames, plan out my lighting, build a second set of stairs to reach the bathroom level of the tower, and faux paint both sets of stairs to look like limestone rock. Then I have to get serious about planning furniture placement and start putting the walls of the house together. I still have a very long way to go before I get to the landscaping - which is the part I'm really looking forward to because I've never done it before. Have I mentioned this is only the 4th year I have actually been building minis? I'm not sure I have enough years left to become as practiced and talented as so many of you out there but I'm going to give it my best effort. So - if I want to live that long I should make sure I get my "beauty rest". Okay - that's definitely not working for me but, hey, I live in hope. so, until my next post -- TTFN!! - Marilyn
Thursday, 28 September 2017
Keeping my promises
Last night I promised you I would give you an update on the pond for the writer's retreat project and I do like to keep my promises whenever possible. *smile*
So - if you remember from my August post, I had purchased a new laptop mouse for my computer and, when I tipped the packaging upside down to get the mouse out, I realized what I held in my hand would make a perfect little pond for my landscaping at the writer's retreat. So, I painted it black/very dark green on the outside before going to Camp. One of the side workshops was about building a pond so I really lucked in on that!!!
Our teacher for this workshop, Adrian C. from Ontario, gave us all a really good introduction to making ponds, materials to use, those to avoid, how to make a formal pond and an informal pond. Then we got started. Adrian provided lots of small shapes that could be used for little ponds in 1:24 scale. Many of them came from the shapes found in chocolate boxes but she also had several other shapes to choose from. She suggested we each try two different ponds but since mine was so much deeper than these other forms, I didn't want to be greedy so used my own mold and then had a tiny shell bird bath filled as well because it took only a couple of drops of resin for that. I will show you the bird bath as I progress to the landscaping portion of my build.
For now, here is my pond, all completely filled and hardened. Firstly, I am showing the underside of my pond. Looks just like a computer mouse, doesn't it?
Following Adrian's instructions, I started by "painting" the bottom of the inside with a thin application of white glue then sprinkled it with an appropriate scale of grit for the bottom of the pond. Adrian was very specific when she told us to make sure we shook out any extra grit, and even to blow on it so no loose bits were left, otherwise they would float in the resin and ruin the look of our ponds. Then we each picked out plants from her extensive supply of scale-appropriate dried materials and glued them to the sides of our ponds. Those with shallow pond forms also glued tiny fish to the bottom of the form in preparation for the first pour.
Because my pond was much deeper, I chose to wait until the second pour before placing fish in the hopes of showing depth in the pond. Adrian instructed us to pour no more than 1/4" maximum of the material at one time, then to wait until it was thoroughly cured, at least overnight, before making the next pour.
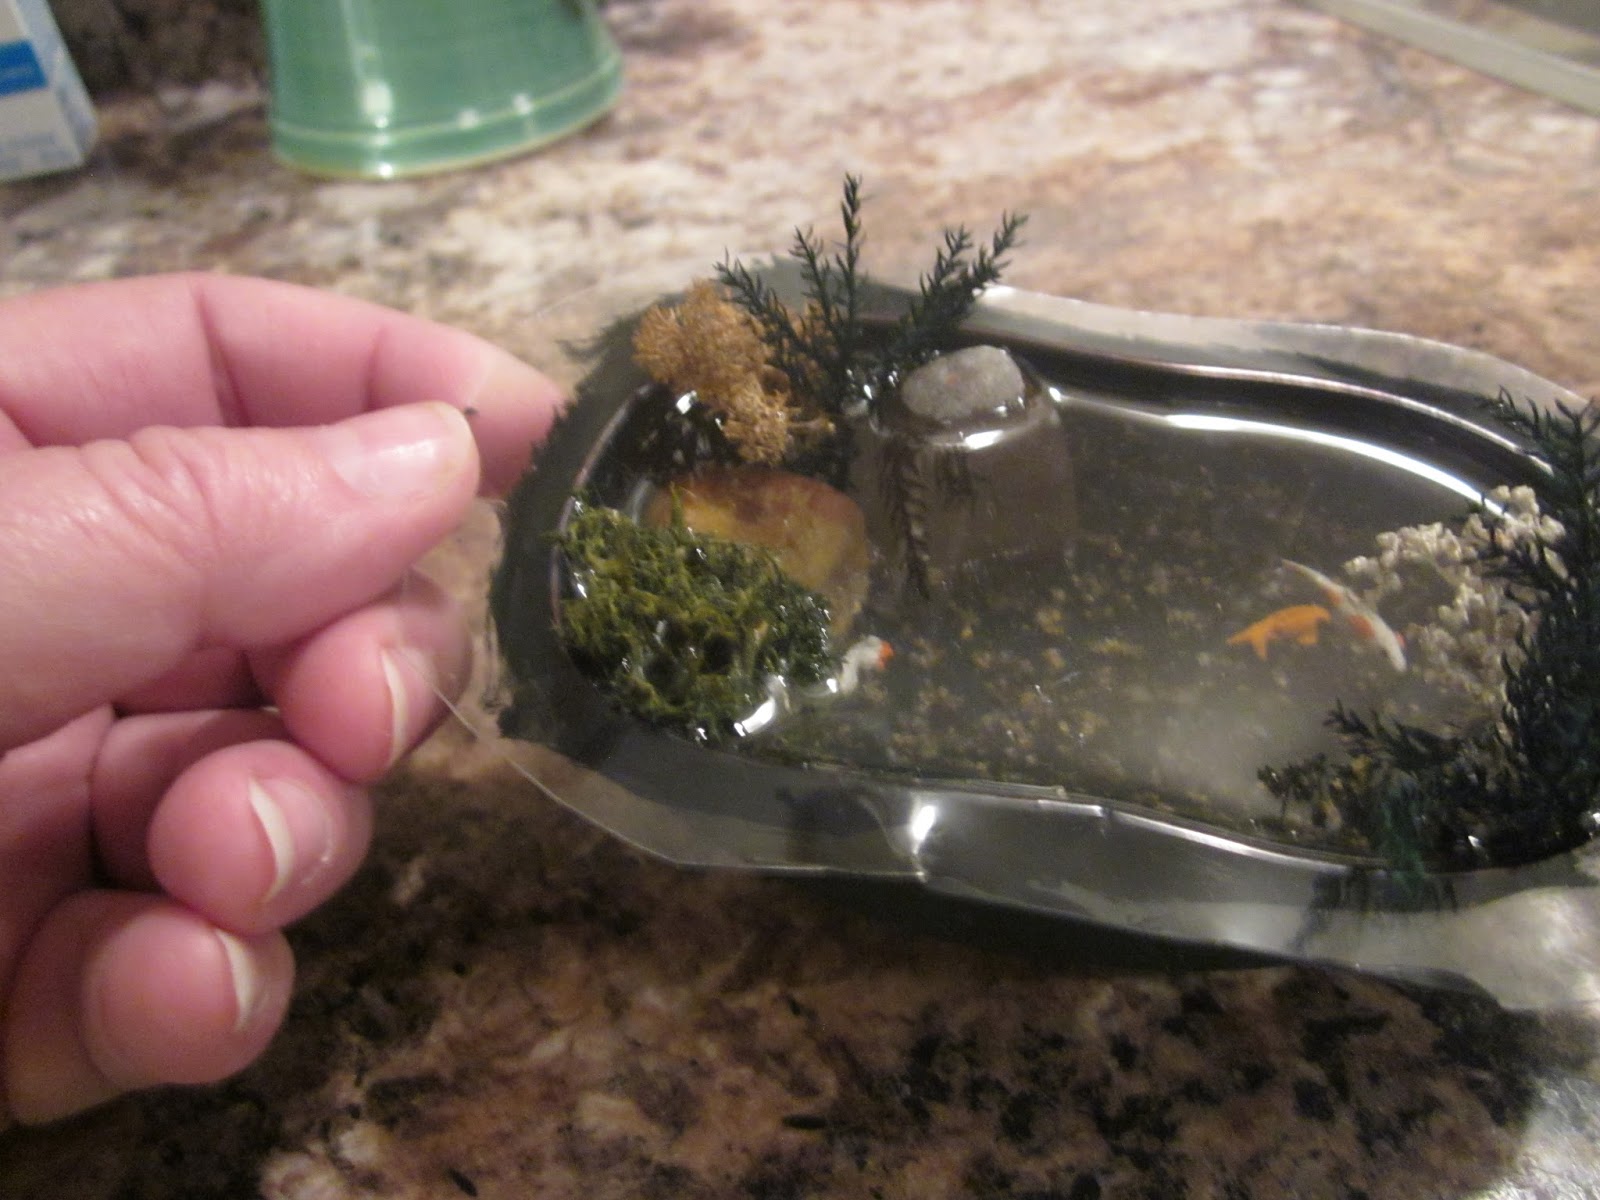
The next morning, with the first pour solid but still a little tacky, I placed two white and orange-spotted Koi in strategic positions and Adrian did a second pour. Late that day I placed a third fish - solid orange this time, and she did the third pour. The result is that the fish are floating at different levels of the pond and I am loving how it turned out. It was a really fun workshop. I'm not sure if you can really tell the different levels that were achieved but here are two pictures of my finished pond:
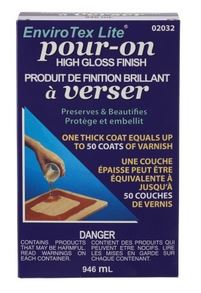
I am definitely going to try this again in the future. As for the product used, Adrian told us that, rather than using a more expensive product that is made for miniature water scenes, she uses a product that is intended for cabinet makers. It is a resin and hardener that is self-levelling and one coat on furniture is meant to be the equivalent of about 50 layers of polyurethane finish. It comes in three different size boxes and, though somewhat pricey in itself, is much cheaper than the other products and she is often able to purchase it at Michael's using a 50% coupon. You can't beat that. Here is the product we used (follow instructions carefully and do not mix the resin and hardener until you are ready to use it.)
Also be careful when pouring because if you drip it anyplace where you don't want it, it will be difficult to get it completely off. Adrian mentioned that one thing that must be kept in mind is that this product probably can't be used if you're trying to fill, say a bathtub or sink - or any application where the water is intended to be clean and clear because it may have a slightly yellow colour to it. This is not noticeable in a pond application but would be noticeable in a white bathtub.
For my pond, I will add additional plantings around it when I work on my landscaping.
So, although this is a short post, I think it's time to go to bed as I am still trying to catch up on my sleep from my week at Camp. Tomorrow I hope to show you some of the work I have done on the building since I've gotten home. TTFN!! - Marilyn
So - if you remember from my August post, I had purchased a new laptop mouse for my computer and, when I tipped the packaging upside down to get the mouse out, I realized what I held in my hand would make a perfect little pond for my landscaping at the writer's retreat. So, I painted it black/very dark green on the outside before going to Camp. One of the side workshops was about building a pond so I really lucked in on that!!!
Our teacher for this workshop, Adrian C. from Ontario, gave us all a really good introduction to making ponds, materials to use, those to avoid, how to make a formal pond and an informal pond. Then we got started. Adrian provided lots of small shapes that could be used for little ponds in 1:24 scale. Many of them came from the shapes found in chocolate boxes but she also had several other shapes to choose from. She suggested we each try two different ponds but since mine was so much deeper than these other forms, I didn't want to be greedy so used my own mold and then had a tiny shell bird bath filled as well because it took only a couple of drops of resin for that. I will show you the bird bath as I progress to the landscaping portion of my build.
For now, here is my pond, all completely filled and hardened. Firstly, I am showing the underside of my pond. Looks just like a computer mouse, doesn't it?
Following Adrian's instructions, I started by "painting" the bottom of the inside with a thin application of white glue then sprinkled it with an appropriate scale of grit for the bottom of the pond. Adrian was very specific when she told us to make sure we shook out any extra grit, and even to blow on it so no loose bits were left, otherwise they would float in the resin and ruin the look of our ponds. Then we each picked out plants from her extensive supply of scale-appropriate dried materials and glued them to the sides of our ponds. Those with shallow pond forms also glued tiny fish to the bottom of the form in preparation for the first pour.
Because my pond was much deeper, I chose to wait until the second pour before placing fish in the hopes of showing depth in the pond. Adrian instructed us to pour no more than 1/4" maximum of the material at one time, then to wait until it was thoroughly cured, at least overnight, before making the next pour.
The next morning, with the first pour solid but still a little tacky, I placed two white and orange-spotted Koi in strategic positions and Adrian did a second pour. Late that day I placed a third fish - solid orange this time, and she did the third pour. The result is that the fish are floating at different levels of the pond and I am loving how it turned out. It was a really fun workshop. I'm not sure if you can really tell the different levels that were achieved but here are two pictures of my finished pond:
I am definitely going to try this again in the future. As for the product used, Adrian told us that, rather than using a more expensive product that is made for miniature water scenes, she uses a product that is intended for cabinet makers. It is a resin and hardener that is self-levelling and one coat on furniture is meant to be the equivalent of about 50 layers of polyurethane finish. It comes in three different size boxes and, though somewhat pricey in itself, is much cheaper than the other products and she is often able to purchase it at Michael's using a 50% coupon. You can't beat that. Here is the product we used (follow instructions carefully and do not mix the resin and hardener until you are ready to use it.)
Also be careful when pouring because if you drip it anyplace where you don't want it, it will be difficult to get it completely off. Adrian mentioned that one thing that must be kept in mind is that this product probably can't be used if you're trying to fill, say a bathtub or sink - or any application where the water is intended to be clean and clear because it may have a slightly yellow colour to it. This is not noticeable in a pond application but would be noticeable in a white bathtub.
For my pond, I will add additional plantings around it when I work on my landscaping.
So, although this is a short post, I think it's time to go to bed as I am still trying to catch up on my sleep from my week at Camp. Tomorrow I hope to show you some of the work I have done on the building since I've gotten home. TTFN!! - Marilyn
Subscribe to:
Posts (Atom)