So, having finished the floors of the North Pole Postal Service, I took a few days to look at it to see if it would tell me where it wanted to go next. I finally settled on the smallest part of the build: the employee bathroom. The floor space of the room is only 3" x 5" so I needed to plan the location of the bathroom fixtures and the door very carefully. For that, I needed to put together the Chrysnbon toilet, sink, cabinet and heater that I planned on using so I could play with the layout. Now, these Chrsynbon pieces go together very easily but, let's face it, they're just inexpensive plastic, and they look like it. The first thing I did after putting the pieces together was to paint the brown toilet seat, water tank, flush handle and wall cabinet white. The sink and toilet were white plastic, not brown so I left them alone at first. Once the paint was dry, I sanded the roughness and painted a second coat. After sanding again, it was obvious that this was going to look like crap! (No pun intended!)
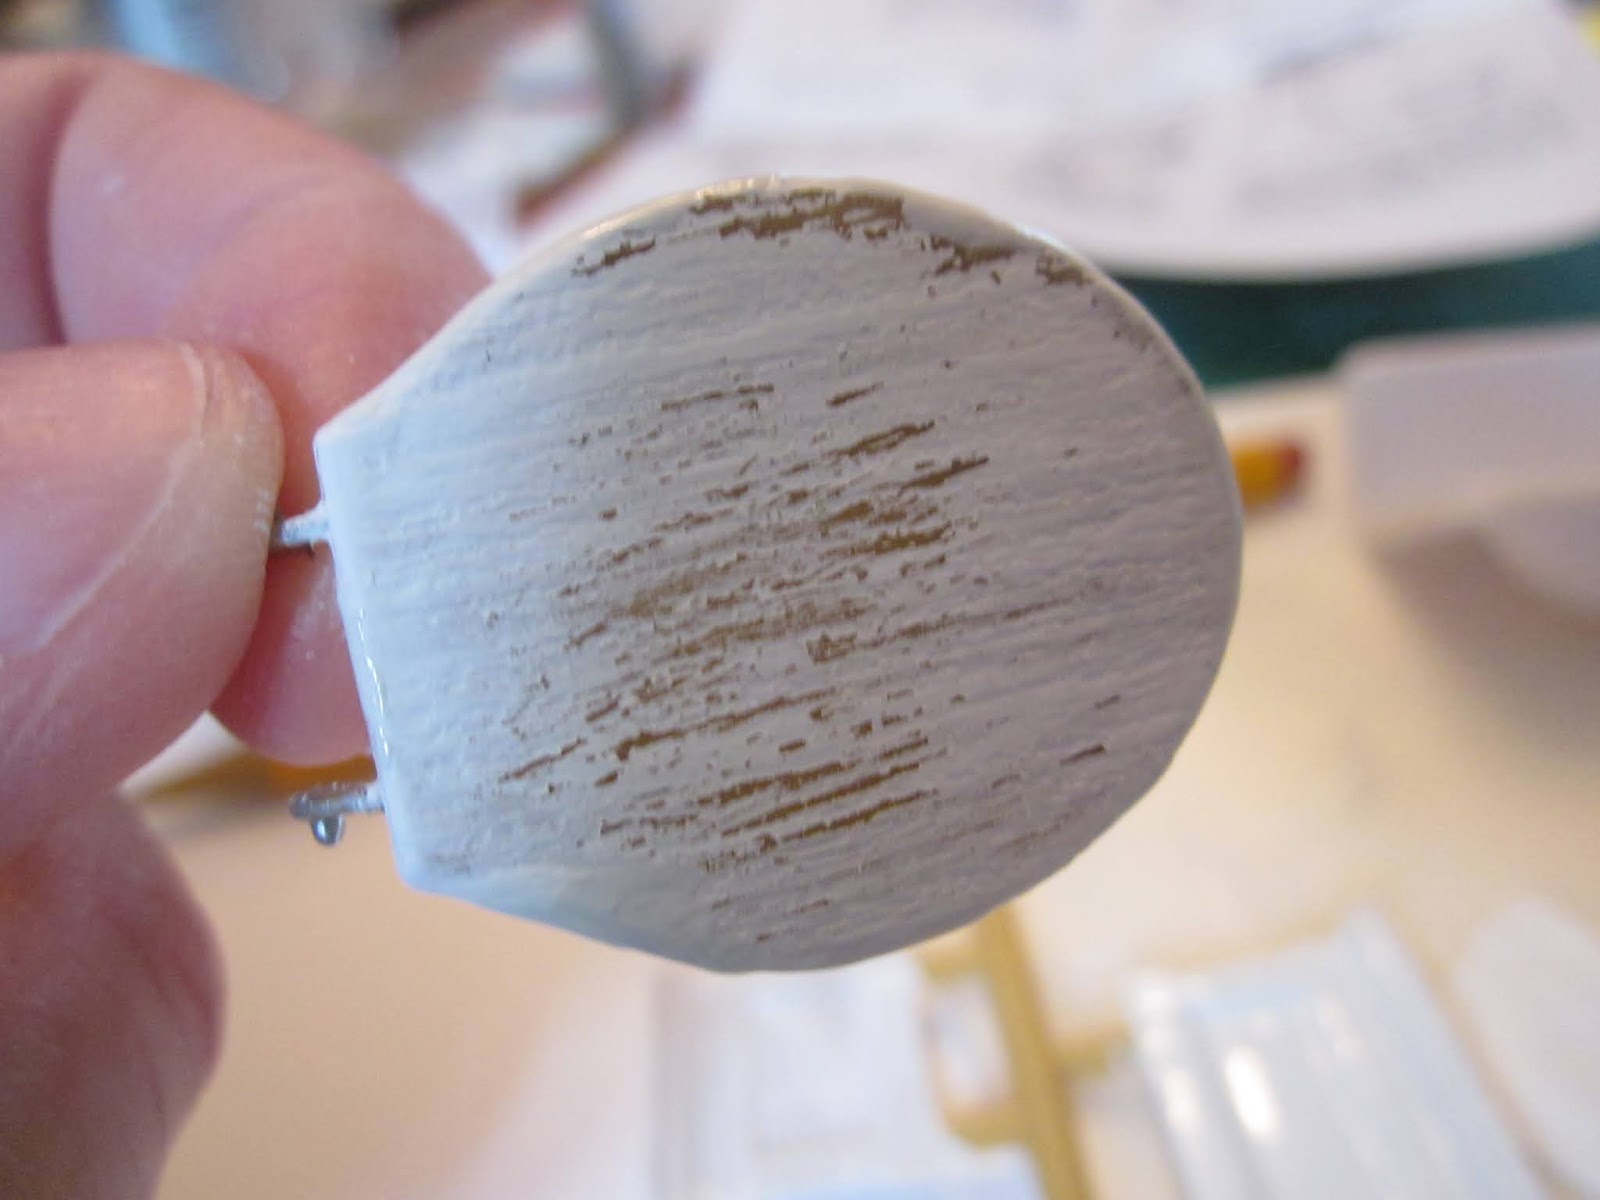

What I wanted was for the fixtures to look like high gloss porcelain. The easiest would have been to use a high gloss spray paint - which I didn't have and I did not want to jump in the car and drive anywhere to get some. BUT - I did have a small bottle of "Mr. Touch Up" - a product used to repair nicks or scratches on your white kitchen appliances.

I don't know how old this is because it's been a long time since we've had white appliances but I figured - "What the heck, it's worth a try!"
I tried the toilet first - and with 2 coats of this product here is what it looked like:

Now we're getting somewhere!! Then I painted the sink and the water tank, the toilet seat and lid. I LOVE it! It looks just like what I was going for and I didn't have to waste my time, my gas or my patience having to go to find a different product!


I left the pieces to dry for 24 hours and the finish is as hard and shiny as real porcelain. I'm really happy with it. So, I attached the sink and cabinet to the back wall of the bathroom area to check the amount of room I had. I had put together the walls for the bathroom but hadn't put them in place yet but it was already obvious that I would not have the room for the swing required for a full size door.

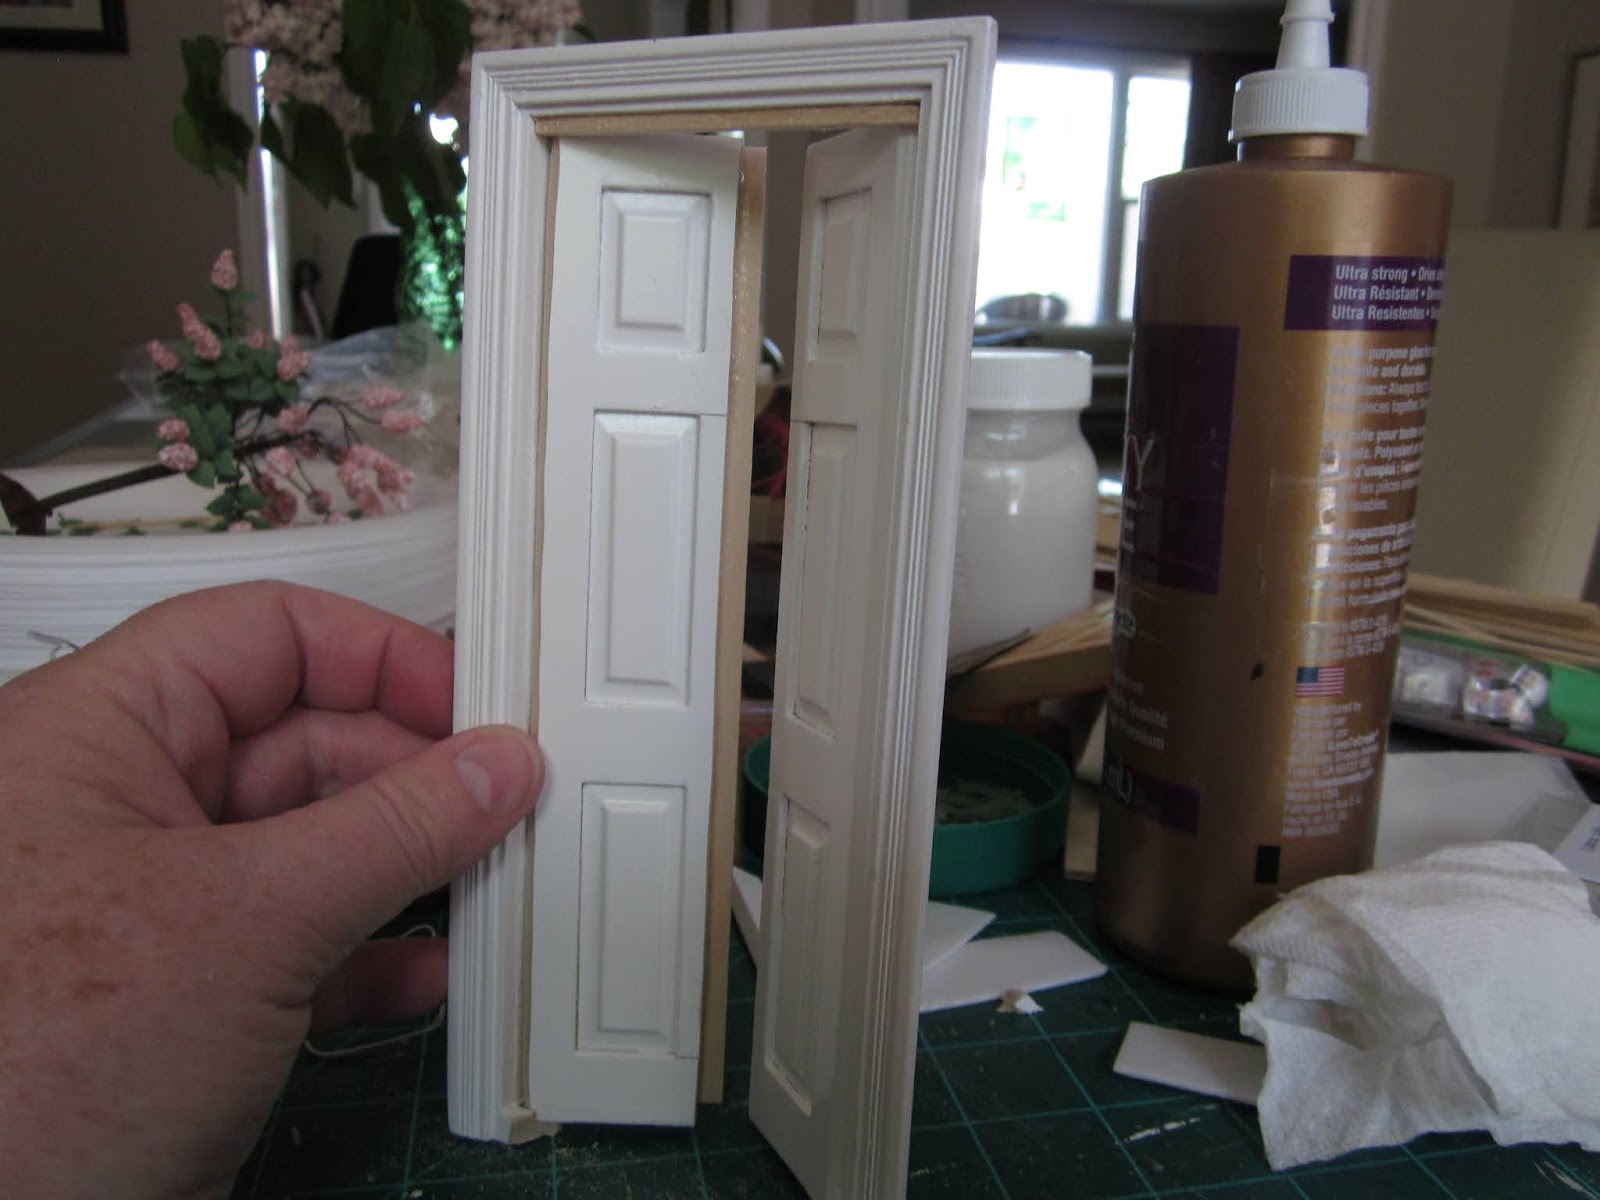
Looking at the pre-hung door I already had, I wondered if I could just cut it in half vertically and have it open from the middle. I went ahead and cut it and it worked perfectly. Then I pin-hinged the half door that was now free and had a perfectly working double door that would swing out instead of in and would not take up much room. I was ecstatic.

In this picture you can see where I tried the walls in place with the door and a few of the fixtures to confirm that yes, it will work just fine! I haven't glued on the wall mounted water tank yet but you can see the pipe that it will connect to. Through the door you can also see that I have finished the wall on the other side of the workroom. You'll get a better idea of the paper in future pics. Keep in mind that there is another 7" side wall that will run down the whole length of the post office. I have left that off in order to have more room to work and probably won't glue it on until I am finished with everything else.

The next morning, before getting back to work on the Post Office, I took the time to read through some of my favourite blogs and, guess what??? On the Studio E blog from a few days before, Elizabeth had also cut a door in half for her bathroom. I thought that was so funny!! If I had read her blog the day before I wouldn't have felt so nervous about cutting my own door. Well, it worked out in the end.
With that done, I then cut out the sill plate of the door and realized that, by doing that, I now didn't have any "door stop" for the doors to close against. Simple fix for that - add a little door stop across the top. Also, there was a little space between the doors when closed, left by the width of the saw cut. Now, what self-respecting elf wants to be sitting on the toilet knowing that anyone can see through that gap? That required me to apply a trim to one door, hanging halfway over the edge so when the two doors were closed, the gap would be covered. Privacy restored! I painted both sides of the doors and trim with 2 coats of white.


Here is a picture of the outside of the door that clearly shows the trim that covers that space between, before I painted the doors. It also shows what the walls of the workroom will look like. I haven't decided yet what I will use for the doorknobs. I have a few possibilities in mind.

The inside of the bathroom is painted red, as is the outside of the front door.

So now I will take some time to sit and watch paint dry before I get on to the next steps.

I hope you've enjoyed this part of the process. I wish I could tell you what I might reveal in next week's post but, with the way my mind works, I'll probably be the last one to know!! Until then - keep safe, keep healthy and keep making minis! TTFN!! - Marilyn D.
Mr. Touch-up will now become part of my paint stash, Marilyn! I'll have to experiment how it will do over wood, as I need to make a small sink for the klompen factory. Thanks for this very good hint! The fixtures really look like china.
ReplyDeleteI think it would work fine on wood, Marijke. It might just take a couple ofcoats. It's an enamel kind of paint so tends to "find its own level". Just be sure to dry well between coats. Cheers! - Marilyn D.
DeleteWow! I'll need to look around for that paint. It works so perfectly!
ReplyDeleteI love your door solution.
Thank you, Sheila. I think you can find it at any hardware store. We probably picked it up in our local Canadian Tire. I found it worked really well and, similar to a bottle of nail polish, it has its own brush attached to the cap. Hugs. - Marilyn D.
DeleteMarilyn,la idea de esa pintura para rasguños de electrodomésticos,ha funcionado perfectamente,parecen porcelana brillante auténtica,gracias por el dato!!!
ReplyDeleteEl baño ha quedado genial y la puerta cortada a la mitad es lo más adecuado,me encanta ese baño!!!!
Veremos con qué nos sorprendes en la siguiente entrada!
Besos.
Gracias, Pilar. El espacio del baño es un poco apretado, pero lo haré lo más cómodo posible para esos pequeños duendes. Sí, ¡casi no puedo esperar para ver a dónde nos llevará a continuación también! ¡Grandes abrazos!
DeleteWhat a fantastic find, I see that your Mr. Touch Up is getting lots of fans (so I would love to know how this stuff is named in Dutch. So I guess I'll have to search on the internet) ;O)! This bathroom looks just like the real life one, it looks GREAT!
ReplyDeleteThe door solution is another great find, your elves can now be assured of privacy ;).
Stay safe, take care, Marilyn!
Hug, Ilona
With so many people choosing stainless steel appliances these days, It's probably getting harder to find these touch up products but they're also good for repairing chips in porcelain sinks as well so I'm sure it's still available by one name or other. Thank you for your kind praise - I think the bathroom will end up the perfect size for the few staff who will be working in the Post Office. Some times no planning does work out - and the Golden Horseshoe helps a lot too! Hugs - Marilyn D.
DeleteI love the way the bath fixtures came out with the porcelain touch up paint and now I really want to try it! Hope I remember next time Russ runs to Ace Hardware and asks if I need anything, lol! And brilliant solution on the door!!! Maybe you can use the bathtub from the Chrysnbon set to make a rusty planter for Dorothy's corner? That would be adorable!!!
ReplyDeleteOMG Jodi - that would be brilliant ... although I was going to save it for when I get back to working on my adobe house. But now I'll have to see. Your idea would be fabulous if I could find room for it in Dorothy's Corner. Maybe behind the fence... hmmm, you've got me thinking! Cheers! - Marilyn D.
DeleteUn resultado espectacular, me apunto el truco.
ReplyDeleteMe encanta como está quedando el baño, y la puerta ha quedado genial !!
Gracias Eloisa. ¡Ahora para terminar el baño y pasar a la iluminación, tal vez! ¡Salud! - Marilyn D.
DeleteMarilyn, Sometimes when you start a project, you just "know" that it will be a "crowning glory" and I think this will be one of yours. I thought that from the beginning and what you have done do far just reinforces that thought. Am just thrilled with how it is coming along.
ReplyDeleteGreat work!
Maureen
Oh, Maureen, that is such a kind thing to say. Sometimes I think I'm lucky to be so inexperienced because I don't know enough to stop myself from doing something because "it just won't work". Not knowing things like that frees me up to jump in with both feet and try it anyway. I think I am learning just as much from my failures as any successes I have so, in the end, I guess they're all successes as long as I learn something new. Let's all just keep having fun! Big hugs! - Marilyn D.
DeleteBRAVO Marilyn!!!
ReplyDeletethe elf employee's bathroom is developing just as it should and I think that your solutions of the cutting the door in two was BRILLIANT and I also LOVE LOVE LOVE the porcelain paint on the fixture: an ideal solution producing a PERFECT FINISH!
Thank you, Elizabeth. Although perhaps it's a case of "great minds think alike" since I noticed afterwards that it was the same solution you had already come up with in your bathroom. I was so proud of myself that I actually thought of the same solution as you since you are definitely one of my mini heroes! I guess I really am learning to trust my instincts more as I get deeper into this hobby. God Bless! - Marilyn D.
Delete